1 Hour Stationery Box
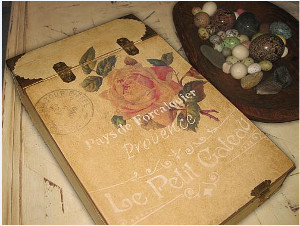
Create a DIY stationery box with all the elegance of a french bistro. This 1 Hour Stationery Box truly lives up to its name. It's time to put away the boring boxes of yesterday and create something entirely new and beautiful. Even old stationery gift boxes can be made new with this creative tutorial. Sometimes, all you need to get inspired is a little bit of adorable organization. This 1 Hour Stationery Box will look nice even if you never put it away.
 You can find this project, and many more just like it, in our new free eBook, How to Paint Furniture: 19 Upcycled Furniture Projects free eBook from DecoArt!

Materials:
Americana® Decor™ Accessories
- Waxing & Finishing Brush (ADB01)
Americana® Decor™ Chalky Finish Paint
- Lace (ADC02)
Americana® Decor™ Crème Waxes
- Clear (ADM01)
- Golden Brown (ADM02)
Americana® Decor™ Mediums
- Image Transfer Medium (ADM10)
Americana® Decor™ Stencils
- The French Bakery (ADS11)
Americana® Decor™ Varnishes
- Soft-Touch Varnish (ADM03)
Other supplies
- Water container
- Paper towels
- Sandpaper
- Scissors
- White cloth
- Laser copy of image of your choice
- Screwdriver
- Tape or spray adhesive
- Brayer
- #2 flat brush
- 3/4" pouncer (Americana Dual Sided Pouncers - DABK19)
Instructions:
Let dry completely between painting steps.
- Use screwdriver to remove all hardware.
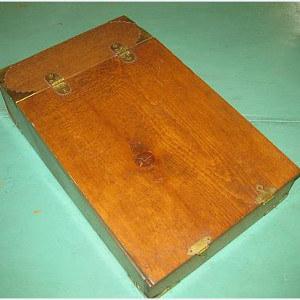
- Use a damp paper towel to wipe the piece down really good in case dust or residue is on it.
- Use #2 Flat Brush and base coat entire outside of box using Lace. Rinse brush. Let completely dry.
- Lightly sand box and edges. Then wipe clean with a damp paper towel.
- Use the Waxing Brush mix (1) part Golden Brown Wax with (2)parts Clear Wax and apply over outside of box. Rinse brush. Let completely dry.

- (Optional) Use a white cloth to buff wax.
- Use scissors to carefully cut out laser print image. Remember if image has words or numbers to reverse image before hand.

- Place images face down and eye ball placement before attaching images to surface.

- Use #2 flat brush to apply Image Transfer over the top of the box. Rinse brush. (Work quickly)
- Place images face down onto surface. Immediately smooth out with your fingers. Then use a brayer to smooth images out from the center out.

- Follow label instructions for times on Image Transfer Medium.
- Once image is completely dry damped images with damp paper towel and let sit 1-2 mins. This will soften the paper.
- Use index finger to very gently rub image the backing of the paper should begin to lift. Wipe away pieces of paper as they ball up they could damage the delicate photo. Work in small sections at a time and keep images moist.

- Spray a stencil adhesive spray or use tape to position stencil where you want.
- Use a 3/4" Pouncer with Lace to pounce on the stencil image. Remove stencil and wash.

- Use #2 Flat Brush and apply Soft Touch Varnish over entire box. Apply two coats to fully seal over the waxes. Rinse brush. Let dry completely.(Optional) to buff with clean white cloth for a satin finish.
- Use screwdriver to replace hardware and enjoy!
Read NextUpcycled Can Gift Containers
Your Recently Viewed Projects
Marilyn B
Jan 23, 2017
A very detailed instructional, thanks! This looks like quite a bit of work, but what a lovely result that looks like a very expensive and classic box! There is something quite therapeutic about the process and this seems to be the proper method with no shortcuts, so this box should last a long time and would look so,elegant sitting out on your desk or coffee table!
Report Inappropriate Comment
Are you sure you would like to report this comment? It will be flagged for our moderators to take action.
Thank you for taking the time to improve the content on our site.

