This project was submitted by one of our readers, just like you.
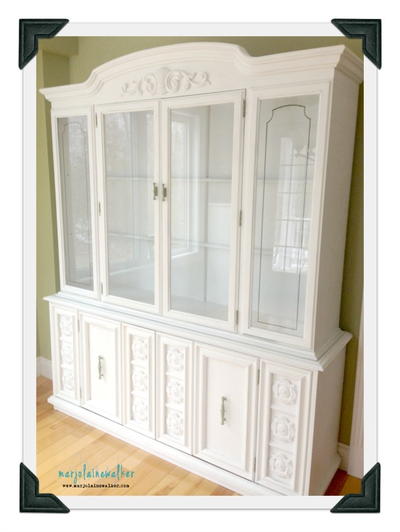
Chalked Paint Hutch and Buffet
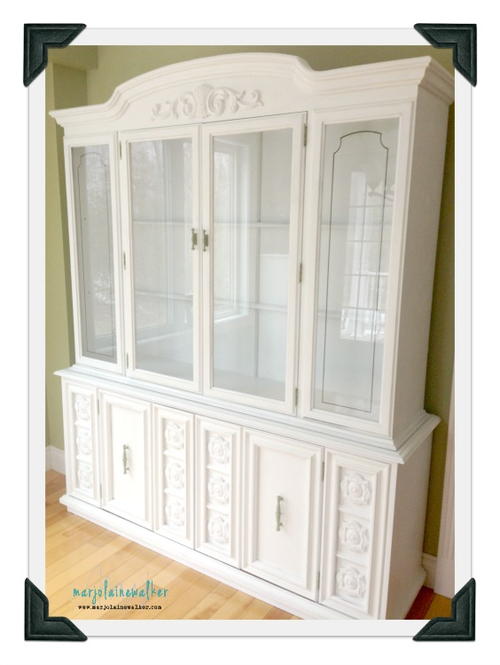
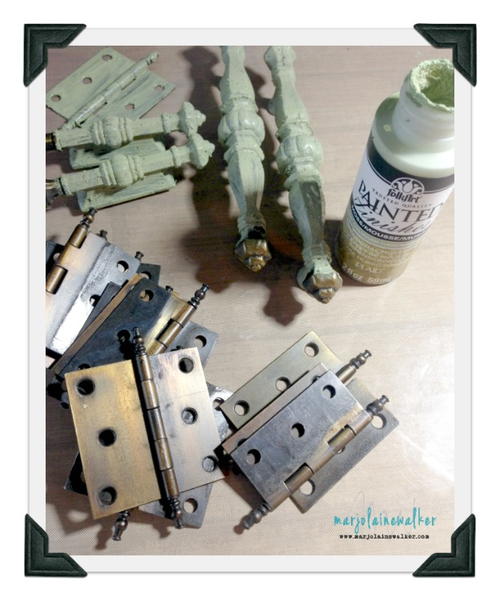
From the Designer: "I re-finished an outdated looking hutch and buffet with Rust-Oleum Chalked Paint. The project was super easy since I didn't have to sand and prep the wood before applying the paint. In no time at all I was able to transform a somewhat ugly piece of furniture into a stunning trendy farmhouse decor accent piece for my home. The paint was not difficult to work with and produced amazing results. I gave the hardware a new and unique look using Plaid Folk Art Painted Finished."
Time to CompleteWeekend project
Primary TechniqueGreen Crafting

Project TypeMake a Project
Materials List
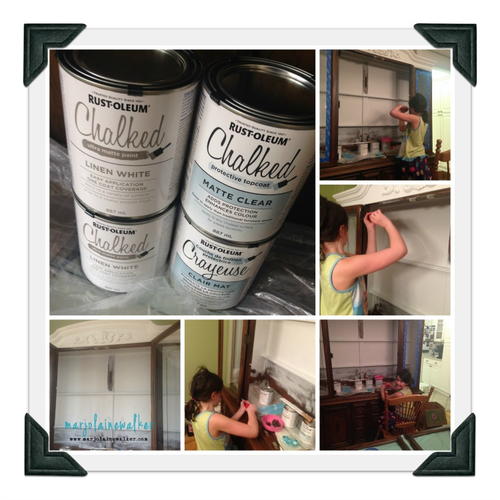
- Rust-Oleum Chalked Paint Linen White
- Rust-Oleum Chalked Protective Topcoat Matte Clear
- Plaid Folk Art Painted Finishes Moss
- Chalk Paint Brush
- Scotch-Blue Painters Tape
- Sand Paper
- De-greaser soap
- Clean Clothe
Instructions
-
Find a hutch and buffet to re-finish. I found mine on a buy and sell site for $100.
-
Wipe down the whole piece with a clean cloth and a de-greaser cleaning solution.
-
Remove doors and hardware.
-
Use painting tape around the glass to protect it.
-
Paint the hutch and buffet with the Chalked Paint and allow it to dry. Repeat with a second coat. (I did three coats in some areas but it wasn't necessary)
-
Use sand paper to distress some areas on the hutch and buffet.
-
Add a coat or two of varnish and allow it to dry.
-
Paint the hardware with two coats of Plaid Folk Art Painted Finishes Moss, allowing it to dry between coats. Sand the hardware in some areas to distress it.
-
Remove the tape from the glass and re-install the doors and hardware.
More Crafty Ideas For You
We know you love working on furniture pieces like your chalked paint hutch and buffet because it's a great way to breathe new life into old pieces. Since you enjoy this type of project, we wanted to recommend a few more craft ideas that we think you'll enjoy.
For starters, have you considered trying your hand at refurbishing a vintage chair or set of dining chairs? Applying chalked paint to these pieces can give them a fresh and updated look while still maintaining their classic charm. This project would be perfect for someone with your skills and eye for detail.
If you're looking for a smaller project, why not try creating some custom chalked paint signs? Whether you want to make a personalized sign for your home or create a unique gift for a friend, this craft allows you to let your creativity shine. Plus, with the versatility of chalked paint, you can easily customize the colors and designs to suit any occasion or style.
Lastly, we think you might enjoy upcycling a wooden tray with chalked paint. This project allows you to combine your love for furniture refinishing with your passion for practical decor items. You can use the tray to display candles, organize small items, or serve drinks in style. It's a fun and functional project that would make a great addition to your crafting repertoire.
We hope these craft project ideas inspire you to continue exploring your love for chalked paint and furniture refurbishing. Happy crafting!
Read NextGold DIY Mason Jar Flower Vase



![Pill Bottle Crafts: Reuse Pill Bottles [15 Ideas]](http://irepo.primecp.com/2017/06/334076/PILL-BOTTLE-CRAFTS-Header_Category-CategoryPageDefault_ID-2274135.jpg?v=2274135)
