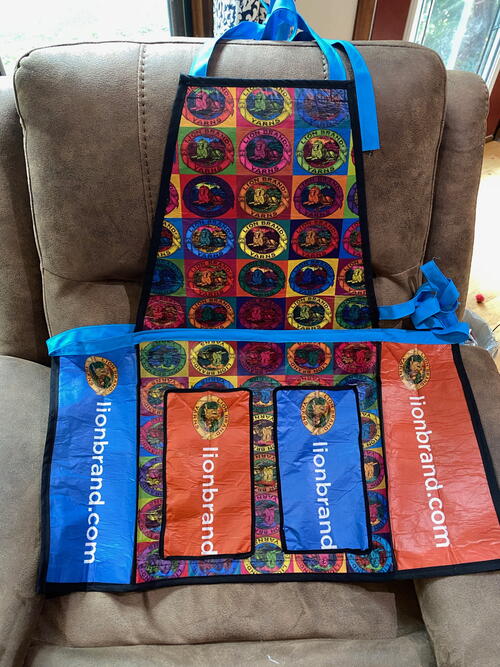
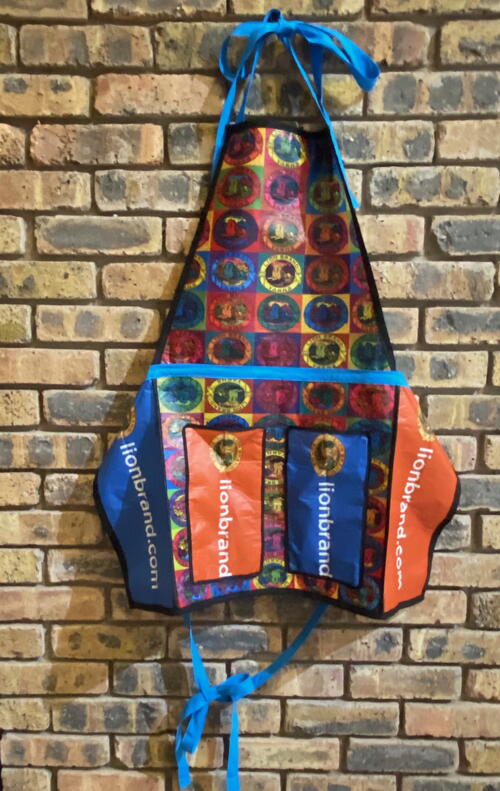
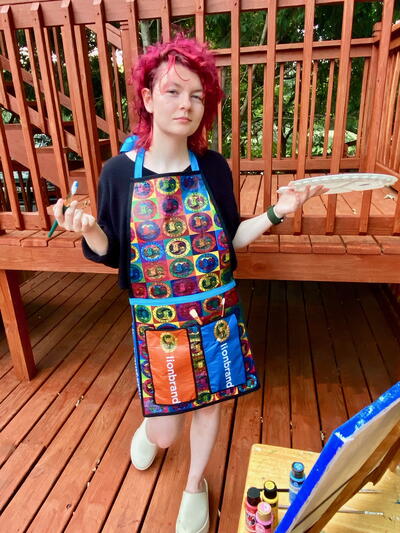
Upcycled Art Apron from Lion Brand Yarn Swag Bag
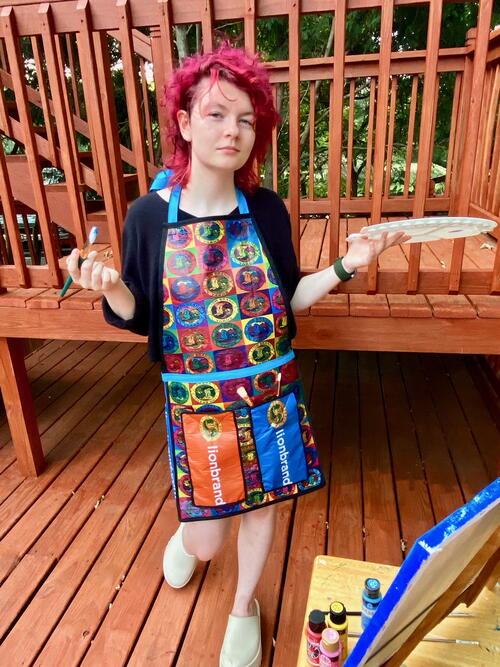
From the Designer: "Who hasn’t received a swag bag from a trade show. This win win piece of promotional giveaway allows the company to have some publicity while you have some place to store the treasures you collect from the show. At the recent h+h Americas show, I received adorable swag bags from Lion Brand Yarns. When the show was over, I could have just repurposed as a new grocery bag, but the bags were not only adorable, but the plastic coating on the provided a bit waterproof protection. I wondered if I could destine these bags for a higher calling. The idea to upcycle them into an Art Apron began to form."
Materials List
- 2-Lion Brand Yarns Swag Bags
- SewTite Magnetic sewing pins (I used Lites and Minis)
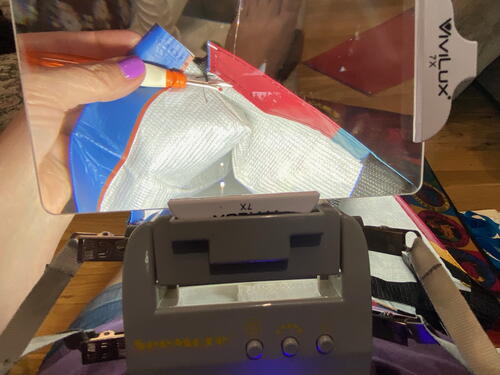
- ViviLux “See More” Hands free magnifying light.
- 2- 3 yd.packages double-fold seam binding in matching color (I used black)
- 3 pieces of 1 inch wide ribbon (3 yd length and 2, 24inch pieces.) in coordinating color (I used blue)
- Seam ripper or micro-tipped scissors (or both)
- Sewing machine thread to match the seam binding and ribbon
- Scissors
- Ruler/pencil
Instructions
-
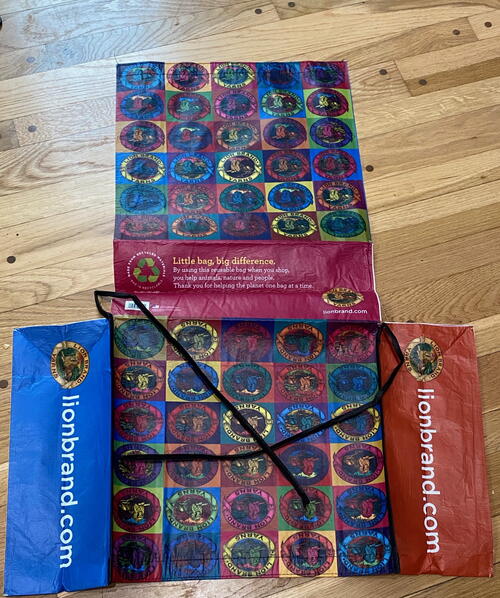
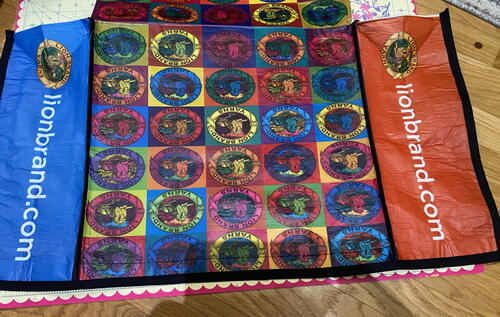
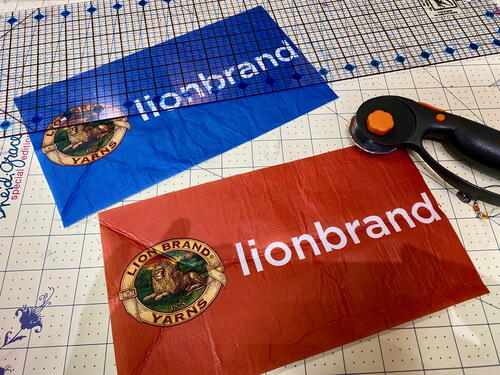
Step 1- Using your seam ripper and/or micro-tipped scissors begin removing the side panels from your bags. You will remove the seams where the back and bottom connect to the sides on 1 (which will become the apron) and completely remove them from the other. (You will use these side panels for pockets.) This task can be tedious but a well lit area really helps things move faster. I used the ViviLux “See More” hands free magnifying light to remedy this. The Lion bags had seam binding around the side panels. Just snip off what isn’t attached. (leave a one inch tail to tuck in when you attach the waist band ribbon). Remove the handles from the bag as well.
-
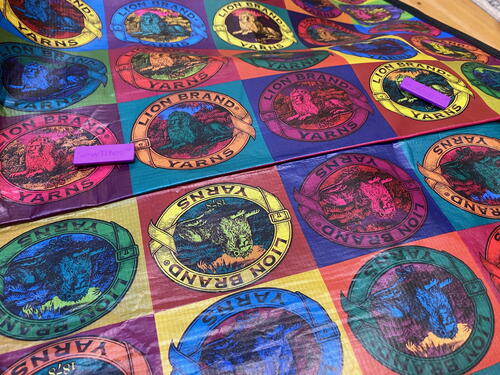
Step 2- Layout the bag with the connected side panels. Using the preexisting fold line from what used to be the bottom of the bag, fold the top of the bottom piece up to the bottom of the top piece. Use SewTites minis to hold in place. (With the plastic coating on the bags fabric, using the SewTite magnetic sewing pins helped me keep the number of extra holes in the fabric to a minimum. ) Baste into place. This area will become the waist of the apron.
-
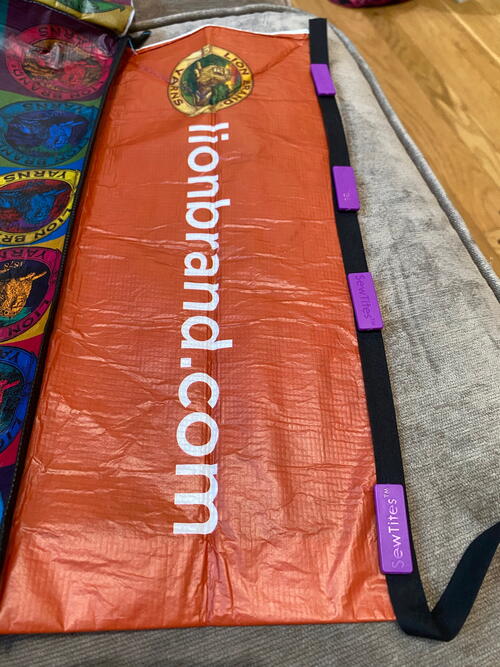
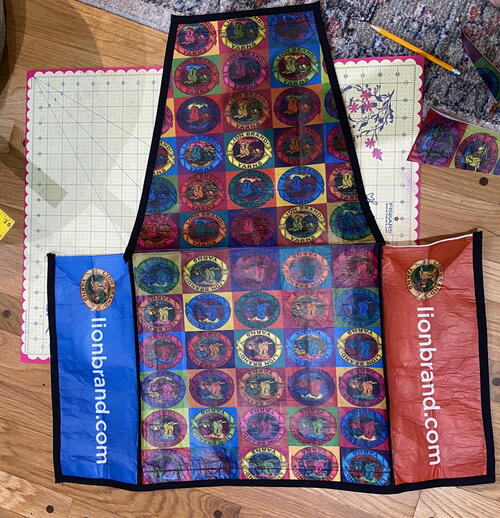
Step 3- Begin wrapping your seam binding around the outside bottom edge of the apron. Use the SewTite minis to keep it in place till you stitch around.
-
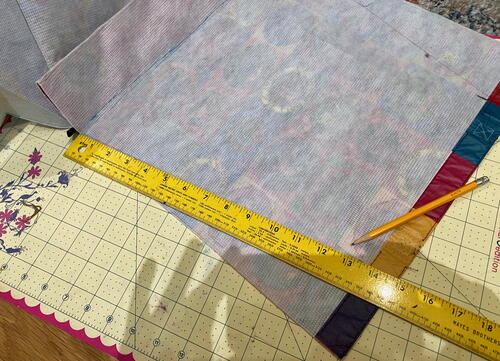
Step 4- Flip your project over. On the top portion of the apron, measure in about 4 inches and make a mark. Using a ruler and pencil draw a diagonal line to the lower corner of the top piece. Repeat on the other side. Cut along the pencil lines (This will help form fit the top portion of the apron.) After you have cut away those pieces, edge the top portion in seam binding like you did for the bottom part in step 3.
-
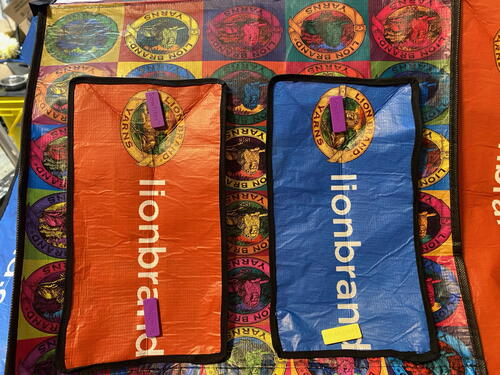
Step 5- Using the pieces designated for pockets, trim to desired size. (I cut them about 10”x 5”) Edge them with seam binding and place into the desired location on the apron. Hold in place with SewTite minis until you stitch onto the apron. Stitching through both layers of fabric, sew around the sides and the bottom of the pocket pieces to secure into place.
-
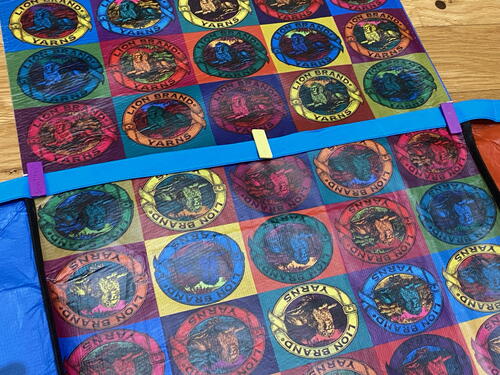
Step 6- Find the center of your 3 yard piece of ribbon. Match up to the middle of the waist of the apron. Lay the rest of the ribbon over the waist seam you created. Hold in place with the SewTite minis. Stitch the ribbon onto the apron along the top and the bottom of the ribbon to secure into place.
-
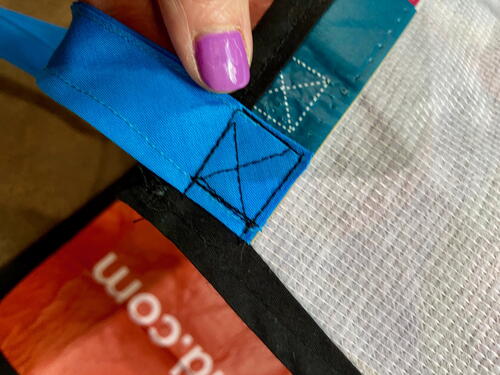
Step 7- Add your neck straps to your apron. On the back side of the top of the apron. Measure in about 1 inch from the upper corners, and stitch the end of one of your pieces of shorter ribbon into place in a box formation. (I added an x for stability.) Repeat on the other side.
More Recycled Crafts You'll Love
If you enjoyed creating the Upcycled Art Apron from Lion Brand Yarn Swag Bag, we have a few more craft project ideas that we think you'll love. For those who enjoy upcycling and reusing materials, we recommend trying your hand at creating a set of colorful and unique coasters out of old CDs. This project is perfect for all skill levels and can be a great gift for friends or family members.
Another project we suggest is making a personalized tote bag using fabric scraps and iron-on transfers. This craft is not only fun and creative, but also practical for carrying around your crafting supplies or groceries. It's a great way to show off your individual style and make something useful at the same time.
If you're looking for a seasonal craft project, why not try making your own holiday ornaments out of recycled materials? Whether it's turning old light bulbs into snowmen or creating festive garlands out of leftover fabric scraps, there are endless possibilities for creating unique and budget-friendly decorations for your home.
We hope these craft project ideas inspire you to keep creating and exploring new ways to repurpose materials in your crafting endeavors. Happy crafting!
Read NextUpcycle Thrift Store Plates

