Neon Chevron Cards
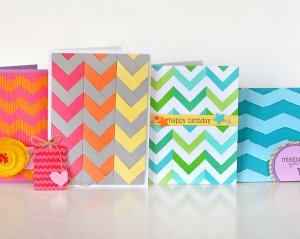
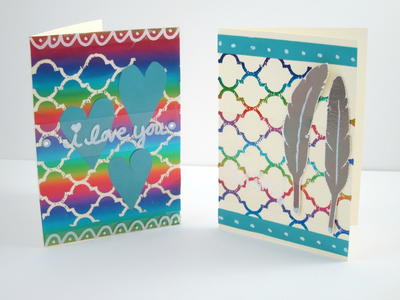
These bright Neon Chevron Cards are great for any occasion. With a variety of styles to select from, there's bound to be something to suit your every need. With great ideas for birthday cards, missing you, and just because, these colorful handmade cards are a great way to show your loved ones just how much you care about them.

Materials:
- Pinking Paper Edger
- Block Party Squeeze Punch (Extra-Large)
- Round ’n Round Squeeze Punch (Extra-Large)
- That’s Amore Squeeze Punch (Medium)
- Tag Lever Punch (XX-Large)
- Butterfly Pop-Up Punch
- Star Pop-Up Punch
- 1/4" Star Hand Punch
- 1/4" Circle Hand Punch
- Micro-Tip® Scissors (No. 5)
- Cardstock in a variety of colors
- Adhesive
Instructions:
-
My first technique allowed me to play around with a colorful design as it is created with individual chevrons. I punched several chevrons from multiple colors to piece together into one design. Here’s how to make your own. Trim a 1.5 inch strip from cardstock and use a ruler to draw a line down the center on the back of strip.

-
Feed the strip diagonally into the XL Block Party squeeze punch until the corners reach the opposite side of the square design without clipping the corners. Be sure to line up the drawn center line with the corner of the square punch. Continue feeding the strip into the punch centered with the corner as shown to punch your desired number of the chevrons. Adhere the assorted chevrons onto white cardstock to form the colorful pattern. You can also use all one color to achieve a more traditional look.

-
Next up is a technique I created using paper braiding that has become one of my favorites. Not only because it’s just plain fun to make, but it adds a lot of texture to the design!

-
To make your own chevron braid, you will need two gray and two yellow strips of cardstock. These can be whatever width you wish, but make sure each braid is the same dimension so the designs will match up when placed together. For this card, my strips were one half inch each.
-
Adhere gray and yellow strips perpendicular onto second gray strip as shown. Adhere second yellow strip perpendicular onto previously adhered strips as shown. Fold right gray strip over to left side, being sure to line up with the left strips. Repeat with the left gray strip over to the right side. Continue with next color always making sure to keep your strips lined up. Create more braids and adhere side-by-side to create chevron design.

-
My take on an ikat chevron pattern would be beautiful as an art piece in your home or on a very special card or project. It’s easy to make but does take a little time and patience since you are working with lots of small strips.

-
To make your own ikat chevron design, cut half inch strips of orange cardstock and adhere evenly onto pink cardstock as shown. It is very important that you cover the back of the strips completely in adhesive so when cut up, all small pieces will stay as they are. Cut up your design into even, thin strips. You can see from the demo photo that I used the edge of the cutting bar as a guide for cutting my strips. Adhere the thin strips side-by-side onto another piece of cardstock with each strip moved up slightly from the previous for five columns and then move back down continuing the pattern.

-
This next chevron technique is super quick to make! Using a tear edger to cut your strips creates a cool, distressed look.

-
I tore my strips very carefully to keep from tearing too much and affecting the design. Tear in small sections along a length of cardstock. Move the tear edger down in even amounts and continue carefully tearing strips until you have enough to piece together your design.

-
When working with small projects, such as tags, you may want to create a much smaller chevron pattern. Pinking Paper Edgers work perfectly for this.

-
Cut several times evenly along a piece of cardstock as shown, keeping the strips connected to the page until you are ready to adhere your design. Be sure to begin cutting each strip at the same spot on the scissors so your chevrons line up. Cut off one strip at a time to adhere onto the tag, leaving equal space between each strip. Trim off excess with scissors along tag.

Read NextFoiled Butterfly Notecards
Your Recently Viewed Projects
Report Inappropriate Comment
Are you sure you would like to report this comment? It will be flagged for our moderators to take action.
Thank you for taking the time to improve the content on our site.

