Tone-on-Tone Foiled Birthday Cards
Learn how to make a birthday card that will wow the recipient.

Learn how to create brilliantly easy Deco Foil transfer cards with this card video tutorial. If you love the look of foil in your crafting, these metallic cards really are a top-notch project to try! Learn how to apply Deco Foil to specially designed Transfer Gel to complete this project. The radiant shine of the foil against the matte background really makes for a beautiful birthday card that pops! You can make these cards in any colors you choose, since Deco Foil is available in so many hues. Celebrate a golden birthday with gold foil for example, or choose the recipient's favorite color. Once you master this technique, you'll love to use it in all of your paper crafting!
Time to CompleteIn an evening
MaterialsPaper
Primary TechniquePaper Crafts
Project or Page SizeCard
Type of Paper UsedCardstock

HolidayBirthdays
Project TypeMake a Project
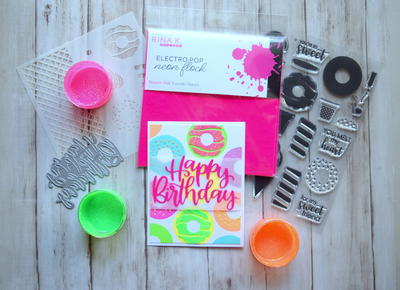
Materials List
- Gina K. Designs Fancy Foils 6"x8" - Turquoise Sea
- Gina K. Designs Premium Dye Inkpad Sets 1" Cube - Island Dream
- Gina K. Designs Premium Cardstock 8.5" x 11" - Island Dream
- Gina K. Designs (3) Nested Oval Dies - Double Stitch Design - Small Set
- Gina K. Designs Foil-Mates Sentiments - Birthday Essentials
- Deco Foil Transfer Gel
- 3D White Foam Squares - Combo Pack
- Foil Laminator - 12"
- Deco Foil Parchment Paper
- Gina K. Designs Fancy Foils 6" x 8" - Jelly Bean Green, Wild Lilac
- Gina K. Designs (3) Nested Rectangle Dies - Single Stitch Design - Large Set
- Gina K. Designs (3) Nested Square Dies - Double Stitch Design - Small Set
- Ranger Ink Blending Tool
- Water bottle
- Hero Arts Numbers Background Stencil
- Powder Tool/Chalk Pouch
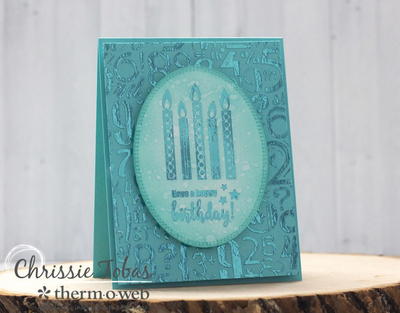
Tone on Tone Birthday Cards
-
Trim a piece of cardstock to 4 x 5.25 and add DecoFoil™ Transfer Gel over a stencil.
-
Allow it to dry.
-
Add Fancy Foils to stenciled background and Foil Mates using a laminator.
-
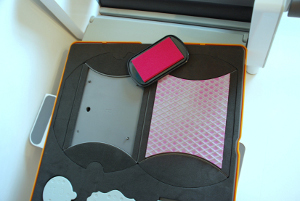
Ink up the Foil-Mate to match the cardstock and foil.
-
Adhere using foam squares.
Step by Step Video Tutorial by Gina K.
Have you ever worked with Deco Foil before? What is your favorite thing about this crafty material?
Read Next64 Handmade Cards for Every Occasion