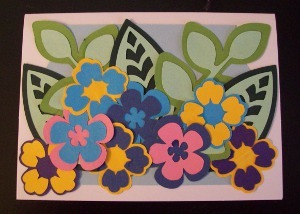
Tropical Flowers Greeting Card
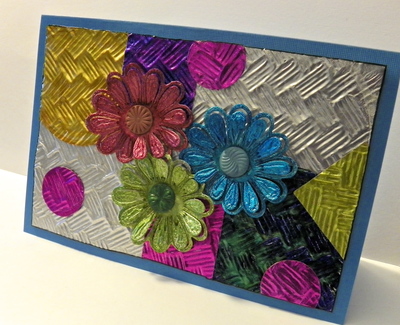
Combine brightly colored flowers and leaves on a greeting card perfect for summertime, a luau invitation, or just to brighten someone's day. To make quick work of the cutting, I used a personal electronic cutter, which gave me plenty of pieces to mix and match. Cutting machines are great for larger projects, such as party invitations, where you want to make a bunch of the same card. And don't miss the video (below) showing how I used the machine.
Materials:
- Blank card and envelope
- Cardstock: assorted colors
- Personal electronic cutters with cutting mat, etc. (I used Cricut Expression 2 Anniversary Edition)
- Flowers and leaves cartridges or dies (I used the Cricut Essentials Cartridge which came with the machine)
- Background die (optional) (I used the Cricut Essentials Cartridge which came with the machine)
- Glue
Instructions:
- Cut a background for the front of the card. I used a name-plate-shaped cutout and sized it for my card, but you can just cut a rectangle. (I like to have a color block as a foundation for my design.)
- Cut out desired styles of flowers, branches, and leaves from your cardstock, sizing as desired. To give you some idea, my leaves are about 2-3/4" x 1-3/8", my flowers range from 1-1/4" to 1-1/2", and the long branches are about 3-1/2" to 4" long. You want to cut some shapes from darker colors and some lighter colors so there's contrast. To see how to cut these designs using the Cricut, watch the video below. (Ignore the references to "fabric"--it's paper!)
- Glue the layered flowers and leaves together. Mix and match colors as desired.
- Glue the background to the front of the card. Arrange and glue the leaves and branches as desired.
- Arrange the flowers as desired and glue in place.
Read Next64 Handmade Cards for Every Occasion

