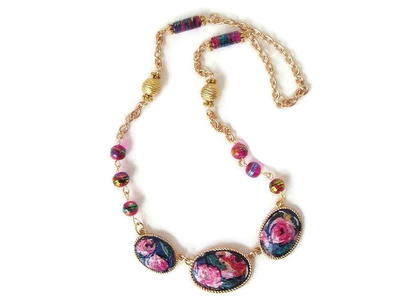
Grape Clusters Ensemble
With a little mixed-media magic, you can harvest your own grapevine set! Grapes and coordinating beads can instantly be created with bead rollers and burnished with a bit of Rub 'n Buff®. Dimensional leaves and swirls enhance the look with wire mesh, ArtEmboss® soft metal sheets, liquid FIMO®, and FunWire™.
By Ann and Karen Mitchell for AMACO
Materials:
- FIMO® soft: One 2 oz. block each of Metallic Purple, Metallic Red, Metallic Green, and Chocolate; two 2 oz. blocks of Gold
- FIMO® Liquid Decorating Gel
- FIMO® Lacquer Gloss
- AMACO® Metal Stamp Art Ink - Rust
- AMACO® WireForm® Metal Mesh - Copper Impression Mesh
- AMACO® ArtEmboss® soft metal sheets - Light Copper
- AMACO® Rub 'n Buff® Wax Metallic Finishes - Amethyst, Autumn Gold, Chinese Red, Emerald, Jade
- AMACO® FunWire™ - 22 gauge Clear Lemon-Lime, 18 gauge Clear Copper
- Glitter: Parisian mist and Christmas cheer
- 70 mm French made barrette
- Sheet of paper
- Grape leaf patterns: (1) 7/8", (1) 1"
- Gold tone 1 1/2" eye pins
- Gold tone 7/8" head pins
- Two gold tone lever back earring hooks
- Gold tone jump rings: 3/16", 1/4"
- Gold tone 12 mm lobster claw clasp
- E-6000 industrial craft glue
- Fine tip permanent marker
- Cornstarch
- Two small glass or metal dishes
- Paper towels
- Oven mitts
Tools:
- AMACO® Polymer Clay and Craft Oven
- AMACO® Pasta Machine
- AMACO® PolyBlade
- AMACO® PolyRoller
- AMACO® bead rollers with bead piercing pins - sets #2, set #8
- AMACO® Professional Bead Baking Rack
- Non-stick work surface (granite, marble or glazed ceramic tile recommended)
- Shape cutters: 13/16" x 1" oval, 1 1/8" x 1 3/8" oval, 2" x 3 1/8" football shape
- Round nose pliers
- Wire clippers
- Old scissors
- Wooden skewer
- Embossing tool
- Craft stick
- Oven thermometer
- Ruler
Steps:
- Mesh Leaves. Cut a 4" x 3" piece of the copper mesh. Using the fine point marker, trace around the larger leaf pattern piece, making an outline on the wire mesh. Repeat this to outline two additional larger leaves and five smaller leaves. Lay the mesh on a piece of paper and rub with the rust colored inkpad until the mesh is darkened. Allow the ink to dry. Cut out all 8 leaves just inside the black outline. Set aside for later.
- Foil Leaves. Cut a 4" x 2" piece of the copper foil. Again using the leaf patterns, outline 2 larger and 2 smaller leaves and cut out.
- Emboss foil leaves. Condition one block of any color of the FIMO® soft clay, and roll it through the pasta machine on the thickest setting. Lay clay sheet flat on your work surface. Sprinkle lightly with cornstarch and spread over the surface of the clay. Take one foil leaf and lay it face down (choose one side to be the top and one to be the bottom) on the sheet of clay. Place the corresponding pattern piece on top. Use the smallest ball on the embossing tool to emboss the lines on the pattern onto the foil, including embossing the outline of the leaf 1/16" from the outside edge (see photo #1). Remove the foil leaf from the clay sheet. Squeeze a thin line of liquid FIMO® decorating gel into the embossed lines. Place the leaf on a flat baking sheet. Repeat this step for the other three foil leaves. Bake the leaves for 30 minutes at 275 degrees (F). Allow leaves to cool.
- Mix enamel colors. Pour 1/2 teaspoon of liquid FIMO® into each of two small metal dishes. In the first dish, scoop 1/8 of a teaspoon of Parisian mist (chartreuse) glitter with a craft stick and mix in completely. In the second dish, mix in 1/8 of a teaspoon of Christmas cheer (dark red) glitter.
- Enamel leaves. Turn foil leaves over so that they are face up on your flat work surface. Gently flatten the leaves by rolling over them with your PolyRoller (see photo #2). Take one leaf, and fill in the outer embossed edge on the leaf with the chartreuse glitter liquid clay using the pointed tip of the skewer (see photo #3). Extend the liquid clay so that it fills the entire indented area, but do not carry it over the edges. Fill in the inner portion of the embossed leaf with the dark red glitter liquid clay (see photo #4). Repeat this step for the other 3 foil leaves. Lay all of the leaves on a flat baking tray and bake for 30 minutes for 230-265 F. Allow leaves to cool.
- Marble leaf base. Cut 1/2 block each of the Metallic Gold clay and Metallic Green FIMO®. Cut 1/4 block of the Chocolate FIMO®. Condition each color separately and roll into a snake. Once the snakes are all the same length, divide each snake in half and stack into a loaf (see photo #5). Roll the loaf into a snake, twist, and fold in half (see photo #6). Roll snake into a ball (see photo #7). Roll back into a snake. Repeat this step until you have fine stripes in your marbling. Press the snake into a flat rectangle (see photo #8). Roll through the pasta machine on the thickest setting, then the third thickest setting, and then the fourth thickest setting.
- Stems. Cut twelve pieces of 18 gauge clear copper FunWire™ that are 1 1/2" long. Make a 1/8" "U" loop at the end of each piece.
- Back mesh leaves. Press mesh leaves onto the marbled sheet of clay, cut around each leaf with a craft knife leaving a 1/16" border of clay beyond the mesh. Take one leaf and slide one wire stem into the clay backing at the center bottom of the leaf, pushing loop 1/4" into the leaf (see photo #9). Blend the clay on the back of the leaf so the wire does not poke through.
- Leaf Edges. Cut 1/8" wide strips from the marbled sheet of clay, and form the edge of the leaf, mitering the corners of the clay (see photo #10). Make sure the strips cover the raw edges of the mesh or foil, and align the strips with the outer edges of the leaf backings. Once the edge is complete, gently bend the leaf to give it some shape, being careful not to pull out the stem. Add texture lines to the edge of the leaves using the back end of the craft knife. Roll skinny snakes of marbled clay and form veins for the leaves (see photo #11). Add a marbled clay backing and edge to the foil leaves and bend the foil leaves the same way you did the mesh leaves in step #8 (see photo #12). Do not add veins to the foil leaves. Bake all twelve leaves for 30 minutes at 230-265 F and allow to cool.
- Accent leaves. Using your finger, apply a light coat of Chinese red Rub 'n Buff® to the edge of the foil leaves (see photo #13). Add a coat of emerald Rub 'n' Buff to four of the mesh leaves (see photo #14) and jade to the other four (see photo #15). Allow the Rub 'n Buff® to dry completely, and buff the edges of the leaves gently.
- Wire Loops: Cut fifteen 1 1/4" pieces of 18 gauge clear copper FunWire™. Take one wire and bend it in half to form a 1/8" loop. Twist the ends together and trim to 1/4". Repeat for the other 14 pieces of wire (see photo #16).
- Necklace base pieces. Condition 1/4 of a block of Gold clay and roll it into a sheet on the thickest setting on the pasta machine. Fold the sheet in half and use PolyRoller to stick the clay layers together. Cut out one medium (1 1/8" x 1 3/8") and two small ovals (13/16" x 1") (see photo #17).
- Add loops. For the largest oval, turn it so that the longer direction is facing vertically. Use your clay blade to make a faint line down the center of the oval lengthwise. Dipping the twisted ends of the loops in liquid FIMO® before inserting them into the clay bases will help them stay in better after the clay is baked. Take the first loop and insert the ends into the center bottom of the oval until only the loop shows. The loops all should be parallel to the clay base. Insert the second loop 3/16" to one side of the first loop. Insert the third loop 3/16" to the other side of the first loop. Insert the fourth and fifth loops 1/2" away from the center top of the oval on either side of the marked line. For the first smaller oval, turn the longer direction so that it is horizontal, and mark a faint line down the center of the oval widthwise. Take the first loop and insert the ends into the center bottom of the oval until only the loop shows. The loops all should be parallel to the clay base. Insert the second loop 3/16" to one side of the first loop. Insert the third loop 3/16" past the second loop. You will reverse sides for the loops on the second small oval. Insert the fourth and fifth loops 5/8" away from the top center line (see photo #18).
- Decorative spiral. Cut a 6" piece of the 18 gauge clear lemon-lime wire. Use the pliers to bed over one end of the wire. Starting at this end, bend the wire into a spiral around the wooden skewer, leaving about 5/8" of the wire straight at the other end (see photo #19).
- Add leaves to center necklace base piece. Make a small loop at the base of one of the larger foil leaves. Take one small mesh leaf and place it over the second larger foil leaf. Twist the leaf stems together. Place the larger oval necklace base piece on your work surface with the 3 loops on the bottom. Place the single foil leaf at an angle on the top portion of the base. Place the two combined leaves on the bottom part of the base, diagonally positioned from the first leaf. Place the green wire coil near the combined leaves (see photo #20). When you like the position of the leaves and coil, dip the wire ends into liquid FIMO® and sink them into the clay base. Roll a small ball of Gold FIMO® and press it over the base of all the leaves where they sink into the base. Blend the ball into the base (see photo #21).
- Necklace side pieces. For each of the two side pieces, twist together one larger and one smaller mesh leaf. Place each pair of leaves on a side piece at an angle on the upper portion of the oval, facing in opposite directions (see photo #22). When you like the placement, Insert the leaves and blend in the stems with a ball of gold clay as you did with the center necklace base.
- Lots of grapes. Condition the Metallic Purple and the Metallic Red FIMO®. Combine 1/3 block of red clay with 1/3 block of purple clay and mix the two colors together completely to make a plum color. Roll six 1/4" thick snakes of clay out of both the red and the plum clays (see photo #23). Take one snake of clay and press it into one of the grooves on the #8 bead roller set (see photo #24). Trim off the excess clay, and gently pull the measure clay out of the groove. Lay the flat side on your work surface, and measure the appropriate length of clay needed for the size of bead that you are making (see photo #25). Roll one of the measured pieces into a ball, and place it in the bead roller groove. Roll the ball in the bead roller, align it with the bead piercing groove, and pierce with a pin (see photo #26). Repeat. You will need approximately 26 pierced beads for the earrings, and 48 pierced beads for the necklace. Place pins with beads on bead baking rack, and bake for 30 minutes at 230-265 F. Allow beads to cool. The beads should be a mix of 6 mm, 7 mm and 8mm in size, in both purple and plum. While the pierced beads are baking, make some more solid beads that will be added to the necklace bases.
- Decorate pierced beads. Once the pierced beads are baked, apply random dabs of Rub 'n Buff® to the surface of each bead. Apply amethyst to the plum beads, and Autumn gold to the purple beads (see photo #27). Allow the Rub 'n Buff® to dry, and buff beads slightly. Apply a coat of FIMO® gloss varnish to the beads and allow to dry. If you do not have adequate space on your bead baking rack to dry the beads, just use a ball of scrap clay (see photo #28).
- Add solid grapes to necklace base Gently press assorted sizes and colors of solid grape beads over the visible parts of the gold base clay, until you have an arrangement you like on all three base pieces. Bring the grapes right up to the loops, but leave enough room to still add the drops to the loops.
- Grape drops. Insert a 7/8" into one pierced grape bead. Make a 1/8" loop, and trim off the excess wire. Repeat this step for all of the grape beads.
- Earring and necklace clusters. For one earring, hook together five 3/16" jump rings to make a small chain. Hook one grape bead on one end of the chain. Hook two grape beads to each of the four remaining loops (see photo #29). Attach that end of the chain to the lever back loop with another jump ring. Form a 1/8" loop on the end of one of the smaller foil leaves and cover the excess wire with a small piece of marbled clay and blend the clay into the back of the leaf (see photo #30). Repeat forming the loop for the second earring leaf. Bake both leaves for 30 minutes at 230-265 F. Allow leaves to cool, and then varnish. Once the varnish is dry, hook the leaf onto the jump ring connected to the lever back. Add two grapes to this ring. Repeat making the cluster for the second earring. Attach the cluster, leaf, and last two grapes to the second earring. The earrings are complete.
- Accent grapes on necklace. Dab Rub 'n Buff® onto the grapes that are baked onto the necklace leaf sections. Use the amethyst to accent the plum grapes, and the Autumn gold to accent the purple grapes (see photo #31). Allow it to dry completely and buff the grapes gently. Apply a coat of FIMO® gloss varnish to the grapes and leaves and allow them to dry.
- Grape clusters for necklace. For the center necklace cluster, hook together six 3/16" jump rings Add grapes as you did with the earrings. Attach the cluster to the center loop of the bottom of the necklace centerpiece. Add two grape beads to this loop, as well as a grape bead to each loop on either side of the center drop. Add grapes as desired to fill out the cluster. Repeat this process for the two necklace side pieces with leaves, starting with five 3/16" jump rings for the initial clusters (see photo #32). Add two grapes to the attaching jump ring, as well as to the side loops.
- Coordinating beads for necklace Roll two 1/2" thick snakes of clay in the following colors: marbled green, purple, plum. Press the green snake into the larger groove on the #2 bead roller set. Trim so that the clay is flat against the bead roller. Remove the clay from the bead roller and lay the flat side on your work surface. Mark the clay at 3/4" increments and cut. Repeat until you have nine pieces. Roll one piece lengthwise into a rough oval, and place back in the bead roller groove. Roll and oval bead and pierce with a bead piercing pin. Repeat for the other eight oval green marbled beads. Repeat this process using the smaller groove on the bead roller to make eight round plum beads and ten round purple beads. Place the beads on the bead baking rack and bake for 30 minutes at 230-265 F. Allow beads to cool. Beads not used on the necklace will be used for the bracelet.
- Embellish beads. Dab Rub 'n Buff® onto the beads. Use the amethyst to accent the plum beads, the Autumn gold to accent the purple beads, and jade, emerald, and Chinese red to accent the green oval beads. Allow them to dry completely and buff the beads gently. Apply a coat of FIMO® gloss varnish to all of the beads and allow them to dry.
- Assemble necklace. Attach the loop end of one of the gold tone eye pins to the upper left loop on the leaf and grape necklace centerpiece. Close the loop and slide a purple round bead onto the eye pin. Form a 1/8" loop on the other side of the bead, parallel to the first loop. Trim excess wire, and hook the end of the loop to the inside loop on the necklace leaf and grape side section for the left side of the necklace. Attach an eye pin to the outside loop on this same section, and slide on a green oval bead. Make a loop at the other end of the oval bead, trim excess wire, and hook on another eye pin (see photo #33). Continue making this segmented bead chain with an eye pin for each bead, adding the beads in the following order: plum round, purple round, green oval, plum round, purple round, green oval, and plum round. Close the final loop on the eye pin. Repeat this step for the right side of the necklace.
- Add clasp. With a 3/16" jump ring, attach a lobster clasp to one end of the necklace. Add a 1/4" eye pin to the other end (see photo #34). The necklace is complete. You can adjust the length by adding or subtracting bead segments.
- Barrette base. Condition half a block of Gold clay. Roll it through the pasta machine on the thickest setting. Use the football shaped cutter to cut out the barrette base (see photo #35).
- Add scrolls. Roll some of your marbled green scraps into several 1/8" thick snakes, tapering the ends into points. Form scrolls and place them randomly on the gold base clay (see photo #36).
- Add leaves. Twist the stems of one large mesh leaf and one small mesh leaf together, trim excess wire. Press the stems into the base clay, positioning the leaf on the upper left hand side of the barrette as it is facing you. Press the stem of another small mesh leaf into the gold base clay, placing it on the lower right hand side of the barrette.
- Add loops. Cut three 1 1/4" pieces of 18 gauge clear copper FunWire™. Take one wire and bend it in half to form a 1/8" loop. Twist the ends together and trim to 1/4". Repeat for the other two. Insert the three loops on the bottom edge of the gold clay base, 3/16" apart, slightly off to the left of the center. Dipping the twisted ends of the loops in liquid Fimo before inserting them into the clay bases will help them stay in better after the clay is baked. The loops should be parallel to the base (see photo #37).
- Add grapes. Place an assortment of sizes and colors of solid grape beads on top of the leaves on the barrette base. Arrange them to taper from a larger cluster at the upper right side of the barrette, to a smaller cluster near the lower left side of the barrette, covering but not obstructing the loops. Lift the clay base off of your work surface, and bend it over the 70 mm French barrette. Carefully place the barrette and clay decoration on a flat tray and bake for 30-45 minutes at 230-265 F. Allow clay to cool on top of barrette in order to retain necessary curve.
- Accent grapes on barrette. Dab Rub 'n Buff® onto the grapes that are baked onto the barrette base. Use the Amethyst to accent the plum grapes, and the Autumn Gold to accent the purple grapes (see photo #38). Allow it to dry completely and buff the grapes gently. Apply a coat of FIMO® gloss varnish to the grapes and leaves and allow them to dry.
- Add cluster drop. Make a grape cluster drop with already prepared grape beads like you did for the earrings and necklace (steps 21 and 23), starting with three 3/16" loops attached together. Use a fourth jump ring to attach the cluster. Add two more grapes to the to jump ring, as well as a grape bead to each of the side loops on the base. Add grape beads as desired to fill out the cluster.
- Attach barrette. Use the E-6000 glue to attach the barrette to the back of the grape cluster clay piece. Your barrette is complete!
- Assemble bracelet. Make individual bracelet bead segments by sliding each bead onto an eye pin, and making a closed loop on the opposite side of the bead. For this bracelet, you will need four purple round beads, two plum round beads, and three green oval beads (see photo #39). You will attach the beads together using 3/16" jump rings. Assemble the beads in the following order: purple round, green oval, plum round, purple round, green oval, plum round, purple round, green oval, purple round (see photo #40). You can adjust the length of the bracelet by adding or subtracting bead segments.
- Add clasp. On one end of the bracelet, attach a lobster clasp with a 3/16" jump ring. Attach a 1/4" jump ring to the other end.
- Add dangles. Use your remaining grape drops (you will need 27) to add dangles to the bracelet (see photo #41). Add three grape beads to each jump ring between each bead, as well as to the one attaching the clasp. Place two beads on one side of each loop, and one bead on the other side, alternating every other bead. Once all drops are attached, your bracelet is ready to wear (see photo #42).
Read NextDisney Princess Bottle Cap Necklaces
Your Recently Viewed Projects
Report Inappropriate Comment
Are you sure you would like to report this comment? It will be flagged for our moderators to take action.
Thank you for taking the time to improve the content on our site.

