Drafting Basic Shapes

Now, it is time to do your first sketches and I am really excited about it! The ability to create something out of thin air and putting it on paper is empowering and life changing—even more so if you are sharing it with other people. In this project, you will be learning how to draw the simplest shapes you can make in perspective. They will later become the foundation for all the other work in this book. But don’t worry, because I will be guiding you through every step of the process. If this is your first-time trying perspective, I urge you to have fun and don’t try to make the drawing perfect. In my world, imperfect is fine as long as you are learning and enjoying.
INSTRUCTIONS
-
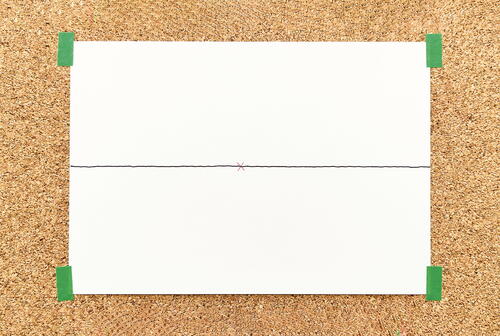
Fix the paper to the corkboard with the masking tape, or directly to the table if you do not have a corkboard.
PRO TIP: When using masking tape, make sure to press it on your clothing first, to take a little bit of the excess glue off before using it on the paper. This will prevent tearing or damage to the corners of your paper when you take it off. -
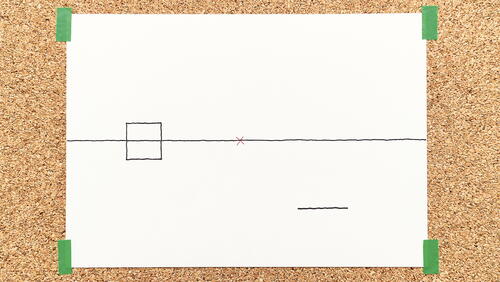
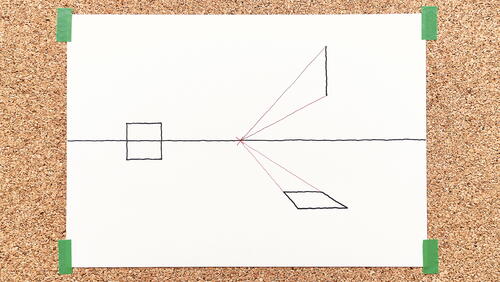
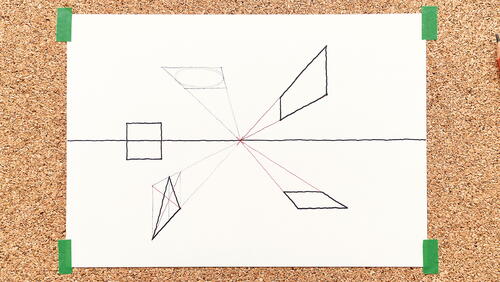
Now, get your pencil ready. Use it to draw a horizon line and vanishing point (red X) in the middle of the paper. I am drawing free hand, but if you want to use a ruler in these first exercises that is okay.
-
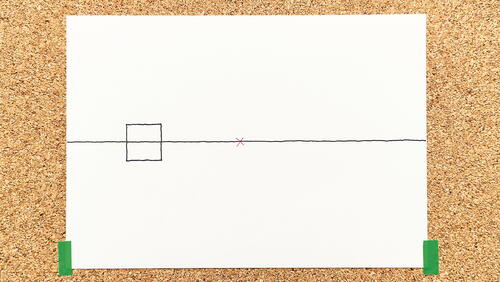
Next, draw a square to the left of the vanishing point, directly over the horizon line. It can be as big as you want. Rectangles and squares are the easiest and most useful of shapes to draw. This one represents a squared plane or surface.
-
Draw a horizontal line below the horizon line and to the right of the vanishing point. This will be the start of another squared plane, but in this case, oriented in the same direction as the floor you are standing or sitting on.
-
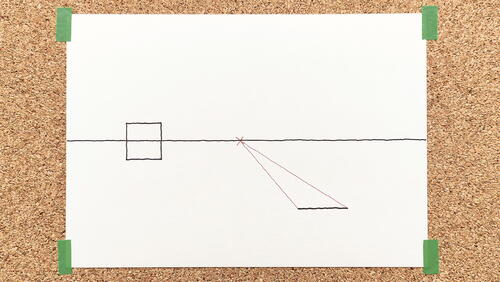
Now add a couple of lines from the ends of the line you drew in Step 4 going to the vanishing point. Because these red lines go in the same direction as the observer’s eyesight, they need to go to the vanishing point.
-
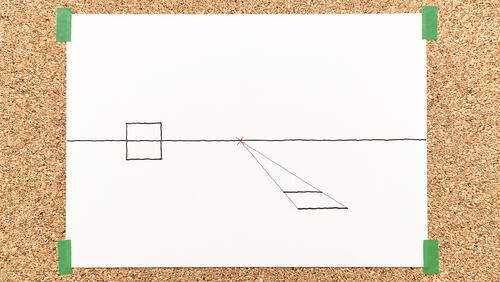
To finish up the square, simply draw another horizontal line between the two vanishing lines you drew in Step 5. This squared plane could very well be a tile on the floor or a carpet, or any other surface with the same orientation as the floor. And you can see in this picture, the square looks and feels like it is bigger in the front and smaller as it goes back in space. However, these two black lines would have the exact same measure in real life. The back one just looks smaller because it is farther away from you.
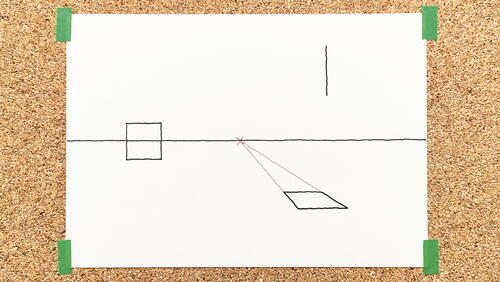
But what if you want to draw a plane that is not “on the floor” but “standing up” and above you? Okay, here is how to do just that. -
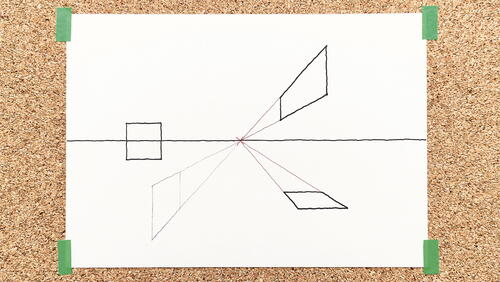
To draw a vertical plane, start with a vertical line instead of a horizontal (Picture 7a), and then repeat the exact same process as in Steps 4 through 6, drawing two vanishing lines from the ends (Picture 7b) and closing with another vertical (Picture 7c). In my example, I made a longer plane that looks more rectangular than square just by spacing the two verticals a bit more. This shape could be a wall or a glass window. By placing it above the horizon line it looks as if it were above your head.
-
Now let me show you how to draw a triangle that has a centered tip. For objects that have lines in directions other than straight horizontal or straight vertical, or that are curved, you will use a technique that I call “the container plane.” Start by drawing a vertical plane in the same way that you did in Step 7. Place this new container plane below the horizon line and to the left of the vanishing point.
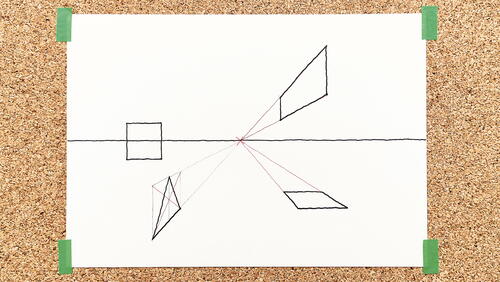
PRO TIP: To find the exact center of a square or rectangle in perspective, draw an X from its opposite corners. I will call this the “X method". -
After defining the container plane, use the X method below to find its center and sketch a vertical line through the center point. This new line lets you know where the centered tip of the triangle should be. To finish the triangle, just draw a couple of lines from both bottom corners of the container plane to the center point of the top line. To polish it up, erase all your construction lines.
-
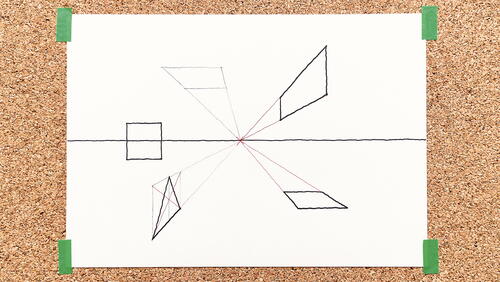
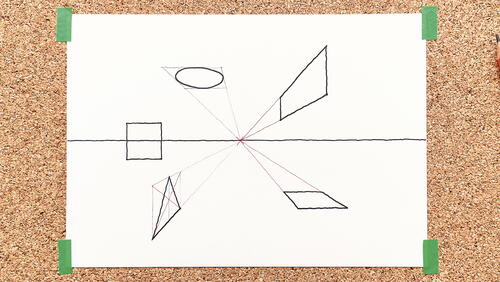
Finally, create a circular plane above the horizon line. Start by drawing a squared container plane above the horizon line like you did in Steps 4 through 6 (Picture 10a). Lightly sketch a circle within the container plane (see the Pro Tip below). Keep in mind that because of the perspective the circular plane is going to look more like an ellipse than a circle (Pictures 10b and 10c).
PRO TIP: When drawing a circle or ellipse shape inside a plane, hover your pencil lightly with its tip gently touching the paper in circular motions, until you see and feel that it is right and that the edges of the circle/ellipse are touching the sides of the box (Picture 10b). Then you can trace over the best lines in pen (Picture 10c).
And now you’ve done it! Before you move on, notice how all objects seem to be “traveling” toward the vanishing point and that creates a strong sense of depth in the drawing. Although they are on a two-dimensional surface like paper, they feel like they belong in a three-dimensional space. That is exactly what perspective is supposed to do. Squares, triangles and circles might not be the most exciting things to draw, but they are the foundational shapes you will later use to draw buildings, towers and trees.
Congratulations on finishing your first project! I hope you enjoyed it as much as I did and that you now have a good understanding of the basic rules of one-point perspective. In the next lesson, you will build on this knowledge to draw some more complex and interesting objects.
Credit:
Reprinted with permission from Foolproof Perspective Drawing by Roberto Bernal. Page Street Publishing Co. 2024. Photo credit: Roberto Bernal.
Read NextMarker Art Quote Page