Mini Love Mixed Media Screen
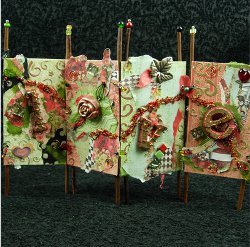
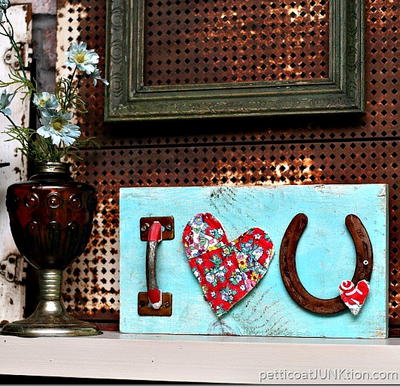
Use cereal boxes, charms, beads, scrapbook paper and more to create this desktop masterpiece. A Mini Love Mixed Media Screen from Heidi Borchers is the perfect compliment to anyone's home decor. You'll love this mixed media art piece.

Materials:
- Cereal box cardboard 3-½“ x 6“ (You will need one panel for each letter)
- Papers – scrapbook papers (For each background you will need a piece 4” x 7”)
- Additional papers needed for collage
- Mulberry tissue
- Glues – Aleene’s Tacky Glue, Aleene’s Collage Pauge Glue, Aleene’s Tacky Spray
- Brush
- Waxed paper
- Sticks/twigs
- Eyelet punch and eyelets (you will need 4 eyelets for each panel
- Decorative wire-24gauge (to attach the message panels to the sticks)
- Needle nose pliers and wire cutters
- Beads
- Cool2Cast pre-made letters- l-v-e
- Cool2Cast pre-made rosette (for the ‘o’)
- Metallic gold spray paint (for the letters)
- Acrylic paint – burgundy (for the letters)
- Additional mixed media items needed: dimensional paint (I used Texture Magic by Delta), Stencil, Small Seed beads, Mirror tiles, mini ceramic tiles, metal leaf, glass heart
Instructions:
- In a well ventilated area, spray one side of the cardboard background with the Aleene’s Tacky Spray. Immediately place the glue side down onto the center of the background paper.

- Cut the edges at the corners. Working with the wrong side facing up, fold up the flaps of the paper. Place the Aleene’s Tacky Glue onto the paper edges and use a piece of cardboard to squeegee the glue, so it is smooth and the paper flap is completely covered.

- Fold the glued paper flaps to the back side of the cardboard panel.

- All four sides glued to the back. Make one of these panels for each letter.

- To add another dimension to the background, Place a stencil where you want it, and apply the Texture Magic with a spatula. Repeat carefully on the other areas you want dimension. Remove stencil and clean it thoroughly. Let dry completely.

- Replace the stencil onto the dried Texture Magic to add color. Using brush, lightly brush on color over the dried Texture Magic, until desired color is obtained. Remove stencil and clean thoroughly. Let paint dry.Lay out all of the panels and the papers the way you want them before gluing.

- Lay out all of the panels and the papers the way you want them before gluing.

- To attach the papers to the panels, use the Aleene’s Collage Pauge for the light weight papers and the Aleene’s Tacky Glue for any of the heavier items. When using the Aleene’s Collage Pauge, brush onto background first, then to the back of paper. Place onto the background and place another coat over the top. Repeat until all papers are attached to the background. Let dry.

- Using an eyelet punch, punch holes about 1” down on each side, at the top and the bottom.

- Place eyelet with the right side of the eyelet on the right side of the panel. Turn over and press with an eyelet press to attached the eyelet.


- To attach the small seed bead design, use the Aleene’s Tacky Glue, then immediately sprinkle the beads into the glue. Let glue dry. Wrap each letter with the decorative wire, applying small beads to the wire as you wrap. End the wire into a swirl using a needle nose pliers.

- Glue each panel to the sticks/twigs where it touches. Let dry. To hold panels together, place wire through the eyelet, and around the twig. Place beads onto the wire before tying wire off at the back of the panel.

Read NextQuilt Heart Love Sign

