This project was submitted by one of our readers, just like you.
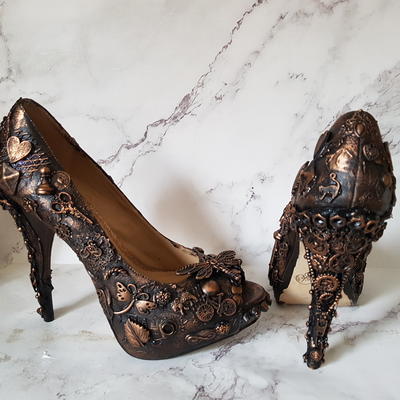
Old Shoes Repurposed Into A Ring Stand
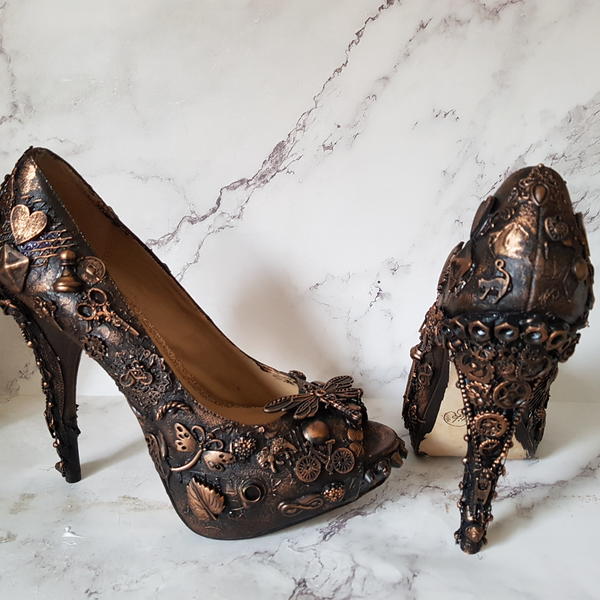
"I am sure many of us ladies have done this. We go into a shoe store and see beautiful pair of high heels at a bargain price and we just have to have them. We try them on and they fit perfectly and our legs look sexy as hell. We go to wear them with our favorite outfit only to find after 5 minutes we can no longer walk in them and our feet are killing. That was the story behind these shoes but the 5 minutes was and exaggeration, after a few steps I was done. If you follow my projects you will know I never throw anything away when I can repurpose them. So these shoes got repurposed into ring holders."
Primary TechniqueMixed Media

Instructions
-
I started by painting the shoes with black gesso. Because the shoes were glitter I was unsure how the glue would stick. It is also easy to paint the base now rather than later with all the embellishments attached.
-
By adding some texture to the shoes, you will see at the end the difference it will make. I used a variety of stencils to do this
-
Place the stencil over the shoes and add the texture paste with a spatula, then remove the stencil straight away. I used a few different stencils on each shoe. They don't have to be the same as each other.
-
To get the texture paste to dry faster so you can carry on, a hairdryer works great. This step does not need to be perfect as you can see mine looks a mess. And it is going to get worse before it get better. This is where you need to hang in there until the end to see the results.
-
The netting you can see on the shoes above are packaging from on onion sack and fruit sack. The white bubbly looking fabric on the right shoe is an off cut of non slip mat. Other great items to use is cardboard or burlap. These items give a great result once highlighted at the end.
-
This is where you can get creative and look around your home for items to use. Being big into crafting, I bought some bulk charms from Amazon. They are cheap and you can get many projects out of one pack.
-
At this stage they look and even bigger mess than before, but stay with me it does get better, I promise.
-
I am a bit of a one trick pony when it comes to my choice of colors. Because I want them all to blend into my spare room I tend to go for the same colors. You can play around with whatever colors you like. I start with the gold first, put the tip of your finger on the wax and rub it over the surface of the raised embellishments. Repeat this step with all the colors. I try add a little of each color to each area or embellishment. When all the colors are added to blend them together with a soft brush, I use a makeup brush.
-
To get extra sparkle you can add some mica powder using a soft brush.
-
Put a tiny amount of mica powder on the shoes and blend with a soft brush
-
If you just want decorated shoes, this is where you stop. But you will need to seal the shoes if you want to wear them. Mod podge would be a good sealer to use.
-
I used a scrap piece of foam which I cut to size to fit inside the shoes. This will be covered in black velvet later.
-
Using a sharp knife cut slots into the foam to hold the rings. Make sure to cut the slot deep enough to hold the rings in place.
-
I added some hot glue to the inside of the slot and and push the black velvet down into the glue. This will hold the velvet in place when the rings are being pulled in and out. This is then glued to the inside of the shoe using a hot glue gun.
Read NextSteampunk Mirror Makeover


