By the Sea Seashells

Our oceans are filled with so many different types of seashells. If you look carefully, you’ll see such beautiful textures and patterns on them. When capturing your day at the beach, why not paint a few of the seashells you collected or some from your previous collections? It’s a beautiful theme to fill a sketchbook page with. Start with one of the seashells I’ve shown here, which you can paint in ten minutes, and if you have more time, you can try painting other kinds as well.

Materials List
-
Colors
- Permanent Rose
- Transparent Orange
- Cadmium-Free Yellow
- Permanent Alizarin Crimson
- Burnt Umber
-
Color Mixing
- Transparent Orange + Cadmium-Free Yellow = Light Orange
- Transparent Orange + Burnt Umber = Terra-cotta
-
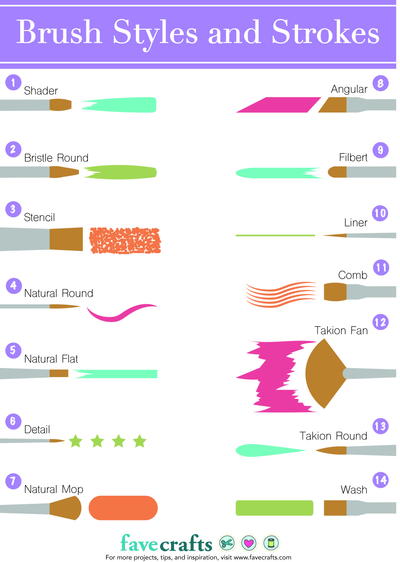
Brushes
- Pointed round no. 4
- Pointed round no. 2
-
Template
Note: A simple line drawing of the finished project is shown here. You can easily paint these seashells without a drawing, but feel free to add some outlines for the seashell shapes. Any excess graphite marks can be removed with an eraser before you start painting if you don’t want them to be visible.
INSTRUCTIONS
-
STEP 1
Tape down all the edges of the watercolor paper to a piece of cardboard to prevent warping.
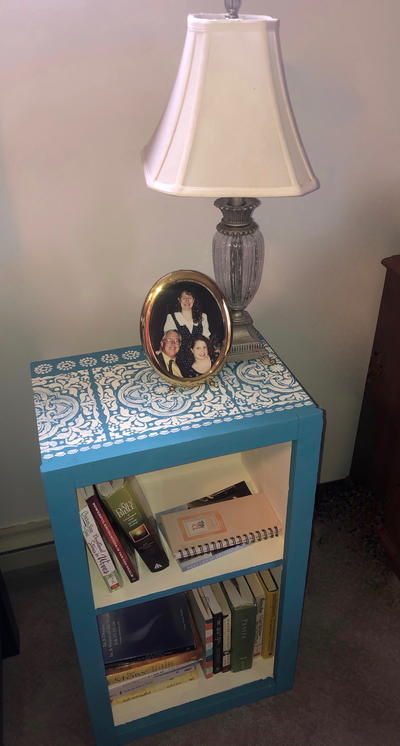
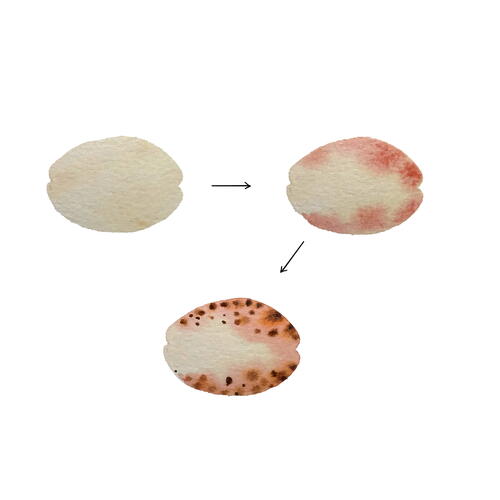
Start with the cockle shell. With some medium-consistency light orange made out of two parts Transparent Orange and one part Cadmium-Free Yellow and using the round no. 4 brush, paint the base layer of the seashell.
While this base layer is still quite wet, use the round no. 2 brush and a thick-consistency Permanent Alizarin Crimson to add three curved marks over the shell following the shell’s outermost curvature, using wet on wet. -
STEP 2
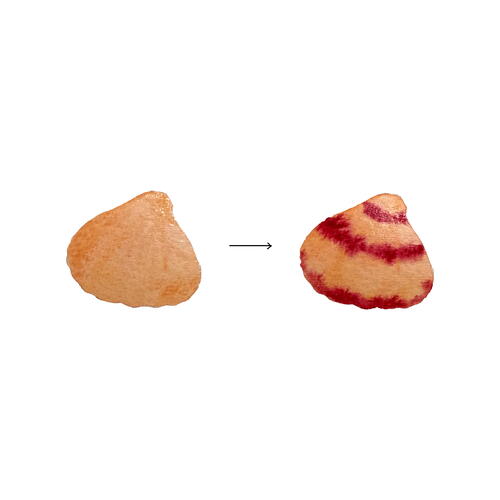
While this base layer is still wet, go back in with some thick-consistency Burnt Umber and a round no. 2 brush to paint ridges all over the cockle shell, converging toward its narrow end. Since the base layer is still wet, these marks will become softened.
Once the base layer has dried, use some medium-consistency Permanent Alizarin Crimson and the round no. 2 brush to add another layer of dots and dabs to the three arcs you painted earlier. Then add two more arcs in between them with some more dots and dabs.
Add a bit more medium-consistency Burnt Umber to the little notch at the narrow end of the cockle shell. -
STEP 3
With a very light watery-consistency Cadmium-Free Yellow and the round no. 4 brush, paint the base layer for the cone with three tiers.
Once this base layer has dried, use the same color but this time with slightly less water, and add some demarcating lines between the tiers, along the sides and at the bottom-right part. -
STEP 4
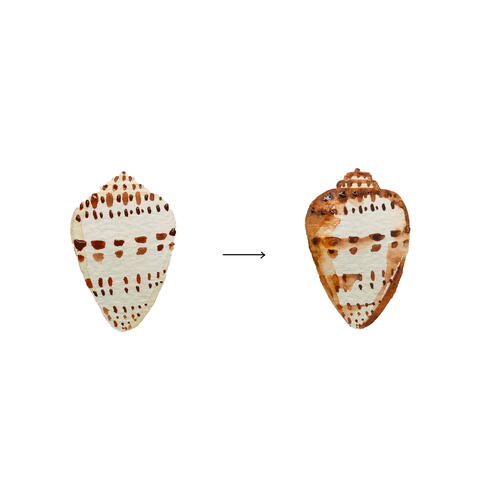
Once the color from the previous step dries, take some medium-consistency Burnt Umber in the round no. 2 brush and add a few rows of little dots, dabs and dashes on the cone. Also add these marks to the small tiers of the cone.
While these marks are still wet, use the round no. 2 brush and a medium-consistency terra-cotta color made out of equal parts Transparent Orange and Burnt Umber to add some shadow around the edges and demarcation between the tiers. Simply add the color on the borders, and then with a clean, wet brush (remove any excess moisture), soften some of this newly added color and the previously painted rows of marks.
This process of adding softened shadows gives the impression of some curvature. Also add this color to the bottom-right part of the cone. -
STEP 5
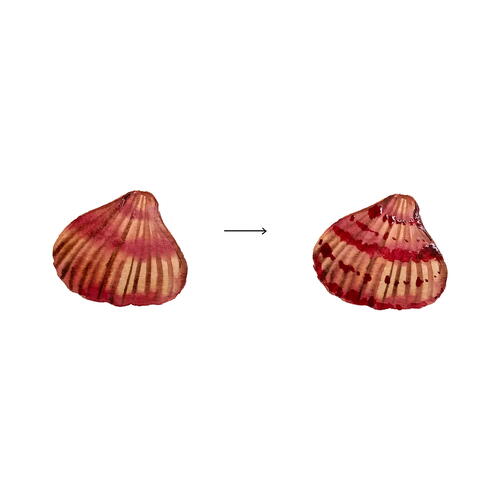
For the cowrie, paint the base layer using the round no. 4 brush and a watery-consistency Cadmium-Free Yellow.
While this base layer is still wet, using a round no. 2 brush, drop some medium-consistency Permanent Rose along the top and bottom edges.
While all this is still wet, add some dots of the thick-consistency terra-cotta color you made earlier. Make some of the dots slightly bigger than the others. Add some dots to wet areas and some to slightly drier areas as well. The ones painted on wet areas will look a bit blurred when dry. -
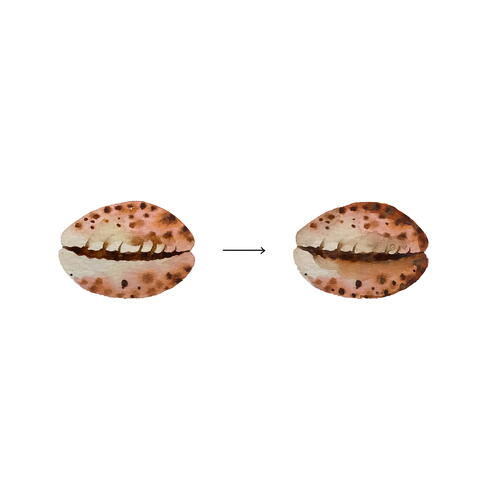
STEP 6
With the round no. 2 brush and some medium-consistency Burnt Umber, add the central wavy line dividing the cowrie in two curved bun shapes. Make it a bit broader in the center and thinner toward the edges.
Use a clean, slightly wet round no. 2 brush to extend this horizontal wavy line into little curved
vertical marks coming out of its top edge to give the impression of the ridges in the cowrie shell. With the medium-consistency terra-cotta color you mixed earlier and using the round no. 2 brush, add more color to the top and bottom edges of the cowrie, especially toward the right side.
Use a medium-consistency Burnt Umber and the round no. 2 brush to give a better shape to the wavy central line and soften it using a clean, damp brush. As a finishing touch, add some more thick Burnt Umber spots on the cowrie.
Now that you’ve painted these three, you can easily paint other types of seashells varying in shapes, colors and patterns.

Credit:
Reprinted with permission from Watercolor in Ten Minutes a Day by Garima Srivastava. Page Street Publishing Co. 2024. Photo credit: Garima Srivastava.
Read NextWild Wines