Watercolor Nature Prints
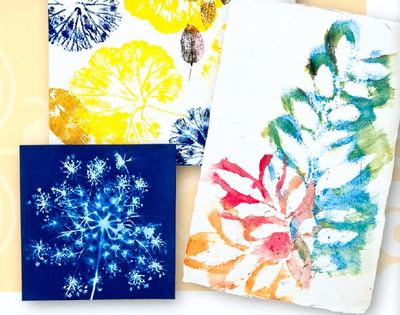
Follow this fast and easy tutorial from Tracie Lyn Huskamp to print a plant or leaf silhouette. Use multiple colors for your watercolor silhouettes.
Materials:
- Light-colored, absorbent paper
- Fresh plant or leaf
- Paintbrush
- Watercolors
Instructions:
- Start by selecting a piece of light colored, absorbent paper, such as watercolor paper or even some handmade papers.
- Because only the outer edge will be seen, choose a fresh plant or a leaf with an interesting shape.
- Carefully towel dry the plant to remove surface moisture and dirt.
- Tuck the specimen between two sheets of plain newsprint paper and place it under a heavy book. Press for 30 minutes to flatten it as much as possible.
- Using water, a paintbrush, and watercolors, create a mixture of water and paint (known as a wash) on the palette.
- Holding the plant or leaf steady on the absorbent paper, begin applying a light wash of more paint than water to the paper, making sure to paint past the edges of the botanical.
- Avoid applying too much paint at once - you don't want the colors to bleed under the edges of the plant or leaf. Sweeping strokes across the entire leaf work best.
- Allow the leaf to dry thoroughly, then apply another wash to intensify the color.
- Continue the drying and painting process until a satisfactory amount of color is showing on the page.
Read NextQuick Minecraft Canvas Art

