This project was submitted by one of our readers, just like you.
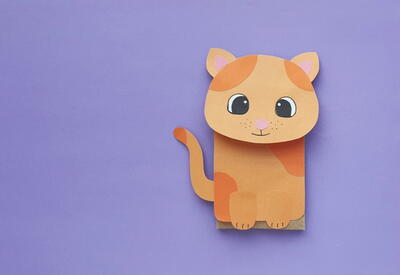
Cat Paper Bag Puppet
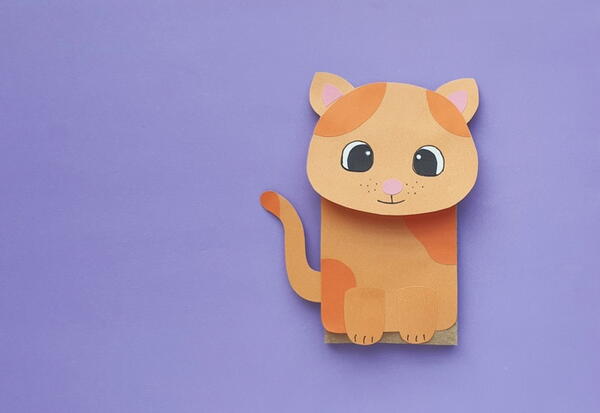
From the blogger: "This adorable Cat Paper Bag Puppet is the PERFECT craft for your kitty loving kiddos. For those with cats, what better way to create a puppet version of your beloved furry friend than with this fun and creative Kitty Puppet Craft! Your kiddos are sure to spend countless hours of playtime fun with both their real life furry pal and their imaginative one with this interactive craft! It is so cute and easy it makes for the perfect afternoon activity!"
Primary TechniquePaper Crafts

Materials List
- Colored Craft Paper
- Brown Paper Bag
- Sharpie
- Craft Glue
- Pencil
- Scissors
Instructions
-
Decide a color for the cat paper bag puppet and select 2 different shades of that colored craft paper; we’re using 2 different shades of orange colored paper. Also, select pink colored paper for the inner ear patterns and the nose.
-
Trace and cut out a piece of paper to cover either side of the selected paper bag, this would be the front side of the paper bag cat. Attach the spot cutouts on the tail, head, and body cutouts. Attach the inner ear cutouts in the middle of the ear parts of the head cutout.
-
Attach the nose and the eye cutouts on the head pattern.
-
Use a sharpie or gel pen to draw outlines of the eyes, mouth, and whiskers of the cat on the head pattern.
-
Attach the leg cutouts near the bottom side of the body pattern, keeping the round ends of the legs along the border. Attach the tail pattern on either side of the body cutouts, keeping the round end of the tail pointing upwards.
-
Now that the body pattern and the head pattern are ready, take the paper bag.
-
Attach the body pattern on either side of the paper bag. The legs should be on the open end of the paper bag.
-
Attach the head pattern on the bottom side of the paper and then flatten the head part with the body part to complete the paper bag cat puppet craft.
Read NextFree Printable Scripture Dolls


