Hand-Painted DIY Gift Wrap
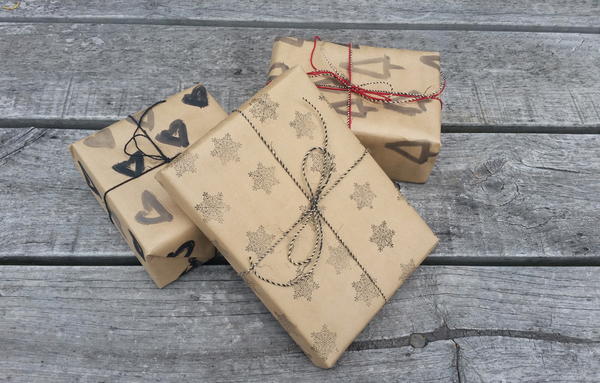
"Make your own hand painted gift wrap with this super quick tutorial. Low cost, unique and looks better than bought stuff, what more could you want in your gift wrap this year!"
Estimated CostUnder $10
Time to CompleteUnder an hour
Main MaterialPaint

Materials List
-
Brown paper
- Paint
- Paint Brushes
- Stamp (can buy from any craft shop)
- Stamp pad
Instructions
-
There is only a couple of steps in making this gift wrap and the first one is to cut a piece of brown paper (or any other paper you want to use) to the size you need to comfortably wrap your gift.
-
The next step is practicing your free hand painting patterns and having a go with the stamp.
-
Now to the fun part.painting and stamping your wrapping paper for real!
-
Once youve let the paint and ink dry its time to wrap all your gifts and then your all done making your very own hand painted gift wrap!
Read Next50+ Adult Coloring Book Pages
Your Recently Viewed Projects
CeciliaKo
Dec 18, 2016
I have made this DIY gift wrap with my students last semester. We used acrylic paint and brush instead of stamp pad. We made colorful designs. We didn't use store bought stamps. We made our own stamps using art foam. We cut the foam according to our design, then stuck them on a small cereal box using double sided tape. Don't forget to fill the cereal box with newspapers, otherwise the paint won't transfer to the paper. Very easy )
Report Inappropriate Comment
Are you sure you would like to report this comment? It will be flagged for our moderators to take action.
Thank you for taking the time to improve the content on our site.


