This project was submitted by one of our readers, just like you.
Easy Paper Bag Dog Puppet
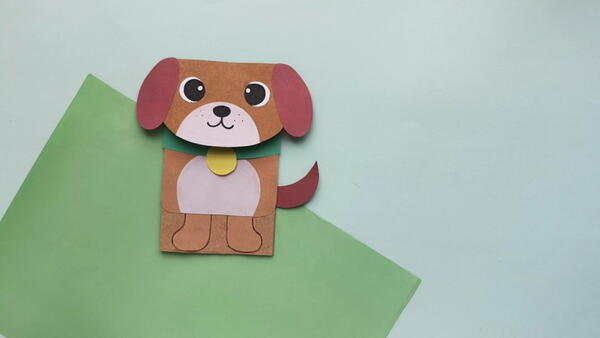
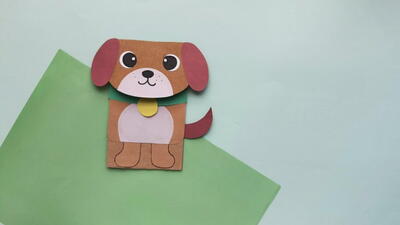
"Dogs aren't just man's best friend - but kid's best friend! And this paper bag dog puppet is the perfectly PAWSOME new pal. Arts and crafts are always a hit when you have littles and there is nothing better than creative this paper bag craft and getting to go on all the new tail wagging adventures together! Follow these instructions and the easy template - with just a few simple supplies and your family is all set!"
Primary TechniquePaper Crafts

Materials List
- Colored paper
- Paper bag
- Craft glue
- Pencil
- Scissors
Instructions
-
Select light brown, dark brown and light pink colored papers for the dog craft.
-
Trace the body base, head, and leg patterns on the light brown colored paper; trace the tail and ear patterns on dark brown colored paper, and trace the mouth and the belly patterns on the light pink colored paper.
-
Cut out the patterns using scissors.
-
Attach the mouth pattern on the bottom side of the head cut out and attach the belly cutout on the bottom side of the body base cutout.
-
Attach the eye cutouts on the top side of the head pattern.
-
Use a sharpie to draw the nose and mouth of the papercraft dog puppet.
-
Grab a paper bag or you can craft your own custom-sized paper bag from brown wrapping paper. We will use the bottom side of the bag as the top side of the puppet pattern.
-
Attach the leg patterns near the open side of the paper bag.
-
Attach the tail on either side of the paper bag.
-
Attach the body base pattern on the top side of the leg and cover the paper bag’s surface.
-
Attach the head pattern of the paper dog on the bottom flat side of the paper bag and then flatten the bottom side with the rest of the pattern.
Read NextRecycled Denim Dog Toy


