8 Plastic Canvas Stitches
If you want to learn how to do plastic canvas, you need to start with the basics.
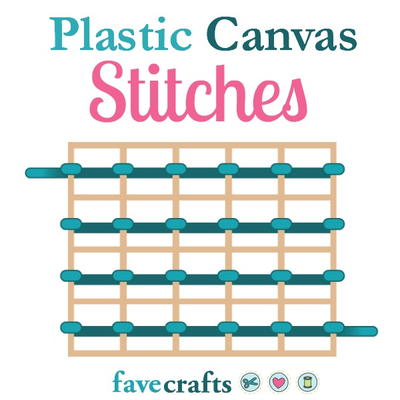
Plastic canvas patterns are excellent for all types of crafters. They are particularly lovely for children, teens, and beginners to stitching because they use a larger grid with thicker yarn, making it easier to see what you are doing. In fact, plastic canvas projects serve as a foundation for other embroidery patterns like needlepoint and cross stitch.
Using yarn, a tapestry needle, and sheets of plastic canvas, crafters can complete projects more quickly. Other embroidery techniques, which are done on canvas and require a smaller needle and thinner thread, take longer to complete (though they are gorgeous and should be tried once you master plastic canvas!).
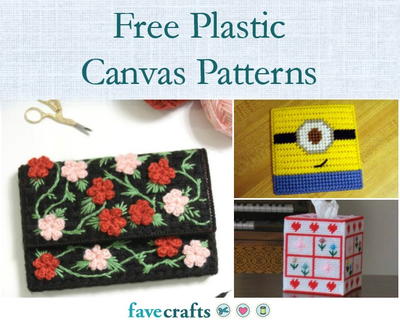
No matter how experienced you are at embroidery, plastic canvas is a lovely option to finish cute projects quickly. Some popular plastic canvas crafts include coasters, ornaments, tissue box covers, and even small purses or sunglasses cases.
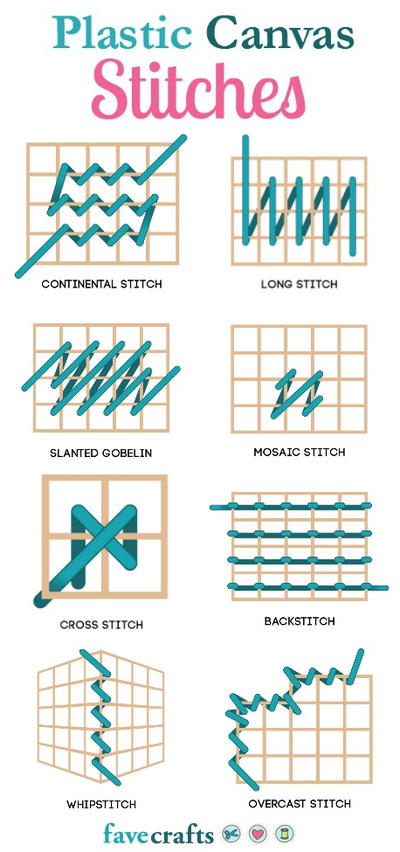
Before you begin making plastic canvas crafts, you must first learn the basic stitches! Using our plastic canvas stitches guide, master these beginner stitches and you will be equipped to complete almost any plastic canvas project.
Bonus! Want to print these plastic canvas stitches to have them handy? Download the Plastic Canvas Stitches PDF.
Table of Contents
Continental Stitch
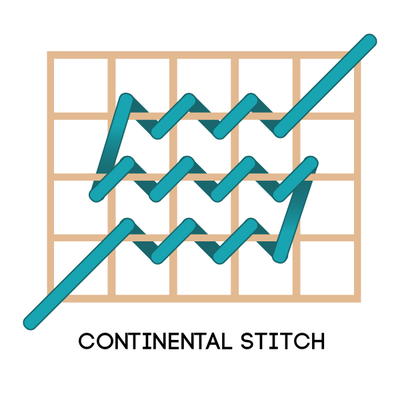
The continental stitch (or half cross stitch) is the stitch you should begin with. It looks like half a cross stitch and is the foundation for many other stitches you'll do in your plastic canvas projects! Depending on what you're more comfortable with, you can begin moving left to right, or right to left. Unlike in crochet projects, you won't turn your work: simply continue the next row in the opposite direct that you started with.
How to do it: If you begin left to right, bring your yarn up through the bottom left corner and insert the needle into the box diagonal (kitty-corner) to the upper right. Bring the yarn back through the box below, and insert it in the next upper-righthand box. Continue to the end of the row.
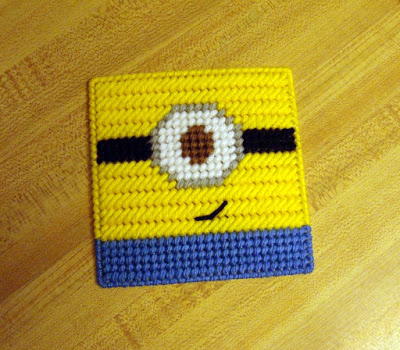
Projects Featuring the Continental Stitch:
Allison Murray from Dream a Little Bigger has an EXCELLENT article on the continental stitch. Her step-by-step photos and thorough tutorial are fantastic for beginners. She begins her article by saying, "Stitching plastic canvas is fun, it’s easy and it’s inexpensive." She makes a great point!
Long Stitch
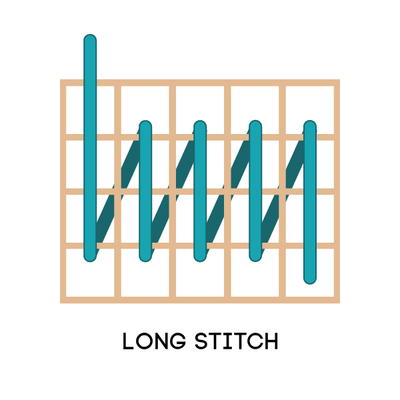
The long stitch uses the same basic principle as the continental stitch, but it spans three boxes instead of just two. Looking at the photo, you can also decide if you want your long stitch to be slanted like the continental stitch, or straight up and down on the front of your project. In fact, you might also see this stitch written as the gobelin stitch or slanted gobelin.
Slanted Gobelin
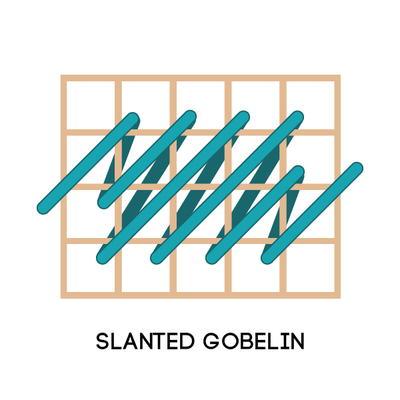
Here is an example of what the slanted long stitch, or slanted gobelin, looks like. You can situate these longer stitches next to shorter ones like the continental stitch for a unique look. In fact, by situating short and long stitches just so, you can create little boxes that form the mosaic stitch!
Projects Featuring the Long Stitch or Gobelin Stitch:
When you've finished practicing beginner stitches, check out our most popular collection of plastic canvas crafts to try your hand at a finished project! Get the tutorials:29 Free Patterns for Plastic Canvas
Mosaic Stitch
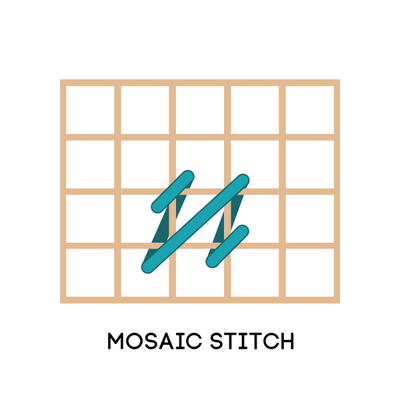
The mosaic stitch is gorgeous for making squares. By pairing the continental stitch with the slanted gobelin (or slanted long stitch), you create little boxes that are great for adding texture to the canvas. This is particularly great for colorwork as well. Alternate colors in your boxes for a lovely checkerboard design, as shown in this sampler video from Mary Maxim (about a minute and a half in).
Projects Featuring the Mosaic Stitch:
Cross Stitch
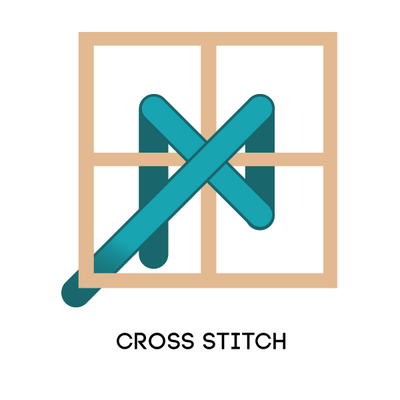
Cross stitch is a term most people are familiar with! It is the natural conclusion of the continental stitch, where you go back and cross over that first diagonal. The back of the cross stitch tends to look messy, but the front is lovely.
Projects featuring the Cross Stitch:
Backstitch
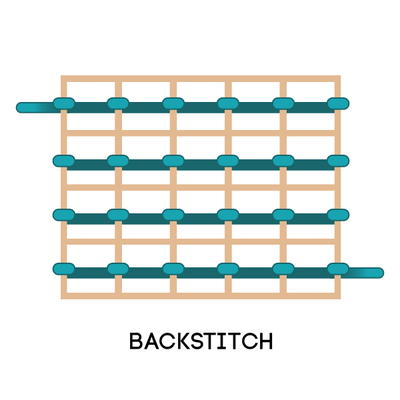
If you are a sewist, you know about the back stitch. This stitch is lovely for borders. It's ideal to use a particularly thick yarn for stitching as it doesn't cover quite as much space as the other stitches. Otherwise the plastic canvas will show through without the aid of the slanting stitches which will ultimately cover the entire grid. It does offer you a great deal of freedom as you can work stitches in any direction.
Whipstitch
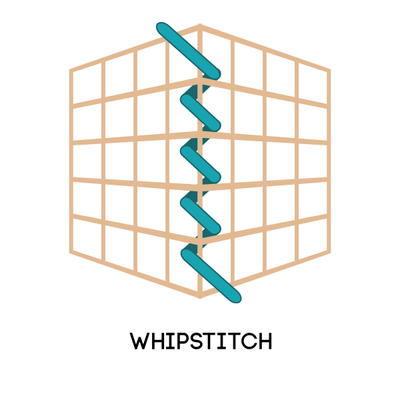
The whipstitch is used for joining two sheets of plastic canvas together, much like joining granny squares in crochet. This is an ideal stitch for making tissue box covers, clutches, and other plastic canvas projects that are 3-dimensional.
Projects Featuring the Whipstitch:
Speaking of these gorgeous 3D projects, explore our complete collection of
Overcast Stitch
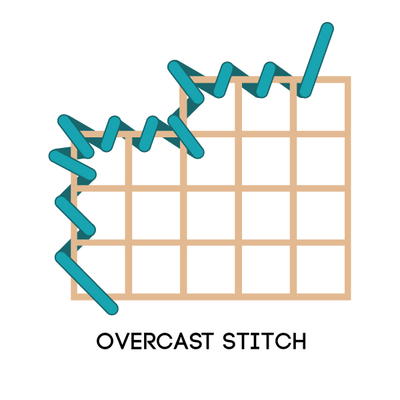
The overcast stitch is used for neatly finishing plastic canvas projects. Much in the same way painters paint the edges of a canvas, so too does using the overcast stitch make a project look finished. Simply follow the edge of the plastic canvas with your needle and yarn in a continental fashion, and you will polish off your project.
Projects Featuring the Overcast Stitch: Most projects feature the overcast stitch to cleanly cover the edges, but below are a few that we think showcase this stitch particularly beautifully.
More Plastic Canvas Stitches
There are several more plastic canvas stitches out there, though this guide covers the basics. If you didn't find what you were looking for in our beginner guide above, or you'd just like to see videos demonstrating these stitches, our friends at Annie's have a gorgeous collection of videos showcasing over twenty plastic canvas stitches.
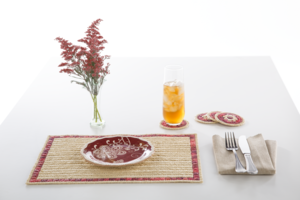
Speaking of videos, if you're a visual learner, watch our video for the Spice Islands Placemat Plastic Canvas Pattern.
Reader Advice for Beginners

Our readers have such excellent advice for beginners, we couldn't help sharing it! Check out these beginner tips below.
Karen McFee: "From my experience when I started, always buy a few extra pieces of canvas. It stinks to get so far into your project, then to realize you snipped to much or in the wrong direction and have to go to the store again. If you don't use it now, you can in other projects and it's so inexpensive, it's not a big loss. Also, have a hot glue gun, sometimes you can repair an area-depending on where it is- with a few dabs of glue instead of starting all over again."
Lola Sillito: "I've been doing plastic canvas for 40 years and my advice that I give to my kids and grandkids is start with something small and very simple. And one type of stitch at a time."
Dana Crowe Long: "Permanent markers and rubbing alcohol will be your best friends! Trace the design before you cut it."
Rhea Hinshaw: "Make sure to have a small enough needle for the yarn. If it's too big it will vreak the plastic."
Kathy Miller: "As with any craft, watch a video or read how to do plastic canvas so it looks neat."
Twila Snyder: "Start simple and small."
Sasha Derek: "Begin to think in 3D. :)"
Cherilyn Wood: "Have fun above all else."
Plastic Canvas Stitches Infographic
Have you ever tried plastic canvas crafts? Which are your favorite to make?
Read Next29 Free Patterns for Plastic Canvas

