Half Star Quilt Block Purse
Use half a star quilt block to adorn the flap of a black sateen purse. You will create the entire quilted purse with these step-by-step instructions featuring many helpful diagrams. You can also embellish with metallic threads or beading.

Materials:
- 1/3 yard black cotton sateen
- 1/3 yard lining fabric
- 1/3 yard heavy weight flannel or thin batting
- 1 yard cording or chain
- Hand dye scraps for block
- Black Velcro dot
Prepare Materials
- Cut 14” by 12” rectangle out of black cotton sateen.
- Cut 19” by 14” rectangle out of flannel or batting.
- Cut 6” by 5” rectangle out of lining fabric for pocket.
- Cut 17” by 10 ½”, 9 ½” trapezoid out of lining fabric.
- Cut 5” by 1” strip out of black sateen for tabs to attach cord handle.
Assemble Handbag
Bag
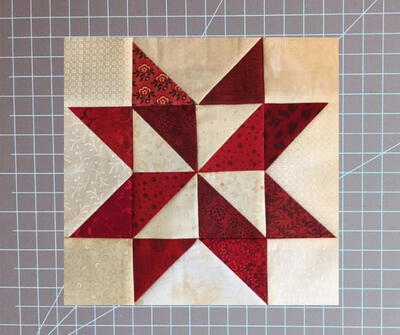
- Make half of a 9” finished block using the chosen block pattern. Suitable block patterns will have a seam in the block center like a 4 patch block or the lone star block. Use the hand dyed scraps to make the block, using the black sateen as the background. The unfinished half block should measure 9 ½” by 5”.
- Center the half block on the 12” side of the black rectangle. The black is cut bigger than needed to allow for shrinkage and distortion when the piece is quilted. Join the half block to the black rectangle using a ¼” seam. Press the seam to the rectangle. See figure 1.

- Lay the half block piece over the flannel or batting and quilt as desired. No backing fabric is required. Metallic thread, couching and beading can be added.
- Trim the quilted piece to 17” by 10 ½, 9 ½”. See figure 2.

- Some blocks look better with the corners of the hand bag flap trimmed. Draw a diagonal sewing line at both corners on the back of the quilted piece. See figure 3.

- With right sides together, fold up the 10 ½” edge of the quilted piece so the edge is ½” down from the seam attaching the half block or 5 ¼” from the top edge. Stitch the side seams securing the top edge with backstitches. See figure 3.
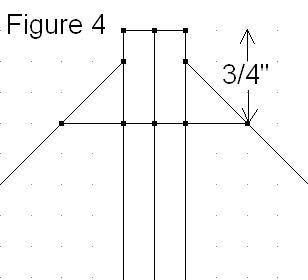
- Box the corners by folding each corner flat and stitching 3/4” away from the point. Trim off the corners leaving ¼”. See figure 4.

Lining
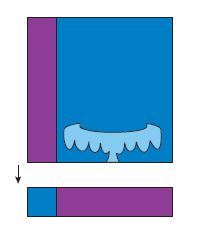
- Make a 1” hem on the long 6” side of the pocket. Press in ½” on the remaining 3 sides of the pocket. Pin the pocket to the lining with the hemmed edge 6 ½” down from the lining top and centering on the lining width. See figure 5. Sew the pocket to the lining by stitching around the 3 pressed edges of the pocket.
- Repeat steps 6 and 7 under Bag above with the lining piece.
Tabs
- Press in ¼” on both edges of the 5” by 1” black strip. Press the strip in half and stitch close to the fold. Cut the long strip in half. Fold both strips in half and baste the raw ends together to make two loops.
- Pin the two loops to the right side of the black quilted piece at the side seams, matching the raw edges.
Bag Assembly
- Pin the quilted piece and the lining together, right sides together, matching side seams and all raw edges.
- Stitch the bag and lining together leaving a 4” gap unstitched in the front of the bag for turning. If the corners are to be trimmed then sew on the marked diagonal sewing line.
- Grade seam allowances by trimming back the batting or flannel to the stitching line. Trim outside corners, and clip inside corners.
- Turn bag right side out. Use a pin or seam ripper to get the corners sharp. Press the seam flat rolling the lining to the inside. Glue or pin the lining and bag together at the gap. Top stitch close to the edge.
- Thread the cording through the loops and tie or sew the ends to secure. Handle can be tucked inside for a clutch.
- Hand stitch the one side of the Velcro dot to the lining of the bag flap. Sew the corresponding side of the Velcro dot to the bag front.
Find more craft ideas at www.ctpubblog.com.
Read NextMini Barn Star Quilt
Your Recently Viewed Projects
Report Inappropriate Comment
Are you sure you would like to report this comment? It will be flagged for our moderators to take action.
Thank you for taking the time to improve the content on our site.

