Millennium Cityscapes Attic Windows Quilt
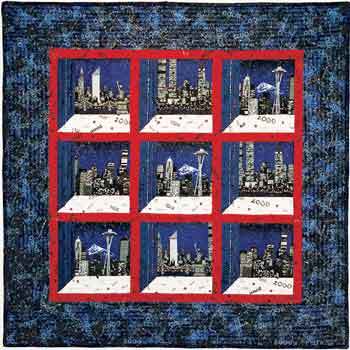
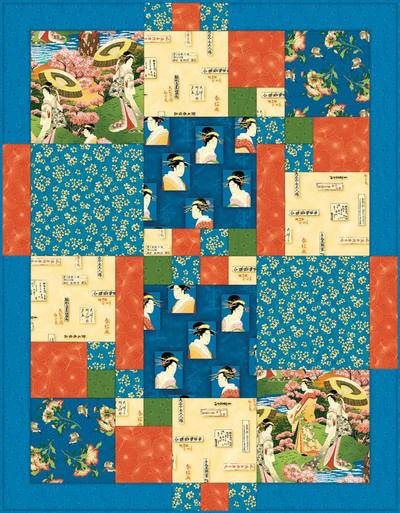
This red, white, and blue attic windows quilt pattern from Sulky of America showcases a Millennium fabric collection, though any scenic print could be the focus. This attic windows quilt pattern is quick to make with half-square triangles instead of mitered seams.

Finished Size:
Approximately 37" x 37"
Materials:
- 1/2 yd. large-scale or scenic print fabric (Building Motif Millennium fabric) -- if fussy-cutting, see below, you may need more to get the motifs desired
- 3/8 yd. red fabric (2000 Millennium print fabric, red)
- 1/4 yd. white fabric (2000 Millennium print fabric, white)
- 1/4 yd. blue fabric (2000 Millennium print fabric, blue)
- 3/4 yd. glitter-finished blue fabric for border (2000 Millennium print fabric, sparkling blue)
- 3/8 yd. glitter-finished blue fabric for binding (Millennium print fabric, sparkling blue)
- 1-1/4 yds. backing fabric
- 1/4 yd. fabric for hanging sleeve
- 42" square batting
- 2" Finished Triangle Papers (enough for 9 half-square triangles)
- sewing machine
- sewing thread
- scissors
- rotary cutter, cutting mat, and ruler
- painter's masking tape
- safety pins
- Sulky KK2000 temporary spray adhesive
- Sulky Smoke invisible thread
- Sulky Silver, colors #8014, #8001, #8016
- Sulky Solvy wash-away stabilizer
- permanent marker
- Q-tip or cotton swab
Cutting:
- "Fussy Cut" nine 6-1/2" squares from Building Motif Millennium Fabric (Fussy Cut means to place the exact-size ruler over the exact area of the fabric you want to feature and cut out just that area.)
- Cut six 1-1/2" x 8-1/2" strips of Red 2000 Fabric
- Cut six 1-1/2" x 30" strips of Red 2000 Fabric
- Cut nine 2-1/2" x 6-1/2" strips of White 2000 Fabric
- Cut nine 2-1/2" x 6-1/2" strips of Blue 2000 Fabric
- Cut four 5-1/2" x 38" strips of Sparkling Blue 2000 for Border
- Cut four 2-1/2" x 38" strips of Sparkling Blue for Binding
- Use 2" Finished Triangle Paper and the White and Blue 2000 Fabric to make the Half-Square Triangles which are used to make the angles in the blocks.
Steps:
Use a 1/4" seam allowance throughout.
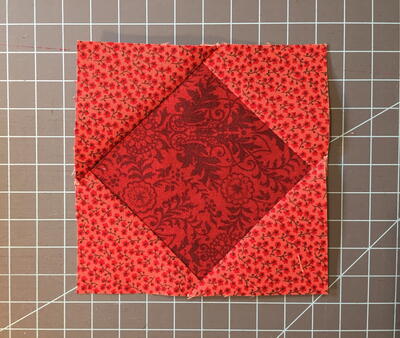
- Add a 2-1/2" x 6-1/2" strip of white fabric to the 6-1/2" square of the Building Print (Illustration "A"). Press.
- Add a half-square triangle to the end of the 2-1/2" x 6-1/2" blue fabric strip. Press. Join both units together to make an 8-1/2" square block (Illustration "A"). Press.
- Create 9 of these blocks. Make 1 more for a pillow, if desired. Arrange the building prints in the order in which you want them to appear in the quilt.
- Determine your three vertical center blocks and add a 1-1/2" x 8-1/2" red fabric strip to each vertical side of all three blocks (Illustration "B"). Press.
- Attach one block to either side of the 3 vertical center blocks (Illustration "C"), being mindful of the placement you determined in #3. Press.
- Add a 1-1/2" red sashing strip to the top and bottom of the horizontal center row of blocks (Illustration "C"). Then, attach the top and bottom rows of blocks to this red sashing strip. Press.
- Add a 1-1/2" red sashing strip to both sides of the 9-block unit, then to the top and bottom of the unit.
- Add Border Fabric, applying straight-cut corners (Illustration "D").
- Prepare for quilting: Use painter's masking tape to tape the backing fabric (right side down) to a table top or a hard surfaced floor. Keep it taut and smooth without stretching it. Spray half of it with KK 2000. Fold the batting in half and lay it over the sprayed half of the backing fabric. Smooth. Spray the other half of the backing fabric, then smooth out remaining half of the batting. Spray the wrong side of the pressed quilt top and smooth over batting. When using KK 2000, use only half as many pins as you normally would.
- Stitch in the ditch around each block and the sashing strips using Sulky Smoke Invisible Thread. (The ditch is the seam line between pieces, blocks, sashings and borders.)
- Quilt each block by stitching three parallel rows 1/2" apart on the white and blue accent strips using Sulky Sliver starting with color #8014, followed by #8001, and then #8016.
- Enlarge the quilting template to the right, trace the design with a permanent-ink marker onto Sulky Solvy. Spray KK 2000 onto the quilt border area and strategically place the stars where you want them to fall. (Ellen overlapped some of the large stars onto the red sashing area.) To remove the Solvy without submerging the quilt in water, run a wet Q-Tip along the stitching line and the Solvy will pull away easily.
- Add the Hanging Sleeve.
- Add the Binding.


Read NextPatchwork Scrunchie Pattern

