Pretty Pretty Princess Quilt
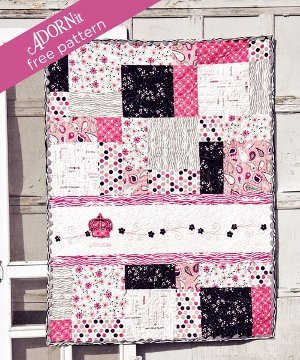
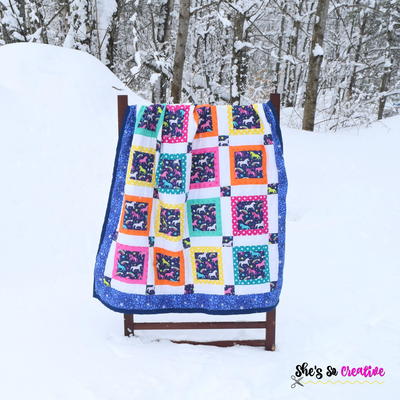
Girls of all ages will love this Pretty Pretty Princess Quilt. Made with the Princess Fabric Collection from ADORNit, this beginner quilt pattern is easy and fun to make, and makes a great gift for little princesses of all ages. The layout of this quilt is a simple disappearing 9 patch quilt pattern and is a great project for those who are looking for something easy and fun to sew this weekend.

Materials:
- 1/3 yard Pretty Flowers #00308
- 1/3 yard Pretty Paisley Pink #00313
- 1/3 yard Princess Word Play #00311
- 1/3 yard Princess Crowns #00312
- 1/3 yard Daisy Scatter Black #00307
- 1/3 yard Vintage Polka Dot Princess #00310
- 1/3 yard Zebra Print Gray #00315
- ¼ yard Zebra Print Hot Pink #00316
- ½ yard Zebra Print Black #00314 for binding
- 5/8 yard Tiny Dot Hot Pink #00264
- 8 yards Gray Jumbo Rick Rac
- Hot Pink thread or floss
- Black thread or floss
- Batting
- Tiny Daisy and Princess Crown Templates
- Quilt Layout
Instructions:
Finished size about 48 x 65 inches.
-
Cut 27 blocks 12" x 12" from Pretty Flowers, Pretty Paisley Pink, Princess Word Play, Princess Crowns, Daisy Scatter Black, Vintage Polka Dot Princess, and Zebra Print Gray.
-
Cut two strips 10” x WOF from Tiny Dot Hot Pink.
-
Cut three strips 3” x WOF from Zebra Print Hot Pink.
-
Using Tiny Daisy template cut ten flowers from Daisy Scatter Black fabric.
-
Using Princess Crown template cut one from Princess Crown fabric.
-
Gather your 12" x 12" squares. Create three Nine Patch blocks, arranging squares in any order. Once it is to your liking, begin by sewing three blocks together in a row, then sew three rows together. Press seams in adjoining rows in opposite directions.
-
Repeat creating three Nine Patch Blocks. Press.
-
Using a ruler cut each block in half vertically and then again horizontally. Make sure each block is square. You should now have 12 blocks.
-
Arrange blocks in a jumbled fashion sewing together three rows for the front of the quilt. You can use the remaining three for the quilt backing.
-
Sew together two rows for top section of quilt.
-
Create Zebra Print Hot Pink borders by cutting one 3" x WOF strip in half. Sew each half strip to remaining 3" x WOF strips creating two long zebra borders. Measure width of Nine Patch Blocks and trim to that size.
-
Sew together 10" x WOF strips from Tiny Dot Hot Pink. Measure width of Nine Patch Blocks and trim to that size.
-
Sew one zebra border to the top of Tiny Dot Hot Pink and one to the bottom.
-
Begin by machine or hand embroidering princess swirls the entire width (leaving room for the crown after first swirl) of the border using pink thread or floss.
-
Position pink crown onto the border and embroider the crown outline using black thread or embroidery floss.
-
Add tiny black flowers along the swirls, see photo for placement.
-
Embroider flower outline and flower center using pink thread or floss.
-
Finish by embroidering “princess” in pink thread or floss underneath the crown.
-
Sew Embroidered section onto the bottom section of Disappearing Nine Patch Blocks.
-
Add third row of Disappearing Nine Patch Blocks onto the bottom. This finishes the quilt top.
-
Layer with batting and backing. Machine Quilt
- Add binding using Zebra Print Black Fabric and Gray Jumbo Rick Rack.
Read NextMini Barn Star Quilt

