This project was submitted by one of our readers, just like you.
3D Picture Layout
Learn a new way to make your pictures stand out
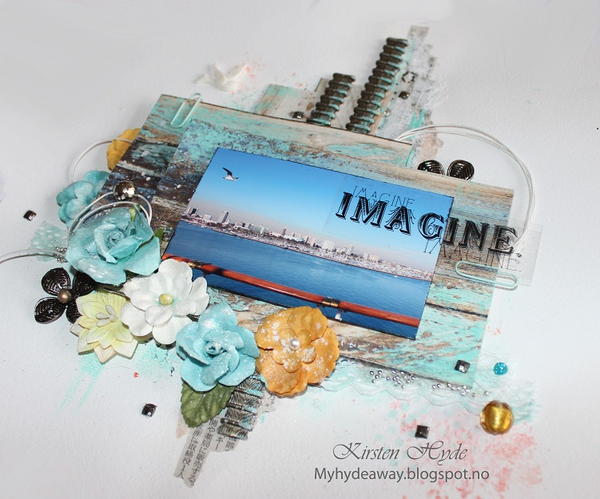
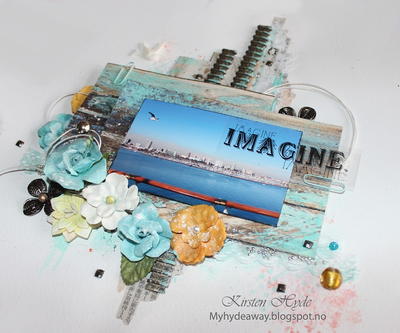
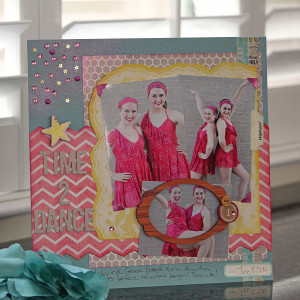
In the Designer's Words: "There are different types of layouts. Some you can keep in an album, and those have to be quite flat. This layout is layered, and is about 1 inch in depth. These kind of layouts, look fantastic as a decoration on the wall, in a 3D frame or mounted on a canvas. You can use 3D foam squares to create the depth between the layers. This layout was created with Therm-o-webs foam squares. Time to create: 1-2 hours."
Here is a new way to display your photos! This 3D decoration will really make your picture stand out and give your room or photo album a rustic touch. The 3D Picture Layout is a summer theme, but you can make one for all seasons and occasions to match your photo. It would be a perfect gift for a friend or make one designed for a wedding. Give your photos an artsy layout with this new design.
Estimated CostUnder $10
Time to CompleteIn an evening
Primary TechniqueScrapbooking
Project or Page Size12 inches x 12 inches
Type of Paper UsedScrapbook Paper

Materials List
- White Bazzill
- Patterned paper (Prima - French Riviera)
- 3D Foam Squares (Thermoweb)
- Flowers (Prima)
- Mists
- Cotton thread
- Brads
- Bling
- Word Sticker (Kaisercraft)
- Glue (Liquitex heavy gel medium)
- Ribbon with metal (from an old sewing machine)
Instructions
-
Add mists and spray to a white 12x12 Bazzill
-
Glue small stripes of torn paper onto the bazzill. You can use several kinds of glue: for instance - Finnabair's gesso or gel medium.
-
Add the squares of patterned paper with 3D foam squares in between all the layers. This creates the 3D effect.
-
Add flowers, string and words. The word here is a sticker from Kaisercraft. You can also use wooden words or words cut out with a dies. Kaisercraft and Sissix have got a lot of different words as dies.


