Knee High Bunnies
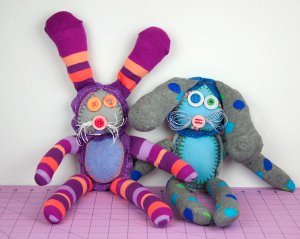
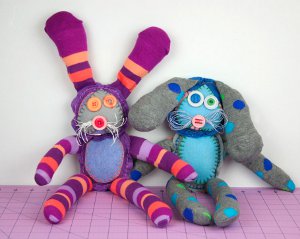
These adorable Knee High Bunnies from Fiskars are made with colorful knee high socks. They're great for tossing in an Easter basket or making for a new baby gift. These sock crafts are perfect for any level of sewist, and are embellished with felt and buttons.
Materials:
- Mixed Shapes and Borders Shape Template (8 1/2" x 11") from Fiskars
- Circle Shape Template (8 1/2" x 11") from Fiskars
- Ovals Shape Template (8 1/2" x 11") from Fiskars
- Knee-High Socks
- Buttons
- White Twine
- Embroidery Floss
- Needle
- Craft Felt
- Polyfil Stuffing
Instructions:
-
With spring just around the corner, what little one wouldn’t squeal with delight upon receiving one of these adorable bunny softies? They will make for the perfect addition to any Easter basket, alongside those candy-filled eggs. Let me show you how you can make your very own with in just a few hours time.
-
The supplies you will need to complete one bunny are: one pair knee-high socks, craft felt sheets in coordinating colors, buttons, white twine, embroidery floss, embroidery needle, pins, Shape Templates – Mixed Shapes and Mixed Borders, Shape Templates – Super Sized Circles, Shape Templates – Super Sized Ovals, sharp scissors, pencil or marker and a sewing machine (optional).
-
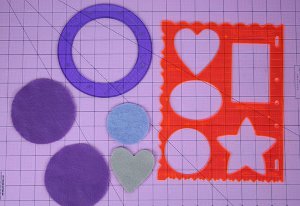
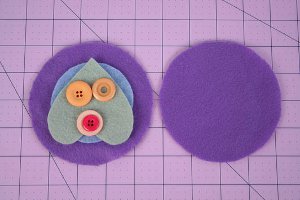
For the face pieces, trace and cut two circles onto one color of felt using the inside of the smallest circle from the Shape Templates – Super Sized Circle package. You also need to trace and cut a heart and a circle from a contrasting, but coordinating color of felt.
-
Arrange face pieces as shown and choose which color buttons and embroidery floss will best coordinating with your socks and felt choices.
-
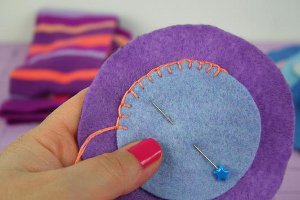
To create the face detail, you will first center the smaller circle in the middle of one of the larger circles and pin. Then you will embellish around the outer edge of the small circle with a blanket stitch. Layer the heart, upside down, over the circle and embellish with a blanket stitch.
-
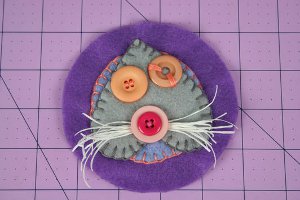
Add more detail by cutting several 3” lengths of white twine and stitching them on for the whiskers in addition to buttons for the eyes and a set of layered buttons for the nose.
-
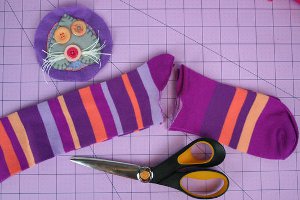
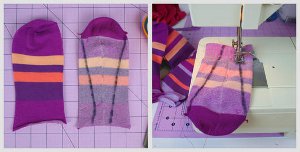
Lay your pair of socks on your work surface and cut off the bottom of the socks just below the heel. These pieces will become the bunny’s ears.
-
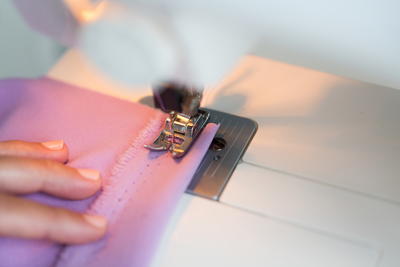
Turn each sock inside out and sew a seam by hand or with a machine start at the outer edge of each side of the toe seam and gradually tapering inward leaving a 1” width opening at the bottom. (see black marker lines in the photo as a guideline)Turn socks inside out and stuff with stuffing. Then sandwich the open seams in between the front embellished piece of the face and the plain back piece. Pin in place. Then blanket stitch ¼” in from the edge all the way around making sure to stuff the face with stuffing before stitching it completely closed.
-
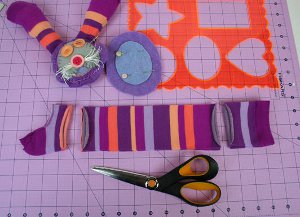
From the remaining sock pieces, cut off the fabric just below the band and just above the ankle. These pieces will become the bunny’s arms and legs. Turn the socks inside out and sew one straight line down the length of the sock slightly to the left of center, rounding the seam out toward the outside edge. Repeat again slightly to the right of center, rounding the seam out toward the right outside edge. Trim the pieces apart between the middle seams.Turn right side out and add desired amount of stuffing.For body, trace and cut two ovals from the smallest inside oval in the Shapes Template – Super Sized Ovals package. For the inside of the belly detail, trace and cut the oval from the Shapes Template – Mixed Shapes and Mixed Borders package. Add hand-stitched embellishing using a blanket stitch.
-
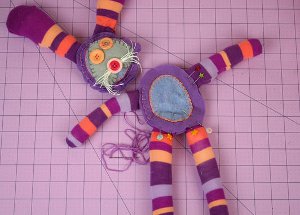
Sandwich arms and legs between the two belly pieces and add a blanket stitch, ¼” from the outside edge all the way around making sure to stitch the arms and legs in place as you go. Before closing the seam completely, add stuffing to the belly.
- This bunny can be easily adapted as a gift for the little gentlemen in your life by simply choosing knee-high socks in an appropriate color combination.
Read NextTwenty Minute Baby Blanket
squawkamole 466861 9
Mar 29, 2013
Very cute! I would think I could use any glass or cookie cuter for templates just depending on the size I would like to make. Right? :)
Nanamagic 9799797
Mar 10, 2013
Would like to have sizes of circles/ovals given for those of us who don't have the templates mentioned. also no directions given for how to attach head. But made it anyway just guessing at sizes and its adoeable!!
Report Inappropriate Comment
Are you sure you would like to report this comment? It will be flagged for our moderators to take action.
Thank you for taking the time to improve the content on our site.

