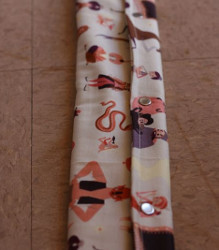
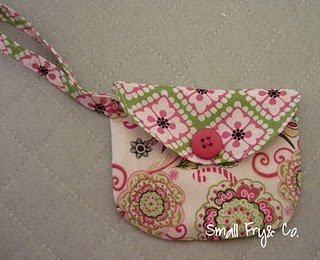
Loose Tooth Pouch
Celebrate your child's first lost tooth by whipping up a quick tooth fairy bag! The loose tooth pouch from Crafty Guides is the perfect place to put the missing tooth, and when your child wakes up, there will be a special surprise inside!

Materials:
- Felt
- Scissors
- Needle
- Embroidery thread
- Button
Instructions:

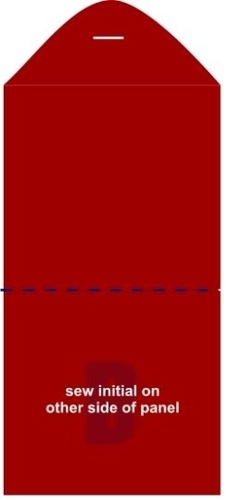
- Cut out a long (6-7") rectangular piece out of felt.
- On the top end, cut a triangular flap.
- Sew initial on opposite side of felt piece, before the next step.
- Cut a small slit on the center flap slightly smaller than the size of the button you will be using.
- Bring flap down to find the exact point for your button. Sew button on.
- Fold in half by bringing the bottom edge to the starting point of the flap.
- Sew around side openings and bottom edge.
Read NextStroller Handlebar Cover
Your Recently Viewed Projects
Thanks for your comment. Don't forget to share!
Report Inappropriate Comment
Are you sure you would like to report this comment? It will be flagged for our moderators to take action.
Thank you for taking the time to improve the content on our site.