Upcycled Fabric Cedar Sachets
Learn how to make sachets with essential oils and cedar. You'll fall in love with the scent!
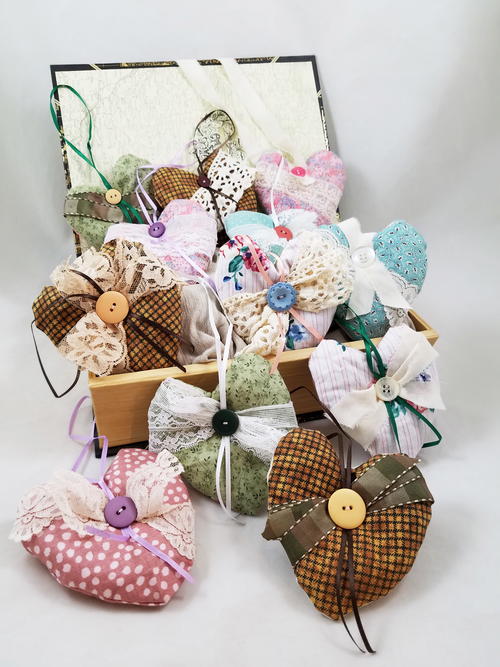
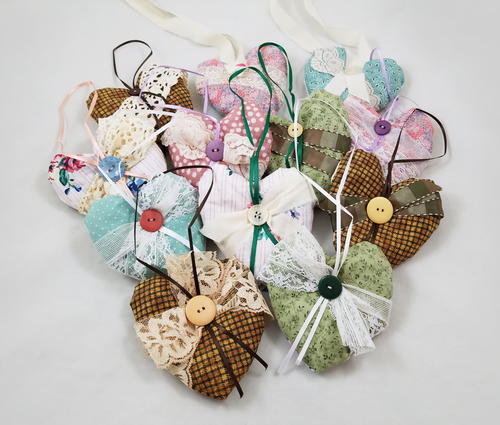
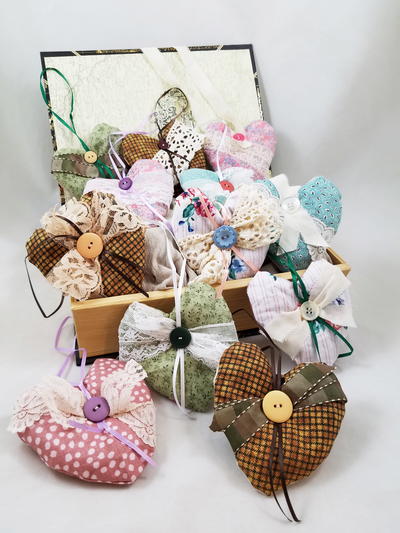
Make your own sachets using recycled materials and your favorite essential oil. By using recycled fabric from old clothing, spare buttons, and bits of lace, you'll be able to sew cedar sachets to put in your drawers for a lovely scent. These sachets make wonderful gifts around the holidays and smell so wonderful. Please note that some people and pets have allergies to plants and essential oils. Make sure no one in your household is allergic to the ingredients before using.
Materials List
- Fabric scraps
- Small pieces of lace and/or trim
- Small lengths of ribbon or thin strips of fabric such as linen or muslin
- Thread
- Sewing needle
- Buttons
- Fabric Scissors
- Cedar shavings (many pet shops and hardware stores have large bags available)
- Cedar essential oil
- Mixing bowl
- Sewing Machine *if not hand stitching
- Ruler
- Pencil
- Paper
- Craft scissors
Instructions
Since I was a child I was raised to save fabric. My childhood was full of stories from my grandmother, who lived through the Great Depression and my mother, who lived through WWII, on how they learned to be frugal and resourceful, saving things to turn into something new. Outgrow a shirt? Pants have too many holes? Curtains sun damaged? Fabric left over from making a dress? Save the fabric! The years have sped by, and in this modern world the ease and access to any number of arts and crafts supplies is astounding. However there is a want and even a need to reduce, reuse, or recycle long forgotten craft supplies.
One of my favorite upcycled crafts I was raised on making was fabric sachets. Both pretty and practical, these little bits of fabric, crafted into any number of shapes, stuffed with cedar, would decorate the house, protect our clothing from insects and remind us of loved ones present and past.
-
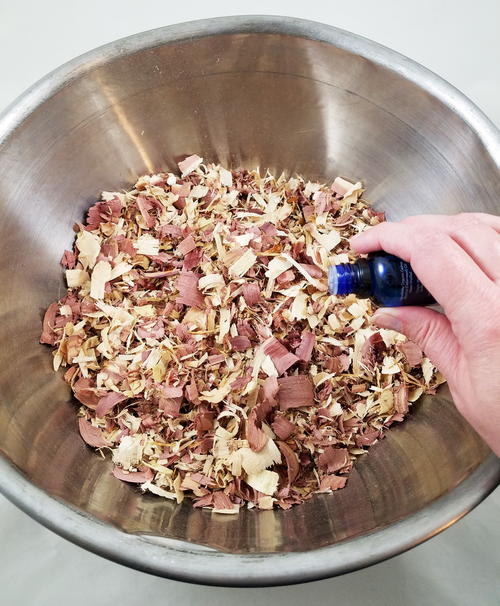
Pour the cedar shavings into the mixing bowl and remove any large chunks of wood or bark from the mix. Sprinkle lightly the cedar essential oil and stir the shavings. Repeat this about 4 times to make sure the shavings have an extra boost of cedar scent. Let the shavings sit and soak up the oil, which can take 5 to 10 hours.
-
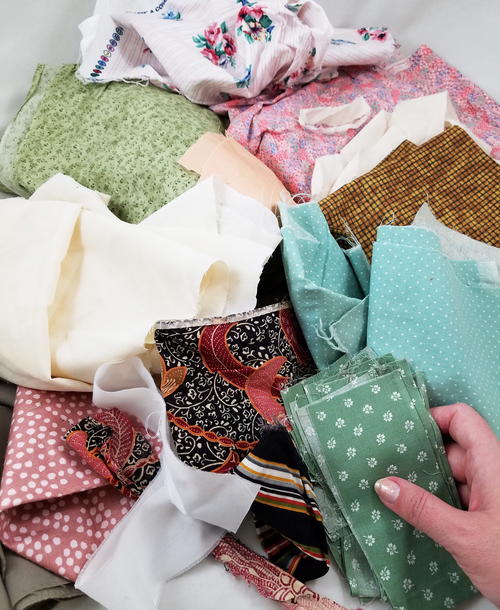
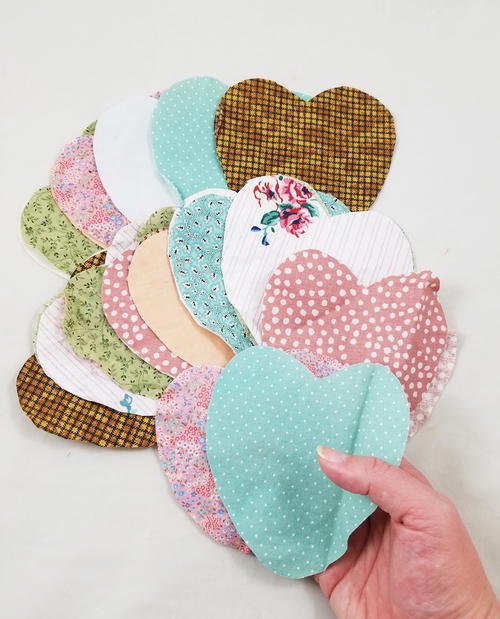
In this pile I have fabric scraps, remnants, old bed linen, swatches of clothing, table cloths and more. The only requirement for any fabric pieces to use in this project is that is to be lightweight and ideally cotton, hemp, linen, muslin or other plant fiber based materials. These will allow the scent of the cedar to release easier over time.
-
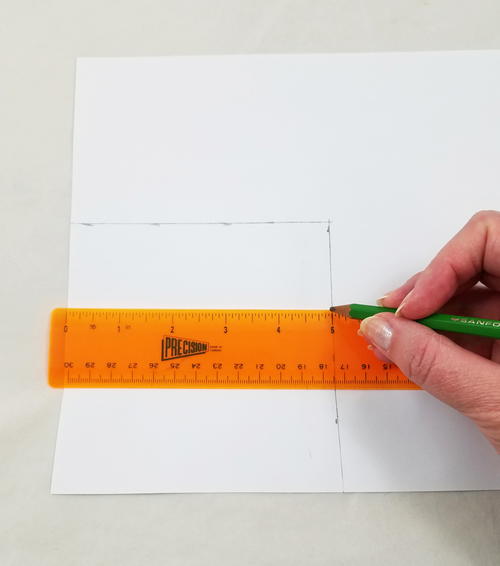
Using a ruler and pencil draw a 5 inch by 5 inch square. This is the starting size for the heart pattern.
-
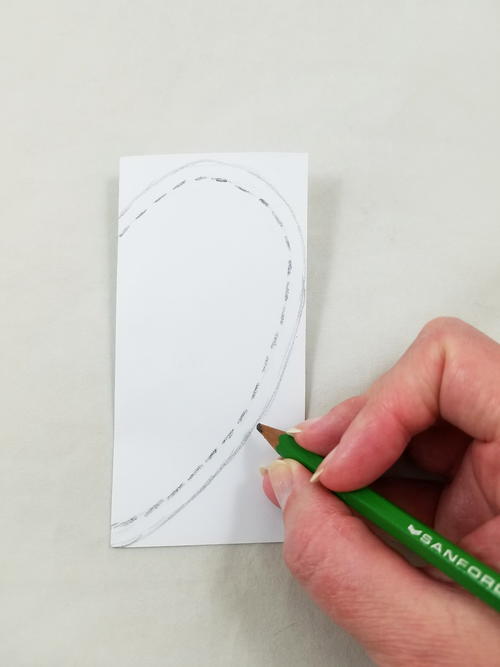
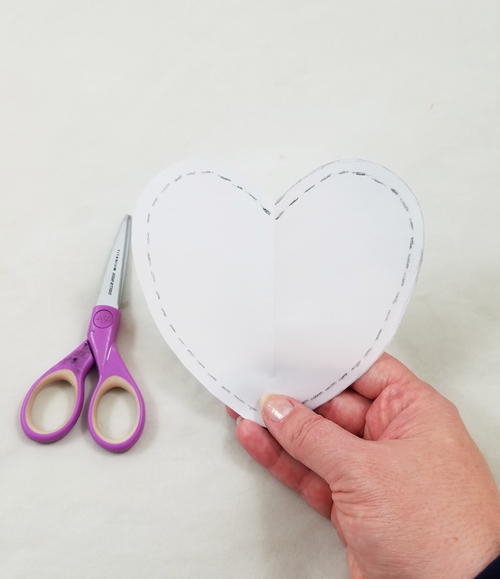
Cut out the 5inch square and fold in half. Staying just within the lines of the paper, draw half a heart. Then within that line draw a second dotted line, ¼” width. This will be the guide for a ¼” seam.
-
Cut out the paper heart and draw in the ¼” seam allowance dotted line on the second side.
-
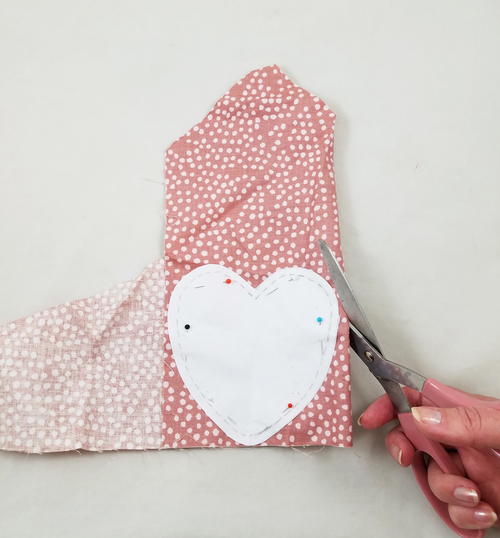
Use the pattern to cut out 2 fabric hearts for each sachet. If possible fold fabric and pin the pattern onto the fabric to cut two fabric hearts at a time if the remnants are large enough.
-
Do not worry if the fabric pieces are only wide enough to cut one heart out, you can always cut more of a contrasting or complementary fabric.
-
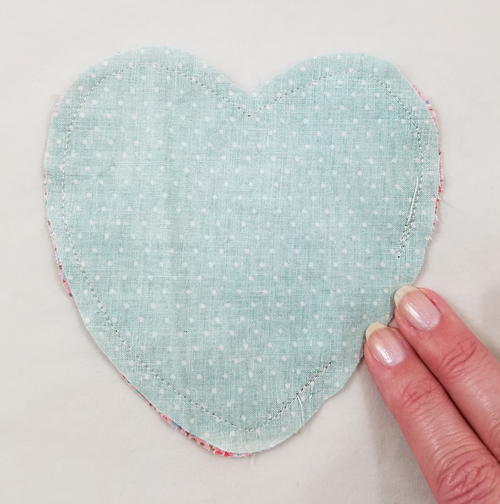
Place the right sides of the fabric hearts together and stitch around the heart with a ¼” seam. Make sure to do a reverse stitch when you start to sew and at the end, as it will strengthen the stitch and prevent it from unraveling when turning rightside out and stuffing the fabric heart. Make sure to leave a portion unstitched, making an opening to turn the fabric heart rightside out.
-
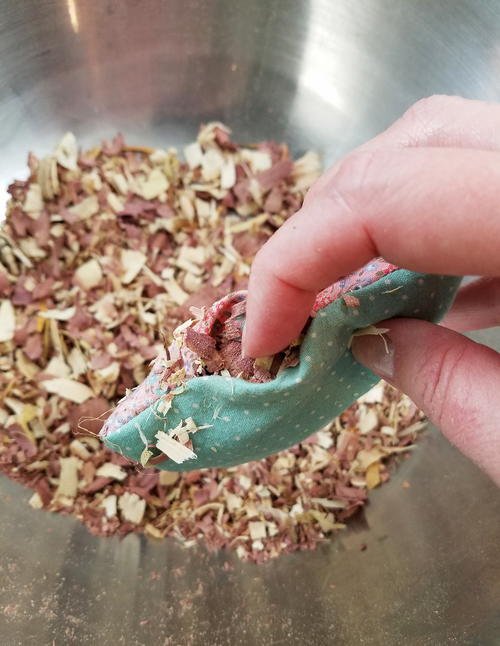
Snip any corners of fabric that might pull or tuck when turned rightside out, such as the dip in the heart or the point of the heart. Turn rightside out and use the eraser end of a pencil to push the heart into shape. Stuff each heart with cedar shavings.
-
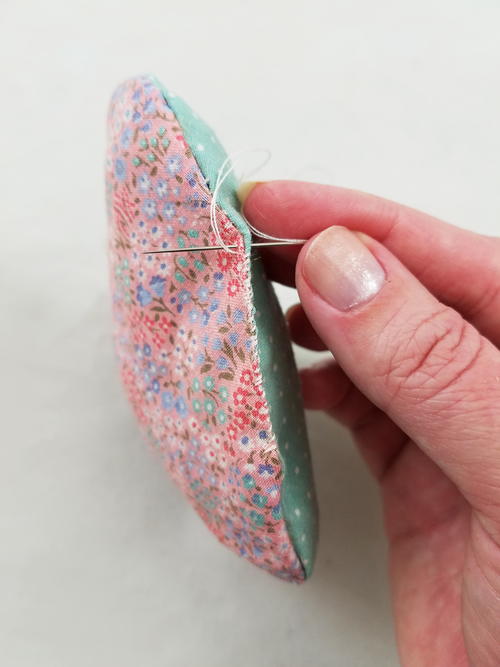
I used an Overcast Stitch to sew up the open part of the heart, as any lace or trim later will cover up the stitches. If you do not want to add lace or trim later, use a Slip Stitch to sew shut the heart.
-
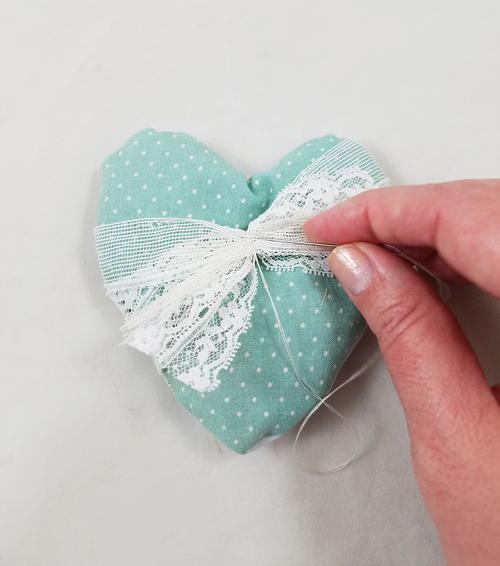
Using a small piece of lace or fabric create a sash that goes around both sides of the heart, making sure to cover the stitch that closed the heart. Gather and stitch together the sash, in the front of the heart. If you do not want a gathered front sash you can always stitch closed the sash on the back of the fabric heart.
-
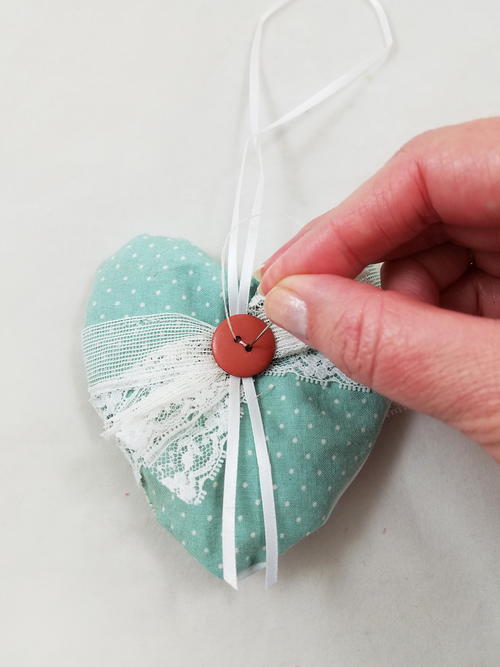
Loop a piece of ribbon and stitch the ribbon and a button through the sash and the fabric heart to create a secure hanger for the sachet. Hang your newly created sachet on doorknobs, hangers, coat racks or in boxes or dressers.
-
Different lace and trim placements make each sachet a unique piece. Try making sachets in different shapes, sizes and fabrics. Not a fan of cedar? Switch out the cedar for dried rose petals, rosemary or lavender!
Find more projects by Tracy at artrez.com.
Why You'll Love This Trash to Treasure Craft
At our arts & crafts website, we are big fans of upcycling and finding creative ways to breathe new life into old materials. That's why we are so excited to share with you the top 5 reasons to make our Upcycled Fabric Cedar Sachets craft project!
1. Eco-Friendly: By upcycling old fabric scraps, you are diverting waste from landfills and reducing your environmental impact. This project is a great way to practice sustainability and contribute to a greener planet.
2. Decorative & Functional: These cedar sachets not only look beautiful but also serve a practical purpose. The cedar will help keep your clothes smelling fresh and repel moths, making them perfect for placing in your closet or drawers.
3. Customizable: With endless possibilities for fabric choices, shapes, and embellishments, you can truly make these sachets your own. Get creative with different patterns and textures to match your personal style or give them as thoughtful handmade gifts.
4. Budget-Friendly: This project is a great way to use up scrap fabric you may already have on hand, saving you money on materials. Plus, cedar chips are relatively inexpensive and easy to find at most craft or hardware stores.
5. Relaxing & Therapeutic: Crafting can be a therapeutic and relaxing activity, and this project is no exception. Take some time for yourself to unwind, get creative, and enjoy the process of making something beautiful and useful.
So grab your fabric scraps, cedar chips, and crafting supplies, and get ready to create your own Upcycled Fabric Cedar Sachets! Happy crafting!
What is your favorite essential oil scent?
Read NextAunt Betty's Strip Pieced Potholder
Your Recently Viewed Projects
flowergirl
May 04, 2018
Ditch your can of room air freshener and bust out your stash of fabric scraps for this project. It's super thrifty, safe for the environment and pretty. You can make several of them and hand them out to your friends or neighbours as gifts. They are wonderful as bathroom fresheners too.
Report Inappropriate Comment
Are you sure you would like to report this comment? It will be flagged for our moderators to take action.
Thank you for taking the time to improve the content on our site.

