Your Favorite T-Shirt Tote
Old t-shirt crafts can help you clean out your closet and get creative at the same time. Use an old, ill-fitting top as inspiration for your next project. Your Favorite T-Shirt Tote can hold all of the essentials without weighing you down. Also, you don't have to spend a fortune on supplies or materials. Use what you can and create a keepsake that will last forever.
Materials:
- T-shirt
- Ruler
- Scissors
- 1/3-yard medium-weight fusible interfacing
- Iron
- 1/3-yard cotton fabric
- 12-inch (or longer) zipper
- Straight pins
- Sewing machine
Instructions:
- Cut one 12-inch square from the front of your t-shirt and one 12-inch square from the back. The graphics on the front of my shirt were spaced farther than 12 inches apart, so I cut and pieced until I had what I wanted within the measurement. I made identical cuts and seams for the back, but one solid 12-inch square would have worked fine. Open the seams and iron flat.
- Cut two 12-inch squares from medium-weight fusible interfacing. Iron the interfacing squares to the back of the t-shirt squares. Note: Use a pressing cloth over the graphics to avoid melting them.
- Cut two 12-inch squares from coordinating cotton fabric for the lining. Cut one 1 1/2-inch-wide by 8-inch long strip for the handle loop.
- Place a fabric lining square on your work table with the front facing up. Place the zipper on one edge of the square with the front of the zipper facing up.
- Place one t-shirt square on top of the lining with the wrong side facing up. Note: The zipper is the top of the pouch. Adjust the t-shirt square so that the graphics are not stitched upside down. Pin the edge with the zipper sandwiched in between the squares. Sew along the pinned edge using a zipper foot.
- Turn the stitched squares right side out and iron, pressing the seam along the zipper edge.
- Lay the remaining lining square on your work table with the front facing up. Place the unstitched zipper edge on one edge of the square with the front of the zipper facing up.
- Place the remaining t-shirt square on top of the lining with the wrong side facing up. Pin the edge with the zipper sandwiched in between the squares. Sew along the pinned edge using a zipper foot.
- Turn right side out and iron. Unzip the zipper.
- Fold the handle loop strip in half with the wrong sides facing and the long edges matching. Iron the fold to crease. Open the strip. Fold the long edges to the crease line and press. Fold the pressed strip in half again with the long edges matching. Pin the long edges. Sew along the pinned edge to close the strip.
- Place the two lining squares together with the wrong sides facing out and pin the three edges that do not have the zipper attached. Do the same with the t-shirt squares. Fold the handle loop in half with the short ends together. Insert the loop between the t-shirt squares with the short ends extending outward 1/2 inch. Slide the ends to just below the zipper and pin. Sew around the entire pouch on all the pinned edges. Leave a 3-inch opening in the center of the bottom lining squares. Note: The zipper can be stitched on either side of the pouch.
- Turn the pouch right side out through the opening in the lining. Sew the opening in the lining closed. Tuck the lining inside the t-shirt portion of the pouch and iron.
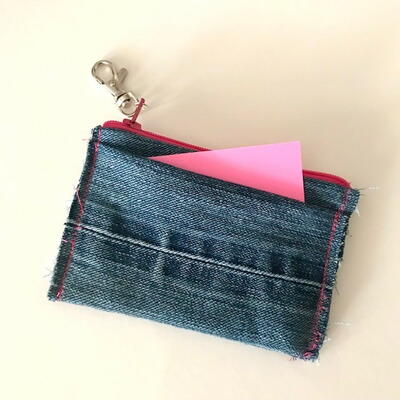
Read NextUpcycled Sewn Denim Mini Pouch
Your Recently Viewed Projects
Marilyn B
Jun 06, 2017
I real appreciate the wonderful,step,by step photos and instructions! The project is less daunting when you can see it all in place. I would consider the use of this tote regarding the weight of the interfacing and lining material. If you are lugging books on it you may want a bit more reinforcement. This idea would be a nice compliment to those t-shirt quilts saved from college and high school shirts. Thank you for the great idea and tutorial!
Report Inappropriate Comment
Are you sure you would like to report this comment? It will be flagged for our moderators to take action.
Thank you for taking the time to improve the content on our site.


