Scenting and Coloring Melt and Pour Soap Like a Pro
Using a melt and pour base for your soapmaking can save time and give you the best results possible whether you are making soap to use, gift, or sell! Read this soap making article from Maria Nerius.
Making soap from scratch takes time. You have to locate the ingredients, which isn’t easy for most of us and you also have to let the soap set for up to 6 weeks before you can even use it! However, using readily available melt and pour soap base lets you concentrate on the fun of soapmaking like mixing scent and adding color.
The easiest way to use melt and pour soap is to melt it in a microwave. Melt and pour soap is sold in blocks so you’ll need to chop up the soap into smaller bits and pieces. The finer you chop the soap base, the quicker it will melt when microwaved. Follow manufacturer recommendations, but in general using a 4 cup microwaveable measuring cup filled 3/4 full, you will microwave on medium for 1 minute, then in 15 second intervals until the soap has completely melted.
Never leave the “cooking” soap unattended and never allow the melting soap to boil or smoke. If the soap is boiling or smoking, you’ve melted it at too high a temperature. Microwaves vary so it’s important that you melt the soap on medium rather than high. If your soap base is boiling or smoking, remove from microwave using a pot holder and allow it to cool enough for a light skin to form at the top. Remove this skin before adding scent, color, or any other additive. This soap is useable, but may feel rubbery.
Once you have melted your soap, you can add scent and color. Use only cosmetically approved scents (like essential oils). Many do use unapproved scent and color like perfumes and crayons, but these kinds of ingredients can cause chemical reactions with the soap base like seizing (soap instantly sets up and you can’t pour into molds) or be too harsh for human skin. Also you need to be aware if anyone using the soap has allergies and avoid using any ingredients that might cause skin reactions.
A little goes a long way with scent. A few drops of an essential oil or soap scent is all you need. If using a commercial soap scent always follow the manufacturer’s measurements and instructions. To add scent you must first remove the thin skin of soap that has been created by the soap cooling. Add the scent drops and stir slowly, but thoroughly to mix the scent well. Vigorous stirring will cause air bubbles which you do not want in your soap so slow is best. Use a metal utensil to mix the scent. Wood utensils will cause air bubbles.
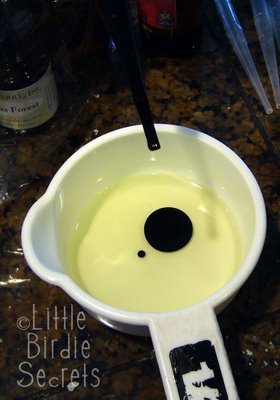
Once the scent is added it is time to add color to your soap. You can use all kinds of things to add color to soap. Adding coffee grounds not only adds an exfoliate to your soap, but also a pretty brown color. Spices are great to use to add color to soap. Paprika give a salmon hue, crushed basil adds a soft green with speckles of green, and a pinch of turmeric creates a muted yellow. There are commercial soap colorants available at crafts stores and online. Some are liquid while others solid in form. Some soapmakers do use scrapings of crayons to add color to soap. Add color a little at a time until you are happy with the hue. Solid colorants need to be melted into liquid form and added to the melted soap. Stir as you do with scent, slowly with a metal utensil.
These are the basics of successfully adding scent and color to melt and pour soap. Scent and color add so much to our handmade soaps and help us create unique and personal soaps for our home and for gifts. It’s good clean fun!
Here are some great soap recipes:
Read NextHow to Make Bath Bombs

