Magnetic Art Folio
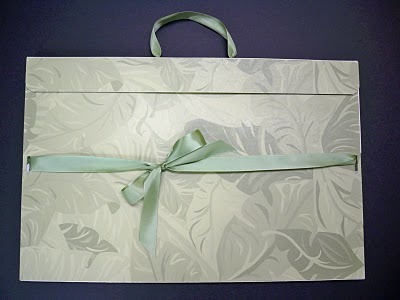
Use matboard and ribbon to create your own magnetic case for carrying artwork or important documents. Create the perfect size for your needs with this easy to follow tutorial by Eileen Hull.
Materials:
- a piece of matboard for your project (this is 18" x 27")
- scrap foamboard strips equal to length of sides and depth of fold
- ribbon
- magnet pieces
- craft knife
- metal straightedge
- tape gun
Instructions:
- Cut matboard to size of desired folio. Score to create bends where box will fold. Use craft knife to cut down about halfway through the matboard to make a clean score line. Make sure you score on the RIGHT side of the project.
- Fold box into folder shape.
- Measure and cut strips of foamboard and layer to create sides to the folder. Adhere layers to each other with tape gun. Adhere to sides of folio.
- Cut slits in sides to allow ribbon through. Thread ribbon around box and tie in front.
- Adhere magnets to folder flap and front.
- Punch two holes with Crop-a-dile on top of folder. Add eyelets if desired. Thread ribbon through for handle and knot.
- Insert artwork and take it in style!
Your Recently Viewed Projects
Ask93 7929298
Mar 02, 2016
I like this lovely folio. I am pretty crafty, so I get pretty much how to go about making one of these myself. Although it would be helpful to have some more photos showing the different steps. I am not sure that a beginner would be able to complete such a project without more visuals.
jfmcrazy
Feb 19, 2011
I am confused about the foam board part of these instructions. Are there photographs to better visualize what is being explained?
Report Inappropriate Comment
Are you sure you would like to report this comment? It will be flagged for our moderators to take action.
Thank you for taking the time to improve the content on our site.

