Embossed Keepsake Box
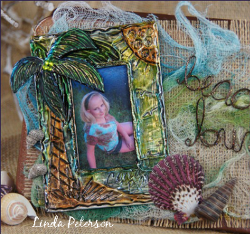
Now you have a pretty place to store shells! Create an Embossed Keepsake Box from Linda Peterson using embossing tools and techniques and display it in a prominent spot. Stash your favorite vacation memorabilia, ticket stubs, exotic finds and more!

Materials:
- Aleene’s Tacky Glue
- ArtEmboss Metal sheet- silver
- Alcohol markers in brown, green, blue or other colors of choice
- Craft foam any color
- Ball point pen
- Acrylic Paint – black
- Scissors
- Ruler
- Paint brush
- Paper towels
Instructions:
- Cut the craft foam to the desired size. Cut a rectangle out of the center to create the frame.

- Place the frame onto the colored (back side) of metal sheet.

- Cut edges on a diagonal and fold metal edged over. Flatten with the side of an ink pen.

- Draw a diagonal line on the inside of frame, cut along the lines and fold metal edges over.

- Draw pattern onto front of frame with ball point pen.

- Add color with markers.

- Add a light coat of black paint to top of frame, getting it down into the creases. Wipe away as much as desired.

- Arrange material, and frame onto top of box. Glue to secure. Add any additional embellishments as desired.

For a comprehensive video tutorial of this project, check out How to Create a Metal Embossed Keepsake Box.
Read Next47 Summer Crafts for Adults

