Craft Foam Stamp
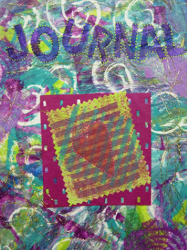
What's better than using stamps for your craft projects? Making your own stamps! Learn how to make stamps from craft foam and watch your project transform into something personal. Make mixed media crafts pop with your Craft Foam Stamp from Heidi Borchers.

Materials:
- Aleene’s Turbo Tacky Glue (in the Aleene’s Tacky Pack)
- Scissors
- Pen
- Craft foam – any color
- Foam board (1/4″ thick)
- Acrylic paint – colors of your choice
- Paint brush (or cosmetic sponge)
- Paper towels, brown bag, dryer sheet or paper of your choice
Instructions:
- Draw desired pattern onto craft foam. Cut piece of foam board slightly larger than craft foam shape.

- Cut craft foam along pattern line.

- Apply Aleene’s Turbo Tacky glue to back of craft foam shape.

- Press in place on foam board. Let dry completely. Aleene’s Turbo Tacky dries in half the time!

- Select surface for stamping on. I love to use paper towels, brown bags and dryer sheets for my mixed media art.

- Apply coat of acrylic paint to surface of craft foam with paint brush or cosmetic sponge.

- Press stamp onto paper surface. Gently press on stamp to transfer print.

- Lift to reveal stamped design. Repeat with desired designs and colors.

- With this technique, you can create unlimited designs from simple lines, bold rectangles or lettering. Remember that lettering needs to be glued onto the foam board backwards!

For a comprehensive video tutorial of this project, check out How to Make a Craft Foam Stamp Featuring Aleene's Turbo Tacky Glue.

