Hanging Thanksgiving Banner
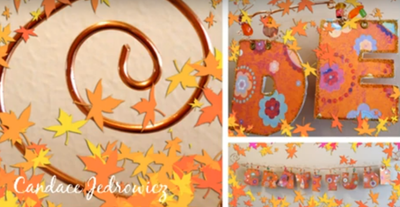
Take some time to express your gratitude this season and really give thanks by making a Hanging Thanksgiving Banner from Candace Jedrowicz. Thanksgiving decor ideas can add a touch of seasonal fun and excitement to your space. Hang one on your wall to greet dinner guests.

Materials:
- Electrical wire/14 gauge wire – about 6 feet
- Letter shapes – I used CK Shear Madness font and made the size 2″ x 3″
- Rubber cement
- Cardboard
- Decorative paper
- Small hole punch
- Grommets
- Scissors
- Round nose pliers
- 24 gauge wire
- Assorted beads
Instructions:
-
Cut your letters from cardboard.
-
Cut strips of decorative paper at least as wide and twice as tall as each letter.
-
Fold the paper in half and paint half with rubber cement.
-
Put a letter on the cemented side and cut around it. Cement the other side and and fold it over the letter. Finish cutting out the letter.
-
Lay the letters out with 1/2″ between. Measure the word and cut your large wire at twice the length.
-
Make some small loops in the wire with the pliers, about where each letter will be. Make curly ques on both ends.
-
Punch 2 holes in the top of the letters. Set with grommets.
-
Cut 6″ lengths of small wire for each whole.
-
Wrap a small coil on one end of the wire and slide tail through on hole. Loop the tail around the coil to secure.
-
Slide on one or two beads – about 1″ worth.
- Wrap the remaining tail around the large wire to attach. Repeat for all the letters.
For a comprehensive video tutorial of this project, check out How to Make a Wired Gratitude Banner.

