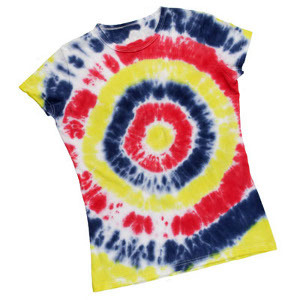
Starfire Explosion Bullseye Tee
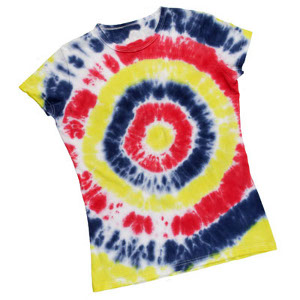
Reach for the stars in this Starfire Explosion Bullseye Tee from I Love to Create. Learn how to tie dye a shirt with a perfect bullseye pattern for some summer fun with amazing and unusual directions to tie dye your very own top.
Find this project and many more in our free eBook, How to Make Tie Dye Shirts, Decor, and More: 18 Tie Dye Patterns!
Materials:
- Tulip® One-Step Tie-Dye Kit™ - Primary Colors
- Tulip® Surface Cover™
- Scissors
- Plastic
- T-shirt
Instructions:
-
Wash shirt in washer to remove sizing.
-
Cover work surface with plastic tablecloth.
-
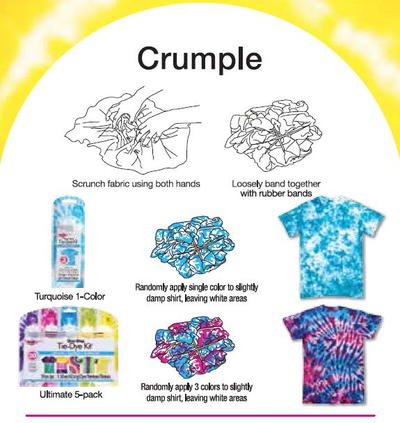
Place damp shirt on prepared surface and smooth flat. To create bullseye design, pinch front of shirt just above center then lift fabric up and scrunch fabric into a tube shape. Wrap a rubber band about 2” from tip, wrapping several times until tight. If using zip-ties, determine placement then wrap and pull tightly. Repeat every 2” or so along entire shirt.
-
Wearing gloves from dye box, fill a dye bottle half with water. Replace cap and shake until all dye is thoroughly mixed. Remove lid, add more water to line indicated on bottle, replace cap and shake to mix.
-
Carefully squeeze Yellow dye on tip, turning shirt until entire tip has dye.
-
Squeeze Red dye around center of next section, letting it bleed toward rubber bands. Insert tip of bottle into folds and squeeze more dye as needed. Note: Try not to squeeze too much dye next to rubber bands to keep white areas between colors. In the next section, apply Blue. Squeeze dye on in the following order: Yellow, Red, Blue until all sections are dyed.
-
Let set 4 to 6 hours. Use scissors to carefully cut off rubber bands or zip ties.
-
Fill washer to a full load setting with a small amount of laundry soap. Once agitation starts, insert shirt. Dry in dryer or line dry.
For more tie-dye designs, check out How to Tie-Dye a Shirt: 11 Colorful Tie-Dye Designs.
Read NextTie Dye Dollar Store Flowers

