Tissue Flower Topiary
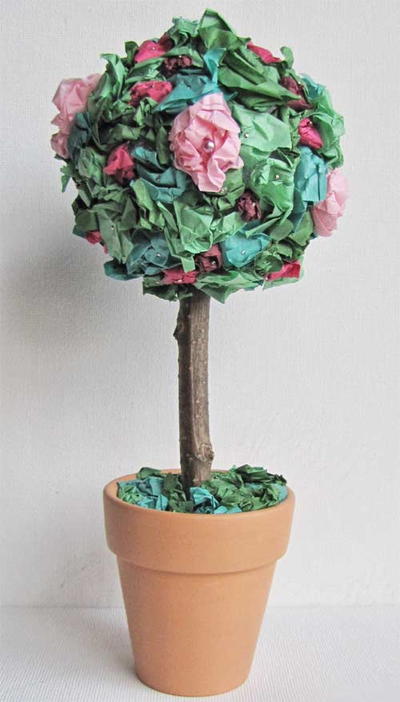
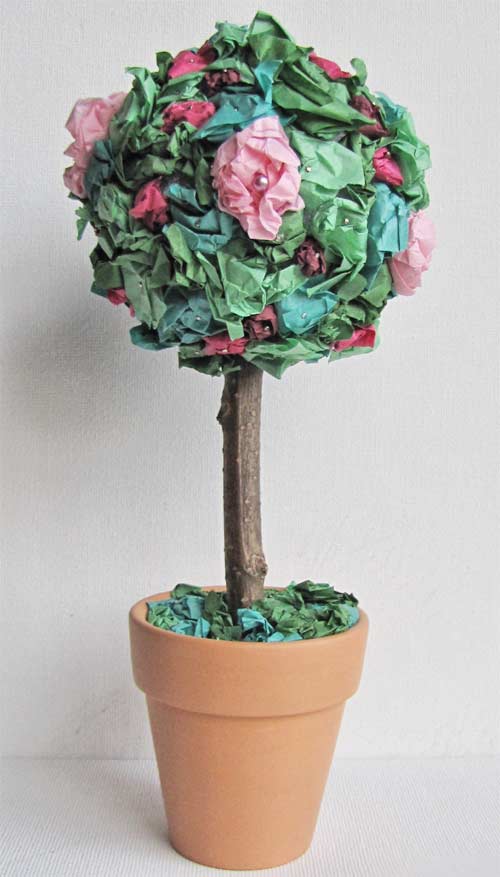
Wendy Piersall of shares this great tutorial for creating a flower topiary tree out of tissue paper. The pretty topiary makes for an inexpensive and lasting gift for Mother's Day. Kids will love scrunching up the tissue paper for this craft too!
See this project and more in 27 Topiary Craft Projects.
Materials:
- Green tissue paper- 3 sheets (ideally in three different shades of green)
- Pink tissue paper- 3 sheets (again ideally in three different shades of pink, or whatever three colors you want)
- 3 inch styrofoam ball
- Small cylinder or cube of floral foam to stick into the clay pot (You could also use play dough)- (I cut a triangle of styrofoam from some appliance packaging we had around the house)
- 3 inch (or so) mini clay plant pot
- Plain straight pins
- 4 straight pins with pretty pearlescent ball on top for the main flowers
- 6″-7″ inch stick from your yard
Note- I think the reason this turned out so well was because I was able to use different shades of green and pink tissue paper. Normal tissue paper packages don’t come so nicely shaded for paper flower crafts, but I swear by a huge package of tissue paper I am able to get at Hobby Lobby for $5 (inconveniently they don’t sell online, but CreateforLess has shades of green at $.89 a package).
Instructions:
- First cut up the green tissue paper into approximately 2 inch squares. They are going to get crumpled up, so don’t worry about being precise or anything.
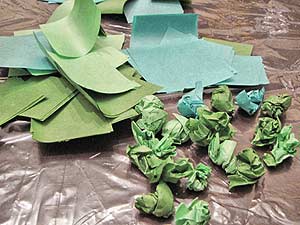
- Start scrunching up the squares into loose little balls. I found it worked best if I rolled them between my hands as if it were clay I was trying to roll into a ball. Even on a tiny ball you will need a surprisingly large number of these, because you want them to be relatively close together.
- Next just start pinning them to the styrofoam ball. Don’t put them too close together, because you will want to have room to put in the flowers. You can see in the second photo how close I put them together.
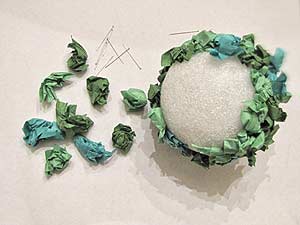
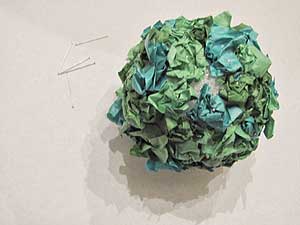
- Now cut up your pink tissue paper into squares. For the largest flowers I used about 3 inch squares, the medium about two inch squares and the small about one inch squares. Again, this is approximate, because they are just going to get crumpled up again.
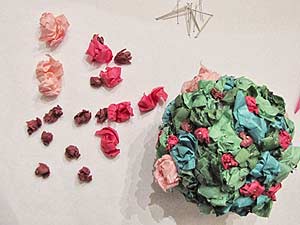
- Add the largest flowers first, because they will be the most prominent and need to be placed somewhat evenly around the ball. I thought I was going to add a lot, but found that four was plenty. If you can find straight pins with the pretty pearl tops, use those to attach the largest flowers. If you have a lot of those, you can also use them for your smaller flowers too. I didn’t, so I just used regular straight pins everywhere else.
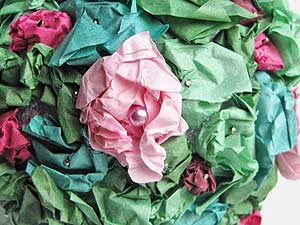
- Then add the smaller flowers in between the green ‘leaves’ where you can still see the styrofoam.
- Next, decide what part of the ball you want to be the top, and stuff the stick from your yard into the bottom. I didn’t take a picture of this part, because it’s pretty dang easy to do. Then shove the cylinder or dough into the flower post, and stuff the stick into the midde so that it is standing straight up.
- Cover the foam base with green tissue like you did the top ball, but this time, don’t let the styrofoam peek through.
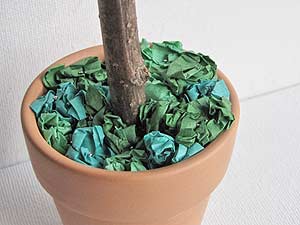
- And ta - da, you are done!
Your Recently Viewed Projects
princess6860504
Oct 01, 2017
Boy, this really is cheap and easy to do! I don't think you'd have to have a creative bone in your body to pull off this one. You don't even have to really know how to make flowers. Everything is just scrunched up and pinned onto the styrofoam ball. After you are done with the entire thing, wouldn't it be a pretty finishing touch to spray a fine mist of a pearlescent top coat?
Marilyn B
Mar 02, 2017
Sometimes it is hard to find a project that kids can do and still look a bit more classy, and this one is it. Imcan also see this project as one that would be easier for a child or even and adult with limited hand motion or arthritis to do as using the tissue paper could be almost therapeutic with gentle motion and assistance for the other steps. This is quite pretty and you could even place the ball itself on a pretty plate without it being a topiary for a variation, possibly as a dining table center piece that kids can be proud of too! Lovely!
memalan 1630483
Sep 14, 2011
I AM FROM SOUTH AFRICA. CANT SUBMIT MY DETAILS. NO SOUTH AFRICA IN YOUR SUBMIT LIST.br br THANKSbr br ELIZE MALANbr br
nannab
Mar 24, 2010
This is GREAT! I'm going to let my 5 year old granddaughter help me make one for her mother. She just had another baby girl and I know she will just love it. Stephanie from Indiana
Report Inappropriate Comment
Are you sure you would like to report this comment? It will be flagged for our moderators to take action.
Thank you for taking the time to improve the content on our site.

