Honey Bee Vase
Learn how to make a beehive decoration that will be the envy of any tablescape!
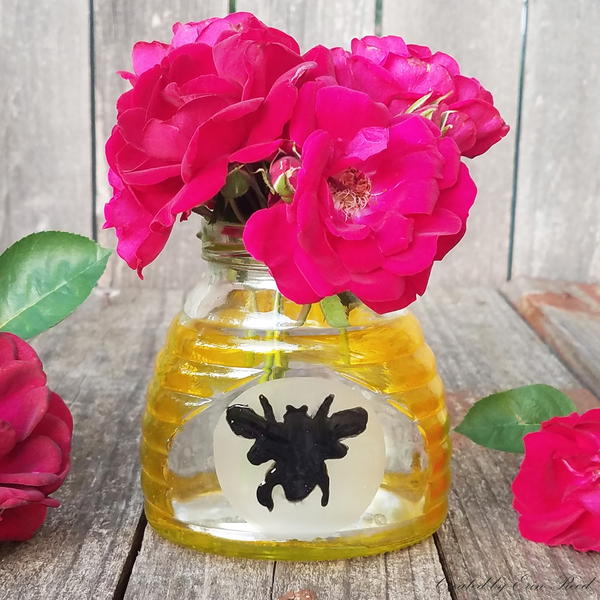
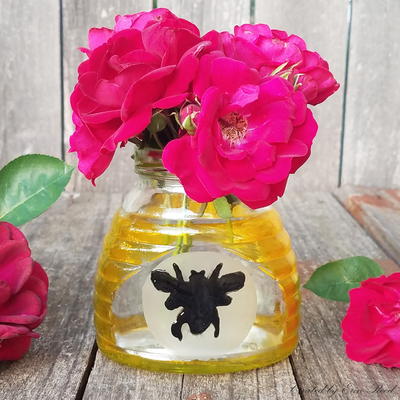
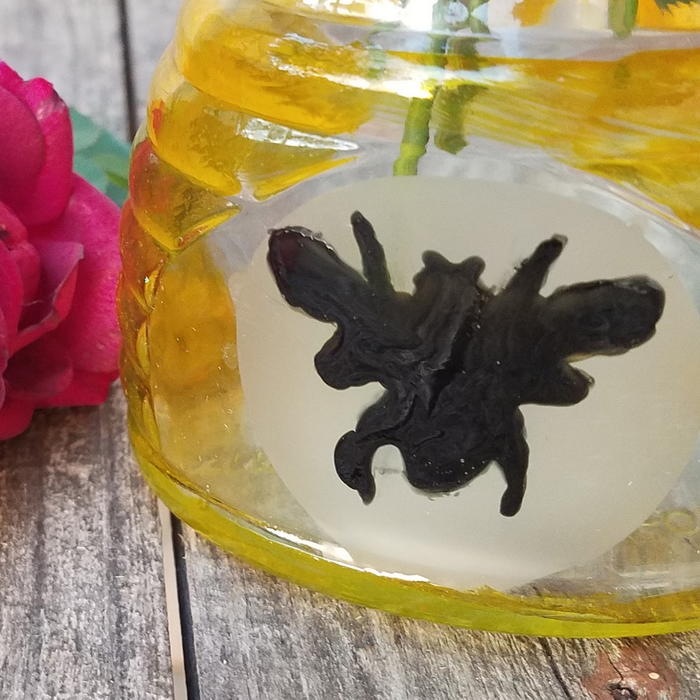
Know someone who loves bees? Maybe it's you! Learn how to make this beautiful honey bee vase to decorate your windowsill or serve as a lovely centerpiece for your table. This project is so easy to complete and the results are just lovely! Make the central motif really pop when you first use etching creme before stenciling on the bee. If you're a natural artist, you can even freehand the bee. The yellow glass paint really completes that honeycomb look! Complete the project by filling the vase with vivid flowers that any bee would be attracted to. Display the project somewhere where the light can shine through it!
Estimated Cost$11-$20
MaterialsGlass, Paint, Recycled Materials
Primary TechniquePainting

Project TypeMake a Project
Materials List
- Empty honey jar
- Pebeo Vitrea 160 Glass Paints (Ink Black and Sun Yellow)
- etchall Etching Crème
- etchall Squeegee
- Self-adhesive etched glass vinyl
- Stencil brushe
- Craft mat
- Sizzix Big Shot Plus
- Circle Nested Dies
- Bee stencil
- Tape
How to Make the Honey Bee Vase:
Instructions:
-
Clean the outside (and inside, if applicable) of the honey jar bottle. Allow to dry completely.
-
Using your Sizzix Big Shot Plus and circle nested dies, cute a circle out of self-adhesive vinyl. Remove circle and place the remaining vinyl on jar in your desired position.
-
Fill the circle with etching crème. Let sit for 15 minutes.
Note: etchall Etching Crème is reusable, so excess can go back into the jar. -
After 15 minutes, wipe off excess etching crème and rinse jar. Remove the vinyl, and be sure to dry thoroughly.
-
Place bee stencil on the jar, centering the bee in the circle. Use washi tape to secure the stencil. (Please note, the bee can also be free-handed.)
-
Use glass paint and stencil brush to apply paint to the stencil.
-
Carefully remove stencil and fill in the rest of the bee with a paintbrush, if desired
-
Use yellow glass paint to paint honeycomb around jar.
-
Allow paint to air dry for 24 hours.
-
Bake in a conventional oven for 40 minutes at 325° to let set paint set and make Honey Bee Vase dishwasher resistant.
Why You'll Love This Trash to Treasure Craft
Are you ready to create something sweet and stylish for your home? Here are the top 5 reasons why you should make our Honey Bee Vase craft project:
1. Bring a touch of nature indoors: The Honey Bee Vase is inspired by the beauty of bees and the natural world. By making this craft, you can bring a touch of the outdoors into your home and add a whimsical and nature-inspired touch to your decor.
2. Easy and fun to make: This craft project is perfect for crafters of all levels. Whether you are a beginner or an experienced crafter, you will enjoy the process of creating this adorable Honey Bee Vase. It's a fun and relaxing way to spend an afternoon.
3. Personalized and unique: One of the best things about this craft project is that you can personalize it to suit your style and taste. You can choose your favorite colors for the vase and add your own creative touches to make it truly unique. It's a great way to showcase your creativity and make something that is one-of-a-kind.
4. Perfect for gifting: The Honey Bee Vase makes a thoughtful and handmade gift for friends and loved ones. Whether it's for a birthday, holiday, or just because, this craft project is a beautiful and heartfelt gift that will be cherished for years to come.
5. Sustainable and eco-friendly: By making your own Honey Bee Vase, you are taking a step towards sustainability and reducing waste. You can upcycle materials or use eco-friendly supplies to create a beautiful and eco-conscious decoration for your home. It's a great way to show your love for the environment while adding a touch of style to your space.
Read NextDecoupaged Paper Mache Vases

