DIY Studded Leggings
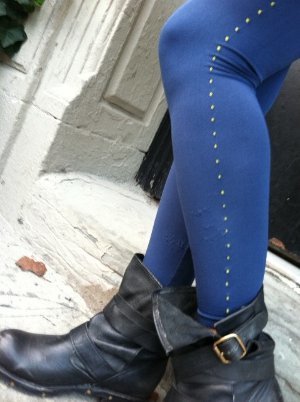
Fall fashion trends love leggings and footless tights...and you can create a fun wardrobe addition in no time with these DIY Studded Leggings from I Love to Create. Grab a pair of cheap footless tights or leggings, some fabric paint, and let your creativity go!

Materials:
- Leggings or footless tights
- Tulip Beads in a Bottle paint in desired colors
- Chalk marker
- Ruler or straightedge
- Iron (optional)
Instructions:
- Prewash the leggings and let them dry completely. Fold the leggings so the sides are facing out. Find the center line down each leg, from hip to ankle and use the ruler and chalk marker to mark dots 3/4" to 1" apart along that line. Optional: Set the iron to a low setting and press the leggings flat to make a crease along the outside of each leg before measuring the dots.

- Select a Beads in a Bottle color to match or contrast the leggings. Make sure the leggings are on a flat surface, with your marked dots facing up. Hold the tip of the tube about 1/16" above the first dot and gently squeeze out the paint to form a bead. Note that the beads shrink slightly when they dry, so be a little generous without going overboard.

- Continue adding dots along the length of the legging until you reach the hip, making sure to lift the tip of the tube straight up after you've applied the bead to prevent smearing.
- If you can lay the second leg flat without disturbing the wet beads on the first leg, do so, and repeat steps 2 and 3 to complete the look. Otherwise, let one side dry completely (about 4 hours) before dotting the other side.
- Let both sides of the leggings dry and get ready to rock them! The beads dry three-dimensionally, so you do get a slightly studded effect that can be seen when silhouetted from the front.
Read NextEasy Sashiko Visible Mending

