DIY Woven Tassel Keychain
Unlock your accessorization prowess with the most fabulous boho DIY keychain design ever.
There’s no denying that keychains are handy, helping us all find and hold onto our keys no matter how deep in our purses they fall. However, just because they’re handy doesn’t mean they have to be drab!
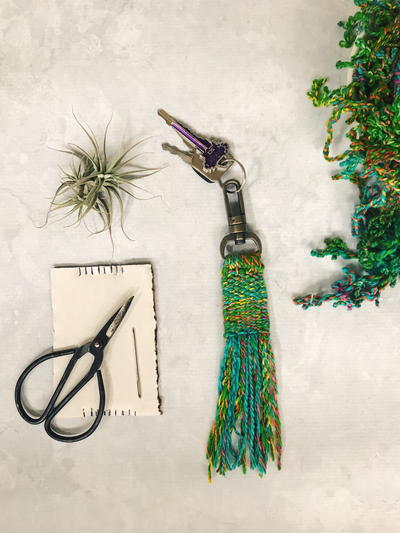
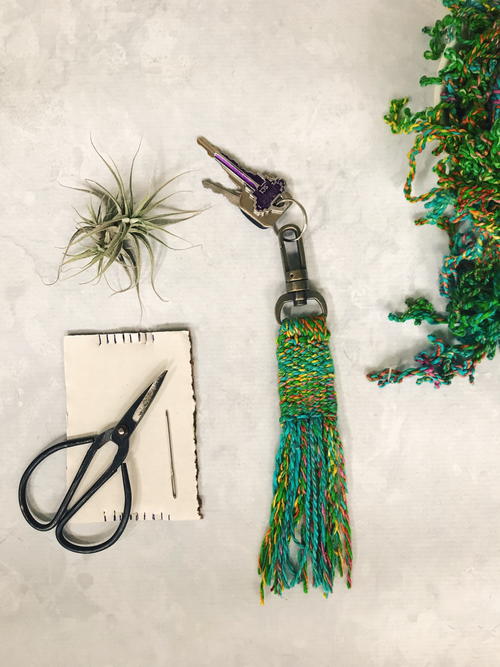
Infuse your keychain style with chic and stylish Bohemian pizzazz with this tassel keychain tutorial. Using twisted silk woven in a mesmerizing tassel pattern, this is easily the most gorgeous of DIY keychain ideas you’ll find on the web.
Though this keychain design by Darn Good Yarn looks like it costs a fortune, it’s an inexpensive and simple accessory to make. Everyone can enjoy the easy weave of this tasseled beauty! After all, you don't need to purchase a loom in order to make this project. All you need is a scrap piece of cardboard from that recent Amazon order and you're equipped with the tools you need to make a beautiful new accessory.
As a special bonus, we have a video tutorial shared below. Whether you prefer step-by-step photo instructions or a video tutorial, we've got you covered.
Time to CompleteIn an evening
Project TypeMake a Project
Materials List
- Darn Good Yarn Darn Good Twist Lace Weight Silk
- Cardboard
- Scissors
- Tapestry needle, size 16
- Keychain hook with 1" bar
Video Tutorial
Instructions
-
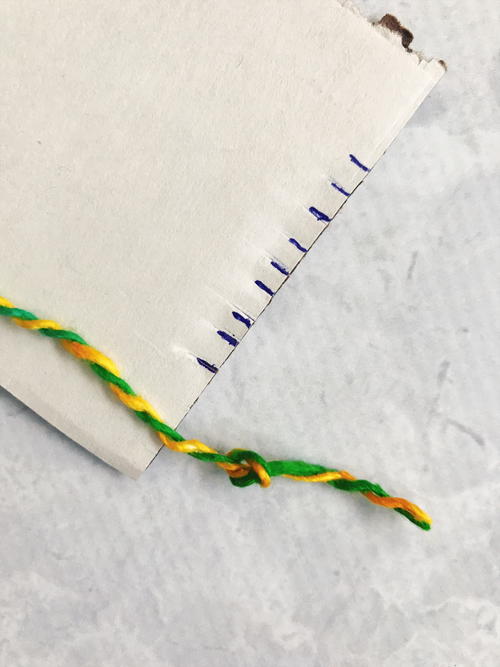
Cut a sturdy piece of cardboard into a rectangle measuring 3” x 5”. Cut 8 notches along the top and bottom approximately 1/8” apart. The top and bottom notches should align; use a ruler to make notches that line up straight.
-
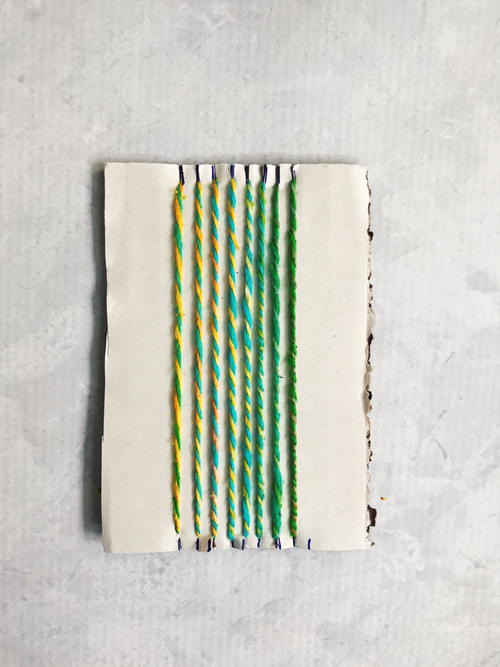
Tie a knot at the end of the yarn. Slip the yarn into the first slit of the loom (bottom left corner). Pull yarn up to the top of the loom, slip yarn into top left slit and around the back of the first notch, then bring the yarn down the front of the loom to the next bottom notch and repeat, ending at the bottom right corner. The warp strands go around the notches and stay on the front of the loom (they don’t go down the back of the loom). Tie a knot at the end of the yarn and trim.
-
To prepare the needle, measure 8 feet of yarn. Thread the needle and double the yarn so that the needle is in the middle of the length of yarn.
-
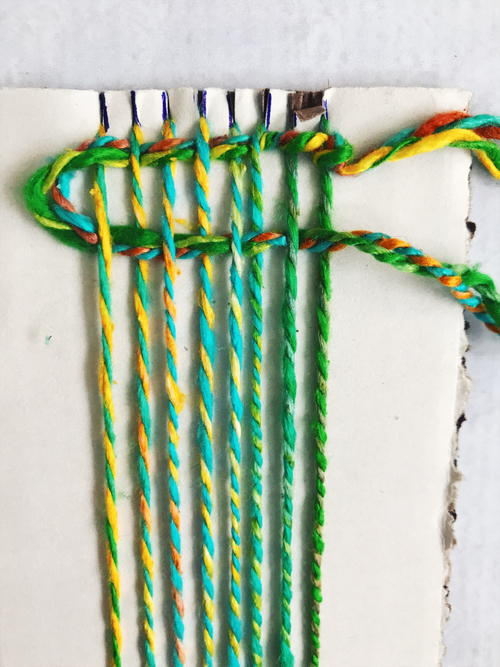
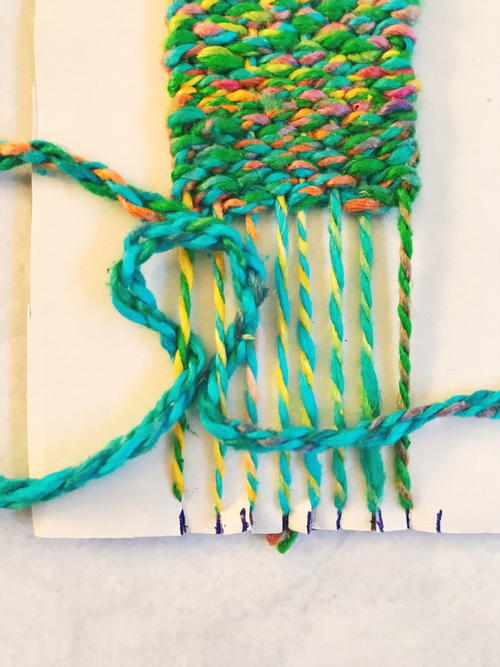
Start at the top right corner of your loom. Tie the ends of the yarn around the first warp strand on the right leaving a 3” tail (you will sew over this tail to hide it when you attach the weaving to the keychain hook). Weave the needle under and over until you reach the last warp strand on the left. Then switch directions and repeat. Continue until you have woven about 2” and have about 6” of yarn left.
-
Cut 16 equal lengths of yarn. You can do this easily by wrapping the yarn around the loom lengthwise 16 times. Cut the yarn along one end of the loom.
-
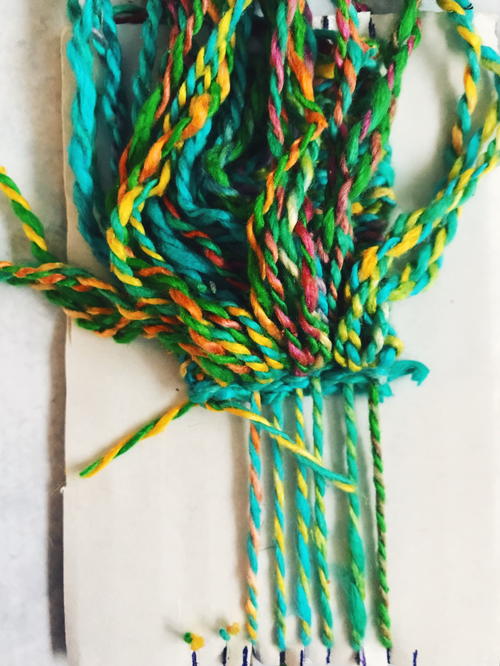
Place two strands of yarn over two warp strands. Wrap each end under the warp strands towards the middle. The left side strand goes over and under the left warp strand and up the middle, and the right side goes over the right warp strand, under it, and up through the middle. Gently pull the yarn ends up and tighten the loop that forms. Repeat across the warp strands. Weave 2 rows of plain weave stitches under the tassels. Then repeat a second row of tassels. Weave 2-1/2 more rows of plain weave, ending in the middle of the warp strands so that the yarn ends up in the back of the weaving.
-
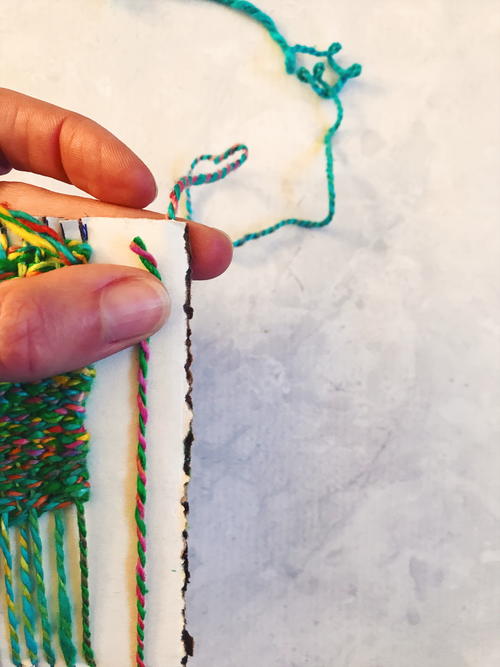
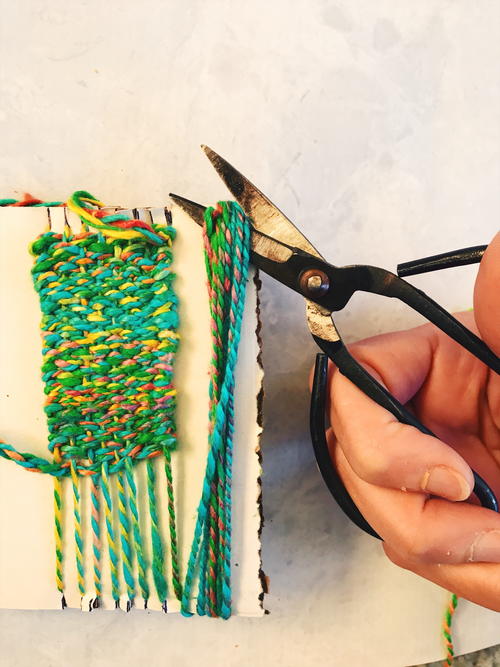
Lift tassels up so they are out of the way. Cut first two warp strands on left side and tie in a double knot repeat with remaining strands. Slip loops off top of the loom, taking care to leave the loops intact.
-
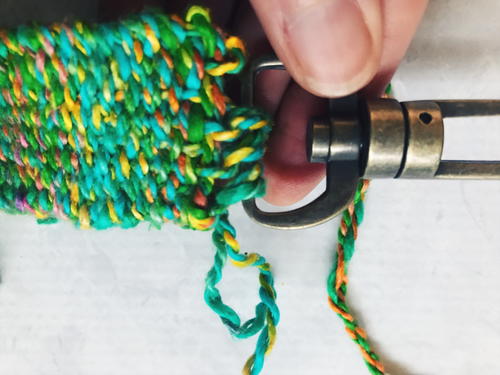
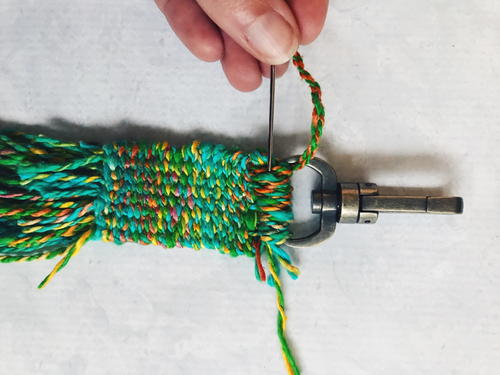
Thread about 18 inches of yarn onto needle. Whip stitch the warp loops onto the keychain. Sew over the tail from the start of the weaving: Place the tail ends along the top of the weaving and below the key chain bar. Stitch over the tail pieces to cover, protect and conceal the tail ends.
What’s your favorite handmade accessory to make? Let us know below in the comments!

