This project was submitted by one of our readers, just like you.
Knit Purse Pattern
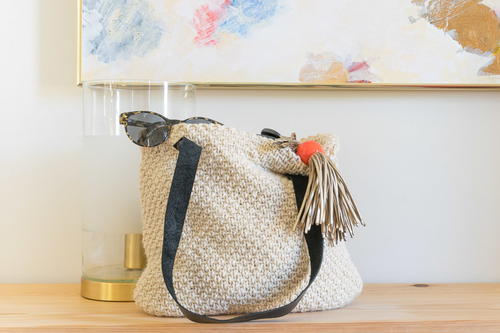
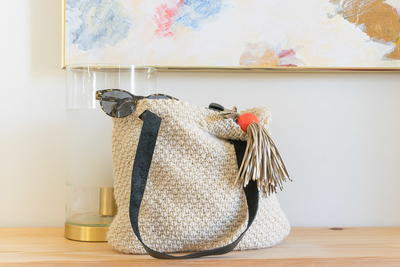
"This Knit Purse Pattern uses the Half-Linen Stitch for the body of the purse. This easy to make handbag is lined and features detachable leather handles for easy washing. It did take me a while to figure out the best stitch for this knit purse pattern. I started several times, with a variety of different knit stitches, but finally realized that I needed a stitch that wouldn't have much give to it; the Half-Linen Stitch is a great stitch that creates a non-stretch fabric Other qualities I wanted to incorporate into this knitted handbag pattern were washable yarn, detachable straps so that the purse could be washed and a lining."
NotesVideo, option for printable pattern PDF and links for supplies on the website

Knitting Needle Size10 or 6 mm
Yarn Weight(5) Bulky/Chunky (12-15 stitches for 4 inches)
Materials List
- 300 yards bulky/chunky yarn. I used 2 skeins of Paintbox Yarns Simply Chunky in Vanilla Cream in this knitted handbag pattern
- US 10 (6mm) Straight Needles, 14"
- 4 buttons ( I used 3/4” as I wanted my buttons to fit within the width of my 1” leather straps)
- 2 leather straps (mine were 24” long. I cut off the ends with the holes that were there if I had wanted to sew the straps on)
- Exacto knife or something to cut leather
- 13-inch square piece of fabric for lining
- Tapestry Needle
- Sewing Needle and thread
- Sewing Machine
Instructions
Instructions
Using 2 balls of yarn, cast on 53 stitches twice, creating two pieces of knit fabric on your needle. This will ensure that your 2 pieces are the exact size.
-
1st row : *K1, WYIF SL1* Repeat until last stitch, K1
-
2nd row : Purl all
-
3rd row: P1, *K1, WYIF SL1* Repeat until last stitch, P1
-
4th row; Purl all
-
Repeat these 4 rows until work measures 12”
-
On right side (an odd numbered row) Purl all stitches to create fold over edge.
-
Repeat rows 1-4 for one more inch, 8 rows. Bind off loosely. Wash and block
Constructing the Purse
-
Sew sides of the purse together, wrong sides together, on three sides, leaving the side with the turned edge open. Pin your purse sides at corners and at several spots to make sure the pieces are lining up correctly.
-
Cut fabric for lining 1 each wider and longer than purse dimensions. In this case, with a 12” by 12” purse dimension, I cut my fabric 13” by 13”. It is better to err on the side of making your purse lining a wee bit bigger than too small.
-
Sew lining fabric together with right sides together, using a 1/2” seam allowance.
-
Place lining inside of the purse, with the wrong side of the fabric facing the inside of the purse
-
Turn over the top turn edge of your knit purse, catching the top of the lining fabric, and using needle and thread, sew the bottom edge of the turn through the lining to the knit fabric of the purse
-
If you’d like, you can wash the purse and block it again after sewing
-
This is optional, but I wanted to finish my purse off a bit by tucking in the corners.
-
I tucked in the corners to match, pinned them and then sewed the edge.
-
Mark where your buttons will go. I measured in 3” from each side, right along the seam where you turned the edge over. Sewing your buttons here will provide more support for the buttons and the purse.
-
Before you sew your buttons on, measure and cut your leather. It’s hard to say exactly how long your cut should be, it depends on the diameter and depth of your button.
-
Using an exacto knife or something similar, start 1/2” up from the bottom edge of your strap and make small cuts until you can squeeze your button through the cut.
-
Sew your buttons on the purse, once again making sure you sew them on the thicker seam created when you turned the top edge of your purse over.
-
When you want to wash your purse, remove the leather straps.
Up Next:
Read Next33 Red Heart Patterns for Hats


