No Sew Terry Cloth Skirt Tutorial
Learn how to make a towel wrap that you can wear to the beach over your swim suit!
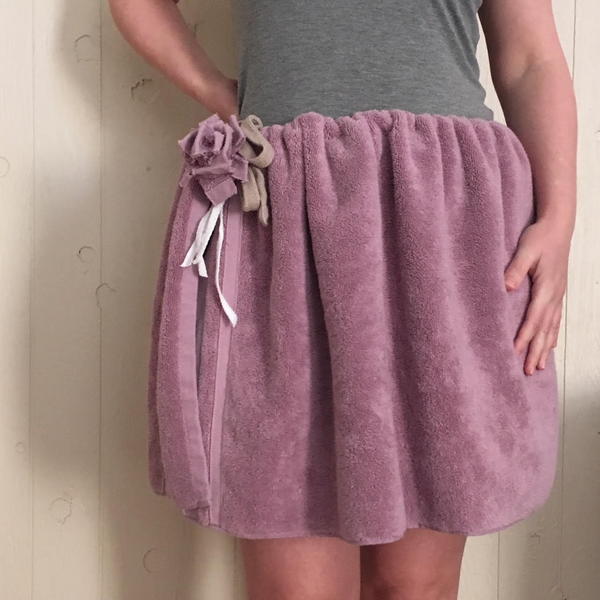
Spring is here, and the flowers everywhere are starting to bloom! You’ll be outside more, so it’s a good idea to have a warm coverup or layer. What’s better to wrap around yourself than a soft, fluffy towel... made into a skirt! This no-sew tutorial shows you how to make a fun, statement-making skirt that you can wear day or night. With your choice of adding a romantic flower adornment, this project is fun and surprisingly easy to complete!
Time to CompleteIn an evening
Primary TechniqueRepurposing

SeasonSummer
Project TypeMake a Project
Materials List
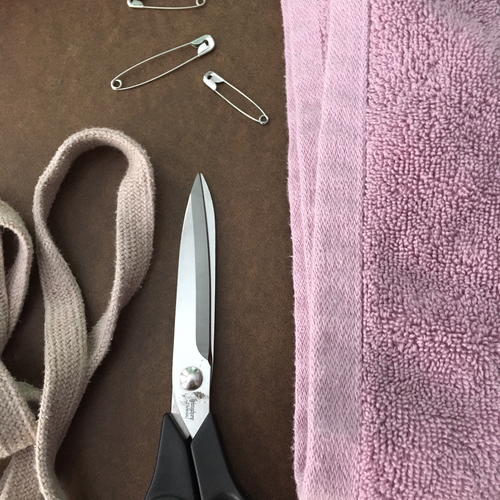
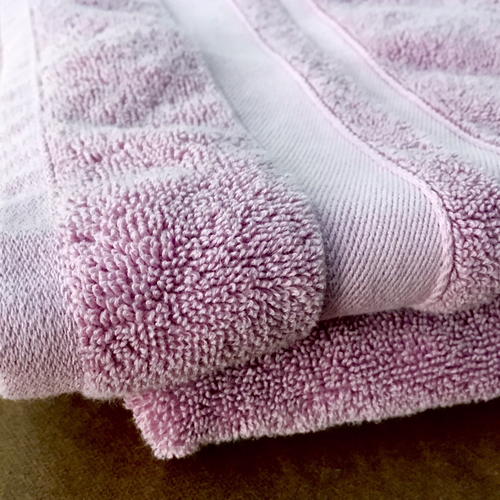
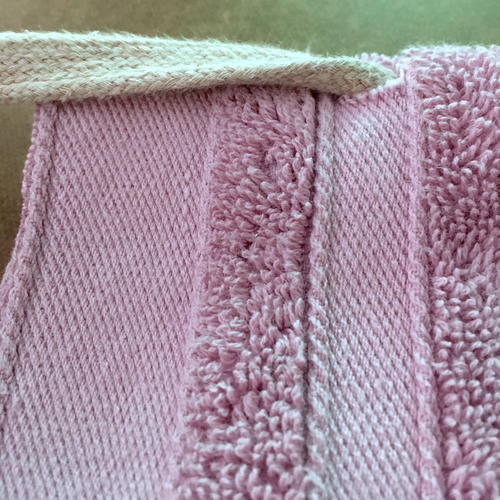
- Very soft terrycloth large bathsheet-size towel in a color of your choice *It must have twill tape ribbon stripes on both sides to keep the towel from fraying.*
- Fabric scissors
- Long string or thick shoelace that is at least 65” (inches) long for the waistband
- Large safety pin
- Clear tape (for removing lint, etc.)
- 2 more shoelaces or strings if you want to make an optional flower from the towel scraps
No-Sew Terrycloth Towel Tulip Skirt with (Optional) Flower Accessory
A few more tips for picking out your towel:
-
Use a new (or newish) towel for your finished version. Practice on an old, worn towel if you need to first.
-
Wash your towel if it’s new before doing this tutorial.
-
The bathsheet I used for this tutorial measures approx. 62” by 32.5”
Skirt instructions:
-
Fold your towel in half lengthwise, then wrap it around your waist to check the length. If there’s some extra overlap from the towel, keep in mind that it will be ruched (gathered) around the waist.
-
Now you’ll need to add a string to tie and hold up the skirt. This “drawstring” can be made of a very long shoelace, strong twill tape, or whatever you have that ties easily and securely. I used the string from an old pair of sweatpants that I pulled out. It’s 67” long, which worked out perfectly for my skirt.
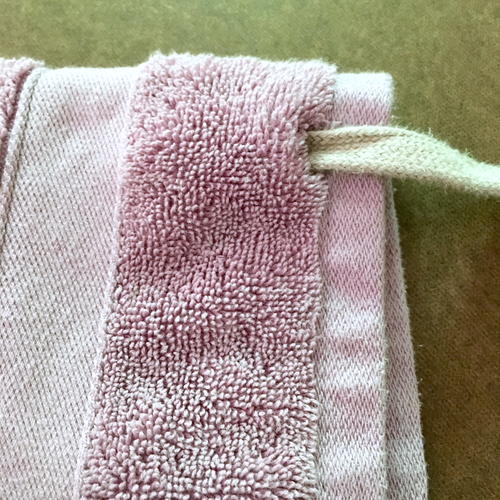
Create a small hole on each end of the towel, right at the top where it folds over (see photos). It must be cut within the twill tape to stop it from fraying very much. -
Next, add a large safety pin to the approximate middle of the skirt. It should go through both towel layers, just below the drawstring without pinning it (so the string can move). This is mainly used to keep the skirt together when you’re putting it on and off, especially during the creative process.
-
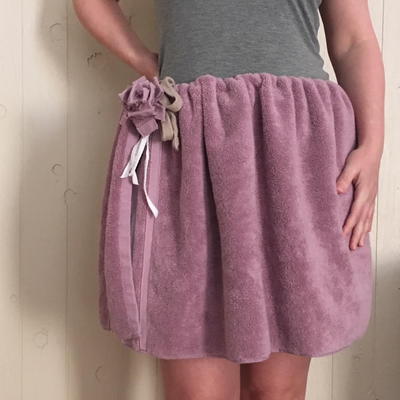
Wrap the skirt around your waist again, with the side of the skirt with the safety pin on the outside. The opening of the skirt should be off towards the side to add interest and leg coverage. The skirt should gather around the waist, so distribute this fabric evenly.
-
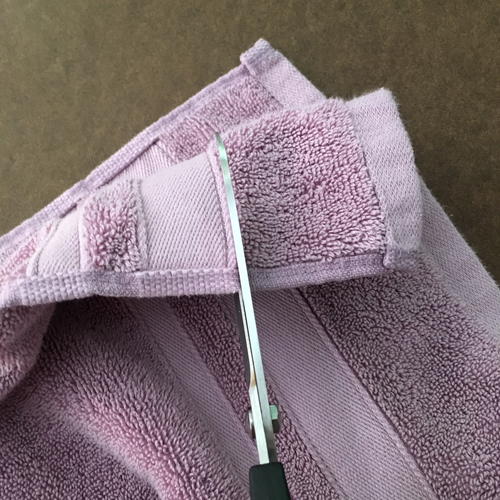
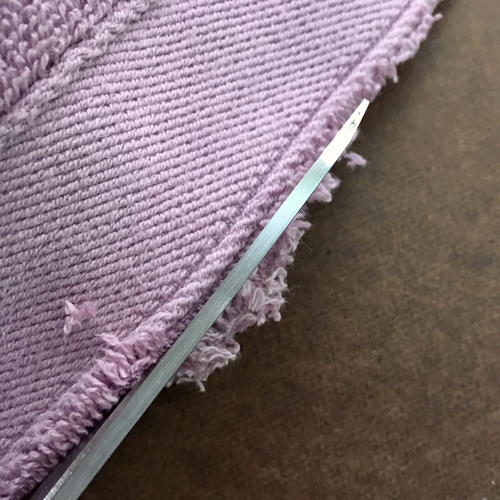
Take the skirt off and put it back on your work table. Trim a strip of excess material from the end of your skirt that is covered by the other side. This will eliminate a bit of the bulk from the towel overlapping, and you can even use the excess fabric to make a pretty flower adornment! Always trim along a twill tape ribbon to minimize fraying.
If you try on the skirt and feel you shouldn’t take off more fabric, skip this step. You want to be comfortable in your skirt or you won’t enjoy wearing it! -
Remove the safety pin from the side of the skirt and save it for later. I recommend putting it back on before you remove the skirt, unless you are washing the towel. If the drawstring is tied well the skirt will stay up at your waist, but if you feel more secure with them attached you can leave the safety pin in (or even add a few more as a detail). Just be careful when sitting and moving a lot not to open a pin up.
-
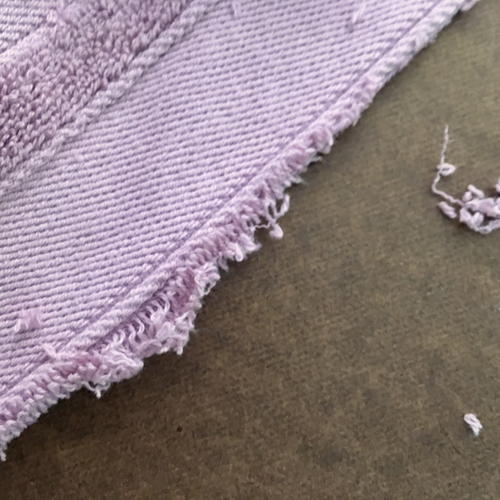
Your tulip skirt is nearly complete. Do a final check to make sure you don’t need to trim any frayed edges before you wear your new creation!
Flower Accessory Instructions:
-
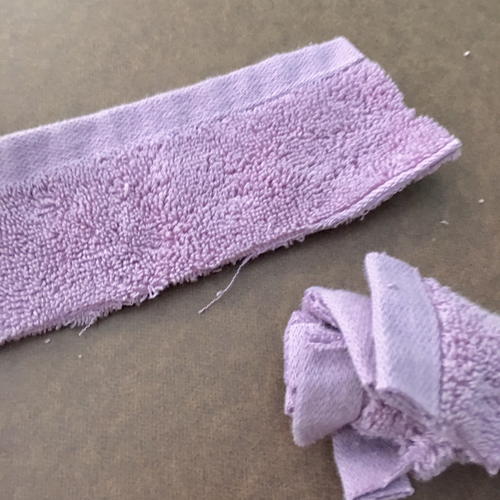
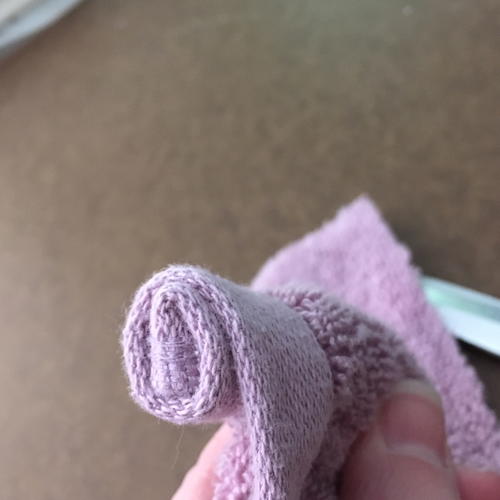
Now it’s time to make the flower accessory with the excess towel material! I used the cut end that includes the sturdy hemmed edge from the towel and a little bit of the terrycloth fabric. Cut this long strip into about three sections to use for the flower.
-
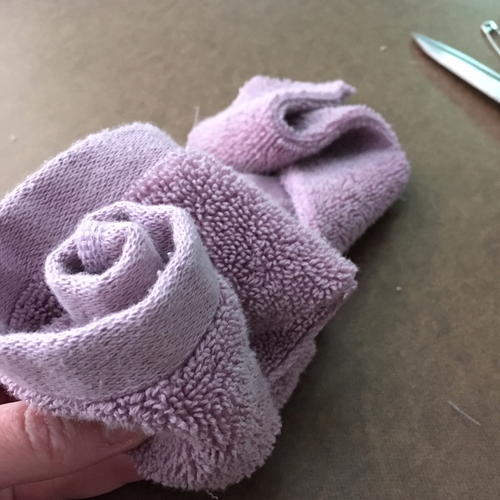
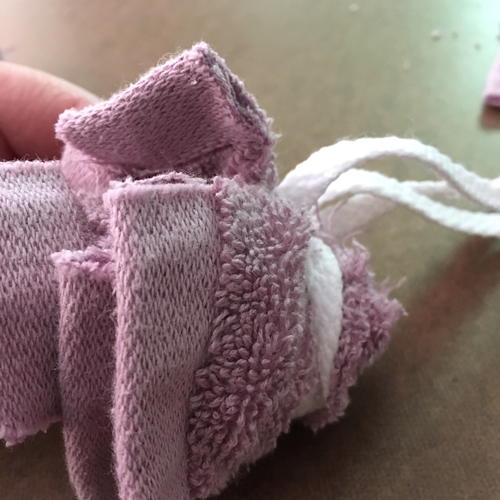
With the hemmed edge at the top, roll the fabric strip until it’s a few layers thick. You can add a second strip of towel material onto the flower if it’s not looking large enough, but be sure to stagger the placement so it adds more dimension (see photos).
-
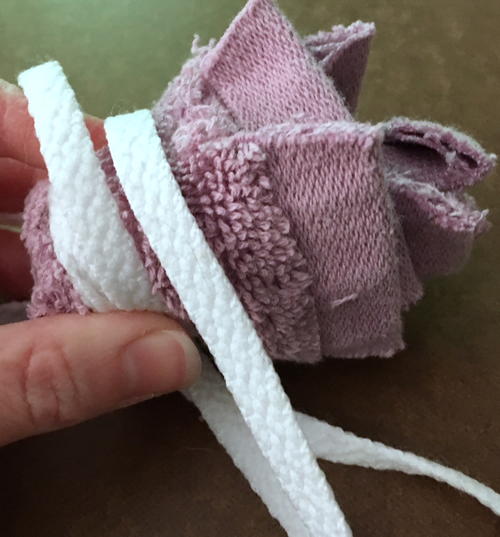
Wrap the shoestring (or a string of your choosing) around this rolled fabric, overlapping and tying it until the layers of terrycloth are very secure within. Leave the excess shoestring ends hanging off, and cut the ends into a point. They decorate the flower like cascading ribbons, adding a romantic feeling.
-
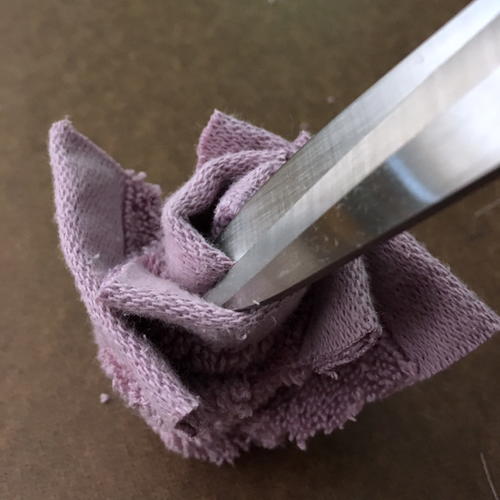
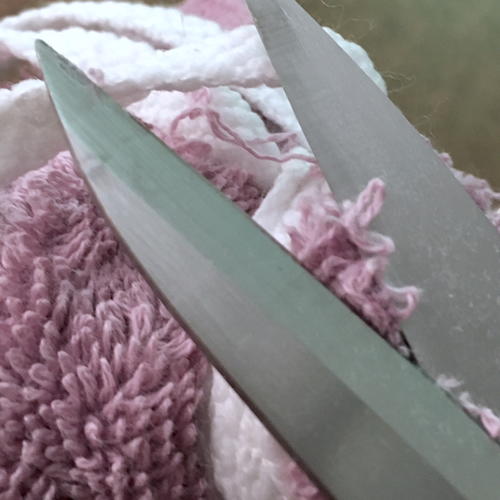
Cut downward into the larger pieces to make smaller “petals” that will give the flower a more natural look. Do this slowly and carefully, stopping periodically to check the way they are folding over. If there is too much bulk in one of the petals, cut a little excess off from inside the triangle shape you’ve already made until you are satisfied.
-
Trim down the back of the flower if there is excess terrycloth, carefully avoiding the shoelaces (or strings). This will help the flower sit nicely and look clean. If it’s fraying a lot you can add a bit of seam sealant to the back, letting it fully dry before wearing.
-
The flower can now be attached to the skirt. I placed mine at the side where skirt closes, tied right onto the drawstring. You can also tie it to a safety pin placed somewhere else on the skirt. Pull the excess shoestrings downwards so they add a little color contrast and texture.
Styling Tips:
-
Since this is a puffy skirt it looks great when worn with a form-fitting tank top or bathing suit.
-
Pastel colors are good for spring and summer so I chose a light pinkish-purple, but you can make this skirt in any color! The possibilities really are endless.
Care Tips:
-
Remove the safety pin, drawstring, and flower before machine washing the towel.
-
Apply a seam sealant if there is too much fraying on the skirt.
Learn more about Rebecca at purpleandlime.com.
More Crafty Ideas For You
As experienced crafters, we know how enjoyable it can be to create beautiful and practical items without needing to sew. If you're a fan of the No Sew Terry Cloth Skirt Tutorial, we have some fantastic project ideas that you will love.
For those who appreciate working with fabrics, we suggest trying a No Sew Fleece Blanket. This project is perfect for cozying up in the colder months and makes a wonderful DIY gift for friends and family. With just a few materials and some simple cutting and tying techniques, you can create a warm and stylish blanket in no time.
If you enjoy creating wearable items, consider making a No Sew T-shirt Tote Bag. This project is great for upcycling old t-shirts and turning them into a fashionable and practical accessory. Whether you use it for groceries, the beach, or everyday errands, this tote bag is sure to be a hit.
For those who like to add a touch of personalization to their crafting projects, we recommend making a No Sew Fabric Bunting. This fun and festive decoration is perfect for birthdays, holidays, or any special occasion. Use your favorite fabrics and embellishments to create a custom bunting that will add charm and color to any space.
We hope these craft project ideas inspire you to try something new and expand your crafting skills. Have fun creating!
Read NextEasy Sashiko Visible Mending
Your Recently Viewed Projects
Lisa
Aug 29, 2018
This is the ugliest thing I have seen lately and I research 1000's of craft and yarn patterns a day, for my job!
Member 5149117
May 22, 2018
This must be the most disgusting and ridiculous skirt I have seen. How anyone would want to wear this confidently is beyond me.
Dana N
May 29, 2018
I think of it more as a beach cover up! Then you don't have to worry about getting the seat in the car wet. Way more practical than some of those thin fabric cover ups!
princess6860504
Mar 28, 2018
Don't you think this is a great project for a bridal party for a wedding? It is a little outside the box, but that is what I like about it. Do something fun for your girls, right? It is also nice for a mom and a daughter to work on together. You can have matching towels, and these can be worn at the pool! I am so glad to see that it is a no sew project as I am not a sewer nor do I have a machine!
Report Inappropriate Comment
Are you sure you would like to report this comment? It will be flagged for our moderators to take action.
Thank you for taking the time to improve the content on our site.

