Winter Joy Scrapbook Layout
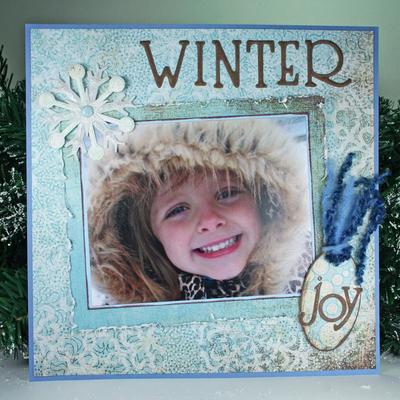
A bit of glitter here and there adds a shimmer to this stunning winter layout from Spellbinders. Layering the snowflake provides dimension and balances the oval tag, all while framing out the photo.

Materials:
- Spellbinders Die Templates S4-081 Tags 5, S4-085 Snowflake Wonder, L2-009 Julius Font
- Prism Prismatics Suede Brown cardstock
- WorldWin Inkjet Printable Vellum paper
- Clearsnap ColorBox Chestnut Roan Chalk Ink
- Copic Clear Spica glitter pen
- Kokuyo Dot'N'Roller adhesive
- Beacon Zip Dry Glue
- glitter glue
- glittered brad
- patterned paper
- blue cardstocks
- blue fibers
- edge distresser
- watermark pen
Instructions:
- Cut a piece of blue cardstock 8” square to use as base layer.
- Cut a piece of snowflake patterned paper 7 3/4" square; adhere to base.
- Trim photo to 4" x 5" and mat with light blue cardstock; ink edges of mat with brown ink.
- Layer photo onto 6" x 5" piece of patterned paper; distress edges and adhere to base.
- Die cute and emboss title and tag lettering from brown cardstock. While cardstock is still in the die, color embossed areas with watermark ink marker, then clear glitter pen.
- Adhere title lettering to top of page.
- Die cut and emboss one tag each from coordinating patterned paper and chipboard; adhere together.
- Adhere lettering to tag; finish tag by tying fibers through top hole. Using dimensional foam tape, adhere tag to lower right of photo.
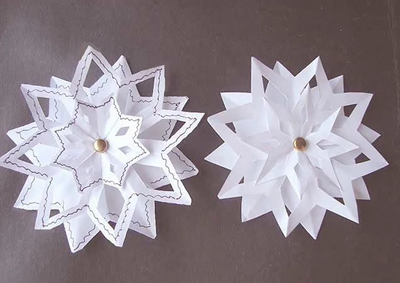
- Die cut and emboss snowflakes from vellum and coordinating patterned paper; layer together using a brad and adhere to top left of photo.
- Accent snowflake with glitter glue.

