This project was submitted by one of our readers, just like you.
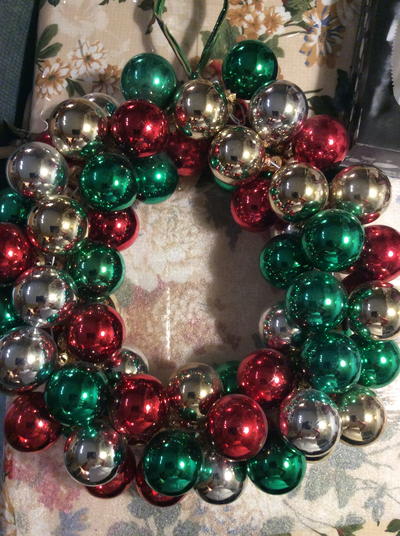
Vintage Ball Ornament Wreath
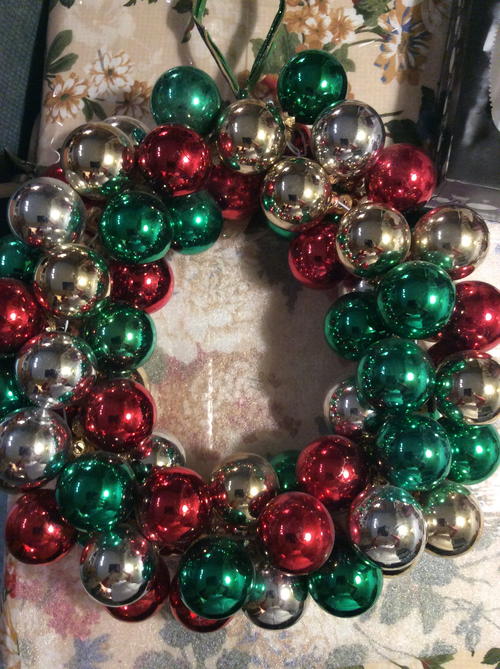
"Fun craft. Takes a bit of planning and time. Beautiful to hang on a wall. Show creativity in matching appropriate colors. I really enjoyed the challenge in making this craft. Everyone who has seen it likes it very much and when I hang it on my wall I use battery lit ribbon to embellish it. It was a little more costly than some decorations because of the amount of decorations needed to make it but we can be thankful for dollar stores which brings the cost down considerably."
Estimated Cost$11-$20
Time to CompleteIn an evening
Primary TechniqueFlorals/Wreaths

HolidayChristmas
Project TypeMake a Project
Materials List
-
Between 60 to 70 ball decorations
Various colors or all the same color a matter of taste - A strong wore coat hanger shaped on a circle wreath shape
- A ribbon to make a bow and one to use to hang it up
Instructions
-
Unwind coat hanger at the top and thread decorations one after the other placing them neatly on top of each other
-
Close hanger back up
-
Tie ribbon to hang with
-
Make a bow and tie to your project
NotesThis is a beautiful decoration and well worth the effort to make it
Read NextBlue and White Paper Doily Wreath
Your Recently Viewed Projects
mulberrygalprinces s
Jul 11, 2018
This is a very pretty and easy project to make. There are just a few caution points. Remember if you do get ok'd vintage ornaments, they were usually made out of glass. If little ones are helping be very careful. And I recommend hanging it on the wall and not the door. It will get dashed to pieces on a door.
Marilyn B
Dec 19, 2016
This is a fun wreath to make, and I have seen them in stores but they don't have this wonderful vintage feel. Check out recycle and free sites and estate sales for old vintage round ornaments and it can be made for not too much cash! For kids, the plastic variety can be used, and no worries of injury if dropped. If an ornament does get broken, the ornament can be removed by taking its cap off, and then slipping the replacement back onto the cap by squeezing the ends in to fit. No need to re-open the hanger! This would make a fun craft night and a lovely gift!
Report Inappropriate Comment
Are you sure you would like to report this comment? It will be flagged for our moderators to take action.
Thank you for taking the time to improve the content on our site.


