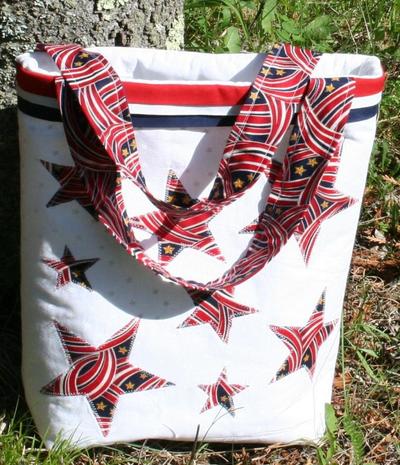
Stars and Stripes Tote
This beautiful July 4th tote comes to us as a guest project from Dorinda at Flower Girl Designs Collection.

Finished Size Approximately 16”h x 11”w-Straps have a 13” drop, 4 inside pockets
Requirements:
½ -yard outside fabric
½ -yard lining fabric
½ -yard pocket fabric
5/8-yard stars & straps fabric
1/8-yard of each, red, white & blue
1-yard Fusible Fleece Interfacing
1-yard Lite Heat-n-Bond Iron-On Adhesive
Supplies needed:
All purpose thread to match fabric
Scissors & Rotary Cutter Pins
Ruler
Sewing Machine
Iron
Note: Read through entire pattern before starting to sew. Remove all pins before sewing over them. All seams are a ¼”.
Cutting Fabric:
Cut 2– 15” w x 18” h- outside fabric
Cut 2- 15” w x 18” h- lining fabric
Cut 2-14” x 15” fabric for pockets
Cut 2- 2” x 15” red strips of fabric
Cut 2- 3” x 15” white strips of fabric
Cut 2- 4” x 15” blue strips of fabric
Cut 2- 4” x 28” strips of fabric for straps
Cut 4- 6” x 6” fabric for #1 stars
Cut 4 – 5” x 5” fabric for #2 stars
Cut 4- 4” x 4” fabric for #3 stars
Cut 4 -3” x 3” fabric for #4 stars
Cut 4- 15” x 18” fusible fleece
Instructions: Ironing on Fusible Fleece & Cutting Corners:
1) Take the 4- 15” x 18” fabric cuts and iron on fusible fleece following manufactures directions.

2) Cut a 2” x 2” square off two corners on a 15” side, on all 4- 15” x 18” fabric cuts.

3) All 4 corners on the 15” bottom, of all 15” x 18” fabric cuts should look like this picture.

Ironing on Lite Heat-n-Bond, Cutting Stars & Sewing on Stripes:
1) Iron on Lite Heat-n-Bond following manufactures directions to all star cuts of fabric, place the template on them and cut out. Take paper backing off and set aside for now.

2) Take the red, white and blue strips of fabric, fold all in half the long way and press. Making the red stripes 1” x 15, white stripes 1 ½” x 15” and blue stripes 2” x 15”.

3) Take 1 of the outside cuts of fabric and place the stripes at the top, raw edges meeting raw edges of the outside fabric cut. First the blue, then the white and last the red on top of each other, pin and sew close to the edge.

4) Now do the same for the other outside fabric cut.

5) Take 2 of each star sizes and place them, wherever you like, between the stripes and the 2” cuts at the bottom, on one of the outside fabric cuts and press in place.

6) Next take the other outside fabric cut, place and press your stars anywhere, then zigzag an appliqué stitch around each star on both cuts of fabric.

Pockets:
1) Take the pocket cuts; fold them in half the long way and press, making 2- 7” x 15” pockets. Topstitch the folded edge on both pockets.

2) Take a lining fabric cut and place a pocket raw edge up and 14” from the top, pin in place and sew.

3) Fold the pocket up and topstitch the bottom seam.

4) Fold the cut in half to find the middle, at the middle sew from the bottom of the pocket to the top (backstitch at the top to make the pockets more secure), this will make 2 pockets. Now, take the other lining cut and sew the other pocket the same way.

Making the Straps:
1) Take the 2- 4” x 28” strips of fabric for straps, fold raw edges to meet in the middle and press.

2) Fold again and press, making a 1” strap. Sew close on both long edges of the strap.

3) Measure in 2” from one end of a outside fabric cut, place and pin raw edge of the strap to the raw edge of the fabric, zigzag in place. Make sure the strap is straight, pin and sew the other end of the strap 2” in, to the other side and zigzag in place. Now, take the other outside fabric cut and sew the other strap the same way.


Finishing:
1) Place the lining cuts right sides together.

2) Pin and sew the sides, at the bottom sew and leave a 3” opening for turning. Leave the top and corners open.

3) At the corners match side and bottom seams.

4) Pin and sew.

5) Leave tote wrong sides out.

6) Place the outside fabric cuts right sides together, pin and sew the sides and the bottom. Leave the top and the corners open. Then, sew the corners the same as the lining of the tote.

7) Turn right sides out.

8) Place the outside of the tote inside the lining with the 3” opening (right sides together). Make sure the straps stay inside the bag, match side seams, pin and sew all around the top. Backstitch over the straps to make them more secure.

9) Turn right sides out through the 3” opening, hand stitch the opening closed and press around the top and the rest of the tote.

10) Your Stars & Stripes Tote is done and ready for fun at the park!

For more great 4th of July craft ideas, download our free 4th of July eBook.
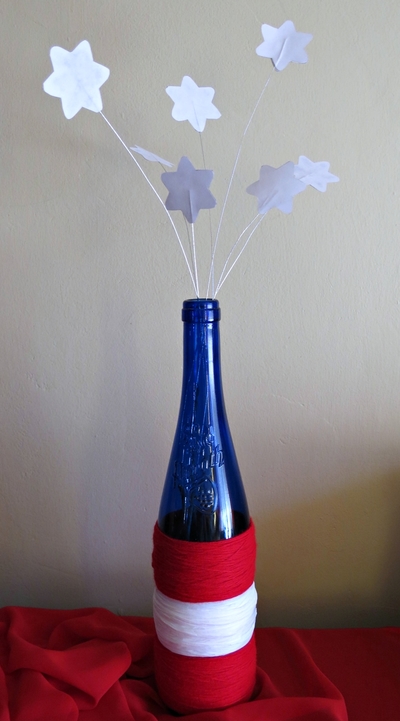
Read NextPatriotic Starburst Bouquet
Your Recently Viewed Projects
Thanks for your comment. Don't forget to share!
mulberrygalprinces s
May 28, 2018
This is a very pretty tote. It just screams summer. It would look great on vacation or at the beach. There are so many patriotic fabrics out there that you can make more than one and still be unique. The directions are so well written with a collection of pictures to help you at every step of the way.
Report Inappropriate Comment
Are you sure you would like to report this comment? It will be flagged for our moderators to take action.
Thank you for taking the time to improve the content on our site.