Teddy Bear Light Switch Cover
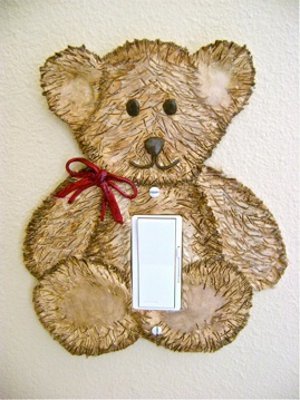
Great for nurseries and kids rooms, this Teddy Bear Light Switch Cover from Gloria Uhler is an adorable wall accent. With his cute ears and happy face, this easy project can help transform any kids room into an adorable playland. Paint and clay is all it takes to make this adorable light switch cover, so it's a great budget friendly alternative to DIY decorating for your home.
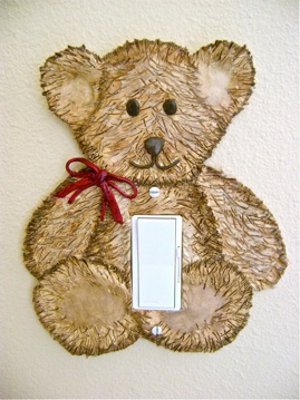
Materials:
- Paint in the following colors: Black, Mocha, Sand, Eggplant Gloss
- Assorted paint brushes
- Sculpey Ultralight white clay - 8 oz.
- Craft knife
- Plastic spatula
- Wood picks
- Pattern
Instructions:
Allow paint to dry completely between steps.
Dents in the unbaked clay caused by tools or fingernails can be smoothed out without changing the size of the piece by lightly rolling a wine cork back and forth across the surface of the clay.
-
Download and print out the teddy bear template onto card stock. Cut out the six pieces.
-
Condition the clay by kneading it. Roll out the clay to about ¼” thickness.
-
Position the head template on the clay and cut it out using a craft knife. Cut out all the remaining pieces.
-
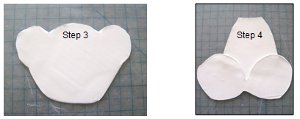
Overlap the clay feet onto the clay body.
-
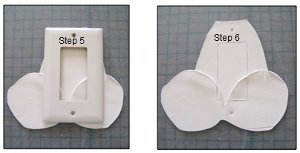
Center a switch plate on top of the clay.
-
Mark the opening in the plate with a plastic knife. Mark the openings for the screws with toothpicks.
-
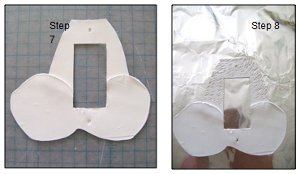
Using a craft knife, cut out the switch opening.
-
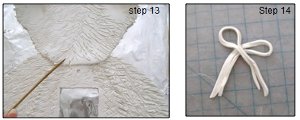
Transfer the clay to a foil lined baking sheet using a plastic spatula. Add furry texture to the body by jabbing and dragging at it with a wood pick.
-
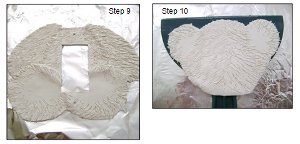
Add the arms, which should slightly overlap the body. The feet should overlap the arms. Add texture to the arms and the outside edges of the feet.
-
Add texture to all of the head except the inside of the ears.
-
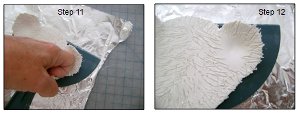
Press into the center of the ears to stretch and smooth the clay slightly.
-
Bend the tops of the ears forward.
-
Position the head template on the clay and cut it out using a craft knife. Cut out all the remaining pieces.
-
Download and print out the teddy bear template onto card stock. Cut out the six pieces.
-
Add the arms, which should slightly overlap the body. The feet should overlap the arms. Add texture to the arms and the outside edges of the feet.
-
Using a craft knife, cut out the switch opening.
-
Transfer the clay to a foil lined baking sheet using a plastic spatula. Add furry texture to the body by jabbing and dragging at it with a wood pick.
-
Go over the areas of the head that overlap the body and arms, jabbing with the wood pick. Apply more pressure, which will join the pieces together.
-
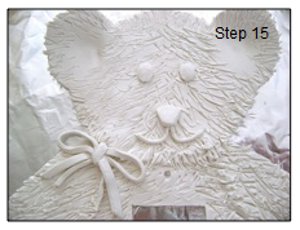
Roll out two pieces of clay, cut them into narrow strips and fold them to form the bow. Wrap another small piece of clay around the strips to create the center of the bow. Press it in place on the teddy bear.
-
Cut pieces of clay to add the eyes, nose, and mouth.
-
Preheat an oven to 275 degrees. Bake the teddy bear for 20 minutes.Step 17 - Remove from oven and let cool completely. Put the teddy bear in place over the light switch and check it for fit. Also check so see if the screws move easily into the holes. If the openings need to be larger, you can sand the clay or shave it away with a craft knife. Enlarge screw openings by piercing the clay with a thick darning needle and twisting it with a screwing motion. Don’t force the needle into the holes as it may crack the clay.
-
Spray or paint the entire teddy bear with a brush using the Sand paint.
-
Mix Black paint with the Mocha to form the dark brown paint for the eyes, nose and mouth. Paint them with a small brush.
-
Use Eggplant paint to add color to the bow with a small brush.
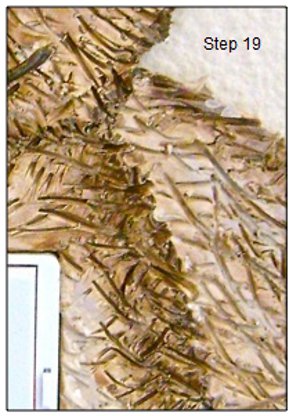
- Use the Mocha paint to highlight the texture. Work in small sections applying paint with a brush then lightly wiping away surface paint with a clean cloth. The dark paint will remain in the deep crevices. Make the sides of the body darker than the center by wiping away less paint.
Read NextHandy Dandy Lamp Shade

