This project was submitted by one of our readers, just like you.
Paper Bag Frog Puppet
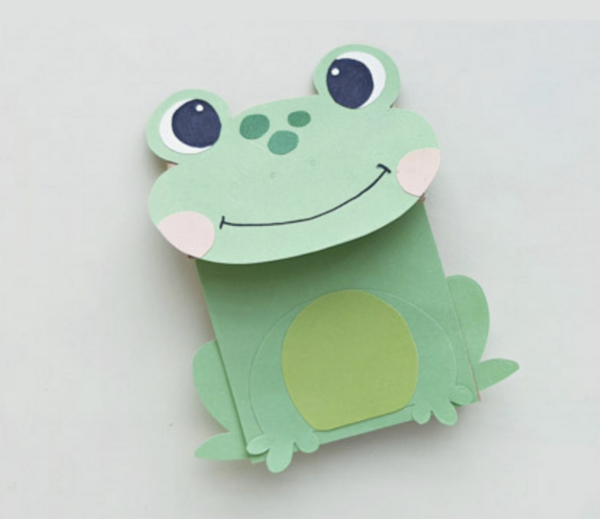
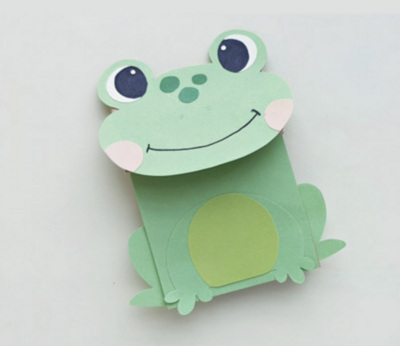
"This adorable Paper Bag Frog puppet is the perfect project to make with your kids! You’ll love how it sparks their imagination and creativity. With these easy-to-follow instructions, you can hop right into creating and playing together! Colored paper Sharpie Craft glue Paper bag Pencil Scissors Add googly eyes or craft pom poms to your frog for some extra fun! Personalize your paper bag frog by using markers or colored paper to add fun details. Try a silly smile, a bow tie, or anything else you can think of!"
Primary TechniquePaper Crafts

Materials List
-
Colored paper
Sharpie
Craft glue
Paper bag
Pencil
Scissors
Instructions
-
Select different colored paper (including green) for the frog paper bag puppet. Trace and cut out the patterns from the provided template. The template includes head, front legs, bag legs, blush, eyes, speckles, and belly patterns.
-
Attach the eye cutouts on the 2 half-circle parts on the top side of the head pattern. Attach the belly cutout on the front leg part.
-
Attach the speckles on the forehead and the blush cutouts on both cheeks of the papercraft frog’s head pattern.
-
Select your paper bag. You can trim extra parts of the blush if necessary.
-
Cut the paper bag short if required and cut out a green paper to cover the front part of the paper bag.
-
Attach the green paper cutout on the front side of the paper bag.
-
Attach the head pattern on the bottom side of the paper bag. Flatten the head pattern with the bag after attaching the head.
-
Attach the bottom part of the body near the bottom side (open side of the bag) of the frog puppet. Attach the 2 separate leg cutouts on both sides of the paper bag to complete the frog paper bag puppet.


