This project was submitted by one of our readers, just like you.
Tapestry Triangles Crochet Pillow
Tapestry Triangles Crochet
From the blogger: "This Tapestry Triangles Crochet Pillow is worked in the round like a granny square, using single crochet through the back loop only. Crocheting through the back loop helps a bit with the ‘lean’ that you sometimes get when you crochet a really large square. Finishing off with a good blocking will give you a near-perfect square at the end. I decided to use fabric for the back of the pillow, but you could easily crochet a second panel and join them together. I even went one step further and added a zip, but this is completely optional. Don’t be put off by the thought of sewing the fabric and the crochet together because I have a nifty little technique that will give you a professional-looking finish even if you are not a professional seamstress! A full tutorial with photos on how to attach the fabric is included in the pattern."

Crochet HookG/6 or 4 mm hook
Yarn Weight(3) Light/DK (21-24 stitches to 4 inches)
Crochet Gauge18 rounds of sc blo = 4” x 4” (10 cm x 10 cm)
Finished SizeApprox 16” x 16” (Pillow without border measures about 15.5” x 15.5” to take a 16” x 16” cushion insert)
Materials List
- Yarn: Any DK/Size 3/Lightweight yarn
- Hook: 4mm/G-6 crochet hook
- Yarn needle for weaving in ends
- Stitch marker
- Zipper (approx. 12-14″)
- Fabric to measure the same size as the finished pillow + 0.5 inch seam allowance (approx. 16” x 16”)
-
16″ x 16″ cushion insert
Construction
The pillow panel is crocheted in the round from the middle outwards. For the back panel, I used a piece of fabric (all instructions can be found on the above link), but you could just as easily crochet 2 panels and join them using a round of slip stitches.
Colorwork
The triangle colorwork on this pillow is done using tapestry crochet. Each triangle is made using a "bobbin" with the unused strand "floated" behind the active strand (the wrong side will be hidden, so you do not need to worry about the floats being seen). Before you begin the colorwork section, create your bobbins by cutting approx. 2 yds/2m of yarn for each triangle. To prevent the bobbins from getting tangled up, I used clothespins to clip the unused bobbins to the main square as I went along. You can also use special plastic or cardboard yarn bobbins.
Pattern Notes
For all rounds (apart from the first round), stitches are worked through the back loop only (blo). Ch 1 at the start of each round DOES NOT COUNT as one stitch. So, at the start of each round, you will ch 1, then sc 3 times into the same corner stitch. The stitch count for each round is given in [] at the end of the round.

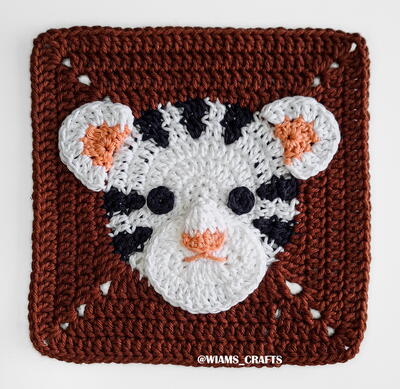
Read NextYear Of The Tiger Granny Square