This project was submitted by one of our readers, just like you.
Metallic Mason Jar DIY Make Up Bag
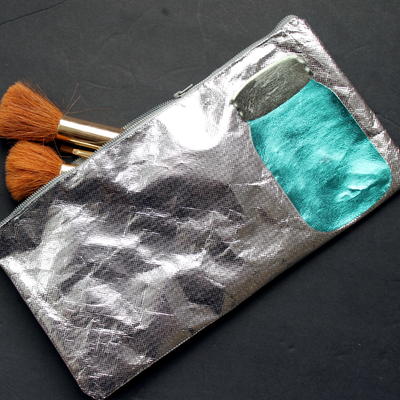
Use Oly Fun, DecoFoil, die cuts, and more to create a chic little homemade cosmetics bag.
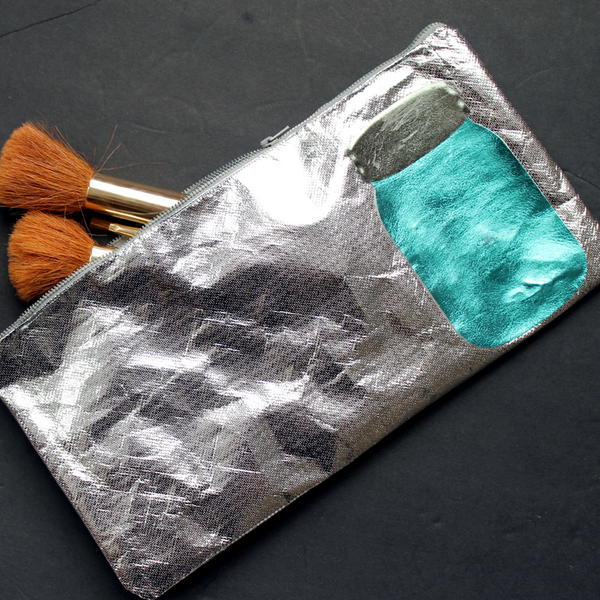
In the Designer's Words: "Turn Therm-o-Web foils and metallic OlyFun into a great make up bag. Definitely a super simple sewing project that is perfect for make up, school, supplies, and so much more."
Making your own DIY cosmetics bag allows you to add some flair to your accessorizing. When it comes to constants in your life, your make-up bag is always by your side! So, why not create a DIY craft to carry around and be proud of? The Metallic Mason Jar DIY Make Up Bag is a stunning project that utilizes DecoFoil and Oly Fun to create one impressive free bag pattern. Metallic and glamorous, this tutorial shows you how to add a cute little Mason Jar design to your bag, but you could easily customize this craft project idea with a different cut-out.
Project TypeMake a Project
Time to CompleteUnder an hour
Sewn byMachine

Materials List
- Metallic Oly Fun in Silver
-
Mason Jar Sizzix Die
- Deco Foil in aqua and silver
- Deco Foil foam adhesive
- Zipper
- Thread
- Scissors
- Sewing machine
- Straight pins
If you are a fan of Mason Jars, check out our full collection of Mason Jar crafts for every occasion - 17 Easy Crafts with Mason Jars
Instructions
-
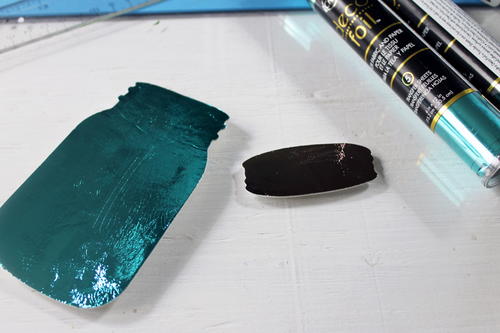
Cut Mason Jar and lid from Deco Foil foam adhesive using Sizzix Mason Jar die.
-
Remove liner from one side of foam adhesive shaped mason jar and apply it to aqua foil. Peel back to reveal that foil is now on the mason jar. Repeat for any areas that do not foil correctly. Repeat with silver foil for mason jar lid.
-
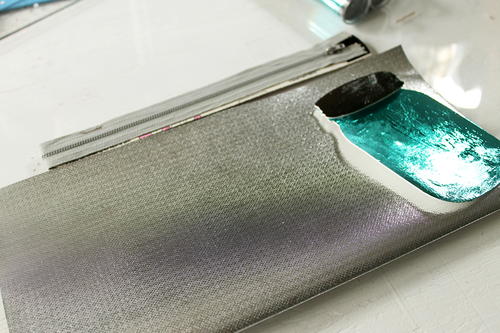
Take one sheet of 12 inch by 12 inch metallic Oly Fun in silver and fold it in half. Remove lining from other side of mason jar to reveal adhesive. Arrange and stick on the Oly Fun. Press well. Remove any air bubbles with straight pin. Repeat with mason jar lid.
-
Sew onto a bag and add zipper to the top of the pouch. I followed an online tutorial for adding in the zipper.
-
Turn right side out and enjoy your new make up bag!

