This project was submitted by one of our readers, just like you.
Fabulous Faux Stained-Glass Table
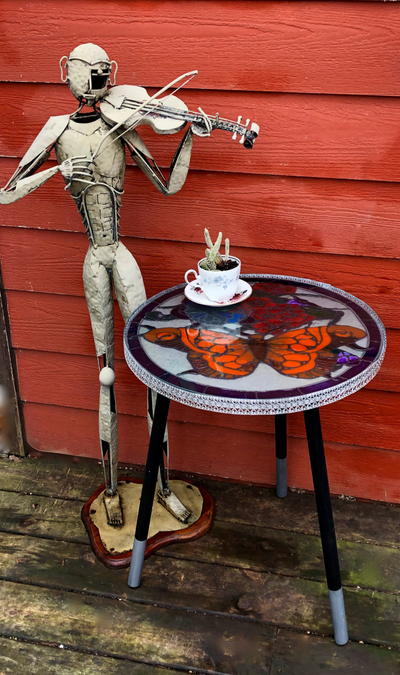
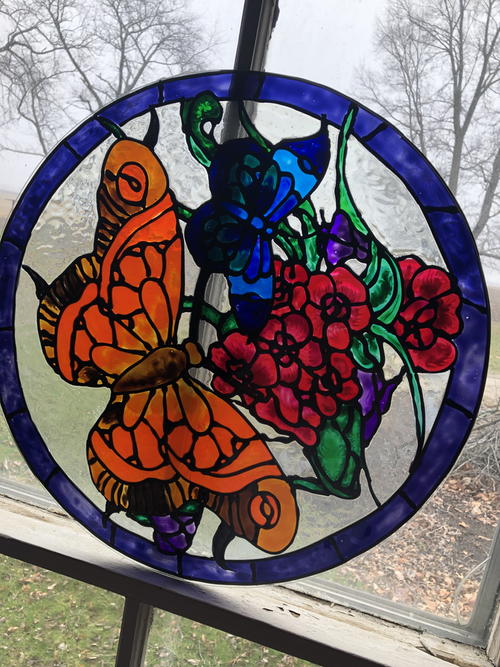
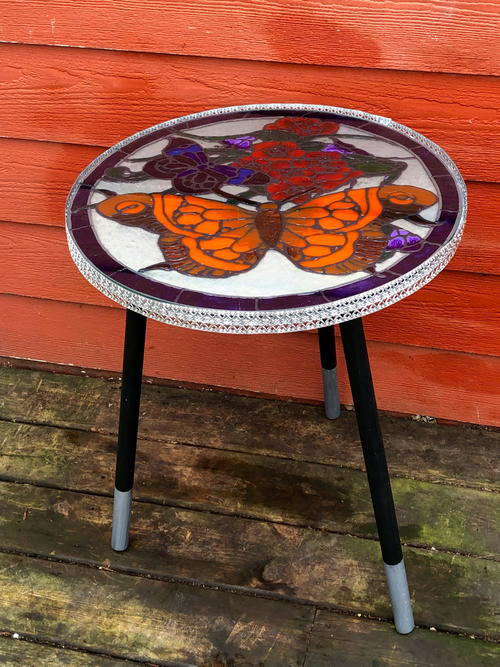
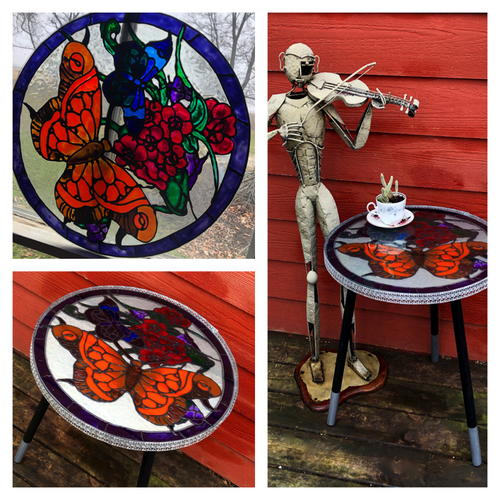
From the Designer: "Create a fabulous faux stained-glass accent table with the magic of Gallery Glass Liquid Leading and Paints. The humble beginnings of this piece are nothing more than an enlarged coloring sheet traced onto glass with liquid leading paint and filled in with color. When dry the Gallery Glass Paints turn a plain glass surface into a colorful work of stained glass art that is sure to add the perfect pop of color to any space."
Primary TechniqueGlass Crafts

Project TypeMake a Project
Materials List
-
1 glass topped “accent table”
-
1 piece of glass cut to match glass top
-
Plaid Crafts Gallery Glass Liquid Leading (Black)
- Plaid Crafts Gallery Glass Window Color (Variety of Colors)
-
Plaid Crafts Folk Art Acrylic Paint (Black, Brushed Metal Silver)
-
Printable “Stained Glass Coloring Sheet”
-
Copy Machine for enlargements
-
Skewer or toothpick
-
Masking Tape
-
Paint Brush
- 1 ½ Yards Metal Ribbon
- Hot Glue Gun/Glue Sticks
- Tin Snips or Scissors you don’t care about to cut the metal ribbon
- Glass Cleaner/paper towel
Instructions
-
Remove the glass topper from your table and set aside. Using the Plaid Crafts Folk Art Acrylic Paint, paint your table legs black and the top of your table silver. If desired, paint the bottom 7 inches of your table legs silver as accent.
-
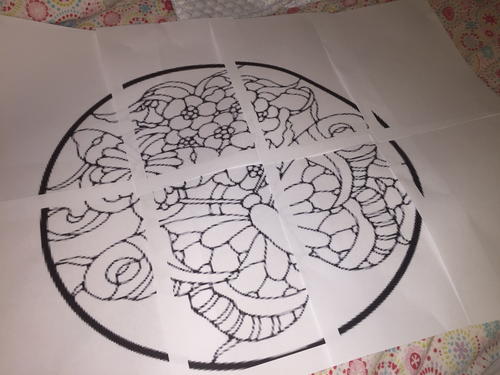
Using the copy machine enlarge your coloring sheet to cover the entire surface of your glass.
-
Clean your glass table top and allow to dry. Tape the enlarged coloring sheet to the underside of the glass, image facing up.
-
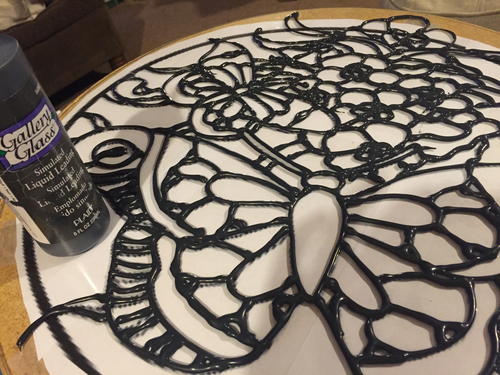
On the top of the glass, use Plaid Crafts Gallery Glass Liquid Leading to trace the lines of the coloring sheet onto the surface of the glass. Begin from the middle and work to the edges to avoid smearing your Liquid Leading. Allow to dry. (Approximately 8 hours)
-
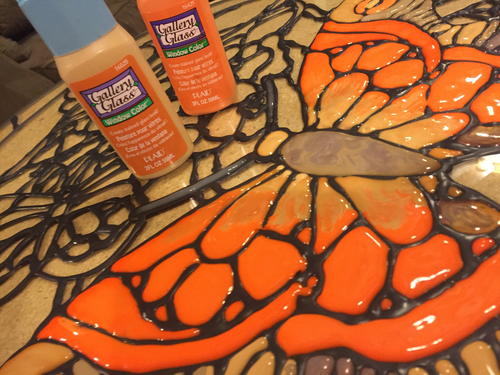
When leading is dry, use your Plaid Crafts Gallery Glass Window Color to fill in the image like you would a coloring sheet. Again, work from the middle of the image to the outer edges to avoid smearing your colors. Occasionally tap the underside of the glass to help remove trapped air bubbles. You can also use your toothpick or wooden skewer to pop stubborn air bubbles. Allow color to dry. Color will dry in 24 hours and will cure to surface in 7 days.
-
Using the metal ribbon, measure around the outside perimeter of the table top add one 1’ for overlap and trim using tin snips or scissors you don’t care about.
-
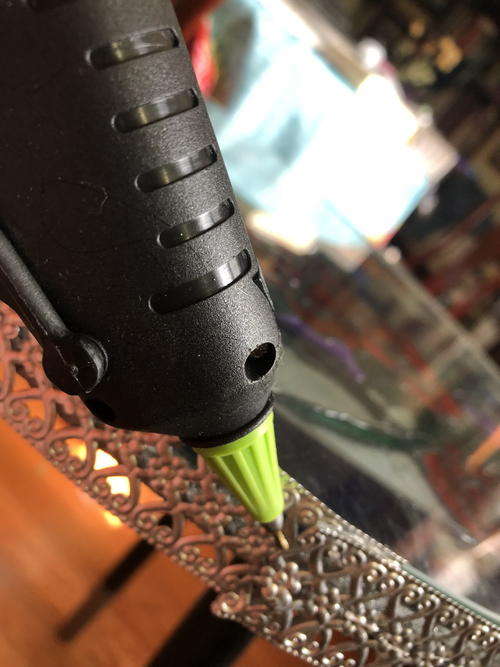
Using your hot glue gun, glue the metal ribbon around the side of the table top. Position the top of the ribbon above the table edge when gluing as this will help hold the glass tops in place.
-
Position your painted glass top paint side up on your table surface. When painted is cured (approximately 7 days after painting) position the second piece of glass on top of the painted surface. This second piece of glass helps to protect your painted surface from moisture while still allowing the beautiful color to shine through.
-
Enjoy your new table.
NotesHints- Use markers or colored pencils and your original version of the coloring sheet to help you choose colors for your stained-glass painting. To help avoid bubbles, do not shake the liquid leading or glass color. The liquid leading and glass color works with gravity, because of this don’t touch the nozzle of the container directly to the surface of the glass. Position your bottle approximately 1 inch above the surface of the glass and allow the leading (or color) to flow out naturally. If you make a mistake with the leading or the window color. Allow to dry completely and then it will easily remove with a craft knife.

