Spooky Halloween Necklaces
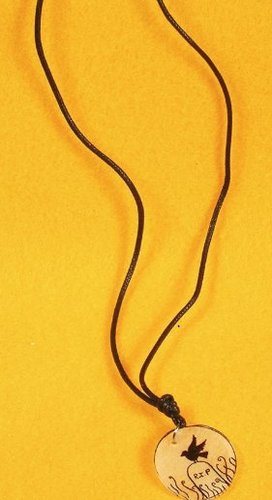
Looking for a spooky accessory to wear to your Halloween party? This easy craft project will give you instructions to make two spectacularly chilling necklaces: one with a bat shape and the other a frightening silhouette. Use whatever Halloween clip art you desire to create even more necklaces.


Materials
- Faber-Castell PITT Artist Pen, black with brush nib
- Faber-Castell GRIP 2001 pencil
- Shrink Film
- Circle template or glass bottom to trace
- Glass E-beads/ oranges, brown, black colors
- 24-gauge black craft wire
- black cord
- scissors
- drawn or Halloween clip art
- jump rings
- hole punch
Option: use Faber-Castell Creative Studio Art GRIP Color Pencils in yellow, red, orange, green, brown to add color to your shrink pieces
Instructions:
Making the necklaces
- Trace your art onto the shrink film with the pencil (following the manufacturers instructions).
- Color in the areas you would like to be black on your design.
- Cut out your art, leaving a 1/8-inch around the outside of your design.
- Punch your holes 1 for the round charm style, 2 on either end of bat style.
- Punch your holes ¼ inch in from the edge of your design.
- Shrink according to manufacturers instructions.
Bat Necklace
- Measure the wire around your neck, leaving enough extra to be able to twist the ends through the holes, and slip it on and off over your head.
- Twist the wire through one hole on the bat, add the beads for both sides, feed through and twist the wire through the hole on the other side of the bat.
- Arrange the beads on each side.
Silhouette Charm Necklace
- Measure the length of the cord around your neck, leaving extra to tie.
- Add a jump ring through the hole.
- Thread the cord through the jump ring, add beads, knot ends.
Read NextScribbled Pumpkins

