Nylon Snow Pants for Kids
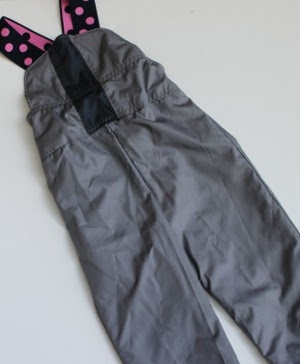
Get ready for snow time fun with these Nylon Snow Pants for Kids from Anshu Jain! You can easily make these kids' snow pants using nylon fabric or revamping a pair of nylon pants you already have. This easy tutorial is great for beginning sewers!
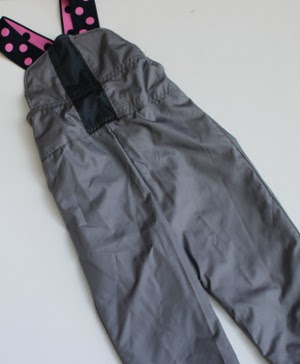
Materials:
- Nylon waterproof fabric : 1 yd (test the fabric to make sure it’s waterproof before you use it)
- Coordinating lining fabric (cotton woven) : 10 in X 10 in
- Wide elastic ( 1 inch or more wide) : 1 yd
- Narrow elastic ( 1/4 inch to 3/8 inch wide) : 1/2 yd
Instructions:
- Use the simplest PJ/pants pattern you have to make these pants. Keep the following things in mind while cutting these pants: Make sure you add half an inch to the width (on each side) because you need these pants to fit over multiple layers. Also remove any margin for waistband, because we will be sewing waistband separately.
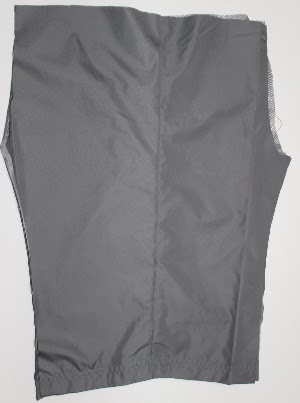
- If you are making these out of another pants, make sure the hem of your pants fall on the original hemline. That would save you the time of hemming them again.
- First sew the inseams on both legs (leave the bottom two inches or the length until the hems open), then turn one leg right side out, insert into the other, align the middle part and sew along the middle of the pants.
- Set pants aside while we work on the yoke and waistband.
- Cut a semi circle with a 7 inch base from nylon. Cut another one from the lining fabric. Cut the wide elastic in two parts. Place them right sides together and sandwich the elastics between these two layers. Place the elastics such that they are about 2 inches apart at the top of semi-circle. Sew a seam along the circular part, making sure you're catching all the layers as well as elastic ends. Cut notches in the fabric along the seam. Turn out.
- For the waistband, measure around the top of the pants. Let’s call this length W. Cut two pieces of width W+1 inch and length 3 inches, one from vinyl (outer shell), one from interlock (lining).
- Sew each of the W+1 inch pieces into a tube by sewing along the 3 inch side (right sides together, half inch sewing margin). So now you will have two tubes of periphery W. Line up these tubes right sides together such that the seams are aligned.
- Sandwich the yoke we just made in step 1 between the two layers of the waistband. Make sure the vinyl side of the yoke is facing vinyl side of the waistband. Sew along the edge, just the part where the yoke is.
- Now decide what length you want your elastics to be, and where they will be positioned in the back. I recommend a criss-cross placement for a snug fit, but you could also do them side by side. Once you have decided the length and placement, pin the elastics and sandwich them between the right sides of nylon and interlock such that when we turn the waistband out they will be attached to the waistband without any twists. If you're not sure, try to hand baste with running stitches and see if they turn out correctly.
- Now that the top part is done (except for the elastic at waist), sew the whole top to the bottom with the right sides of nylon together. Sew all around the waist and make sure you center the yoke at the front center of pants.
- Now turn the whole thing right side out. Does it begin to look like a snow bib? Top-stitch close to the upper edge of waistband. Now fold the interlock lining of the waistband on the inside and sew along its lower edge from the outside. In this seam leave two gaps of 1.5 inches on either side of the yoke. These will be used to insert elastic.
- Insert an elastic in the back of waistband, using the gaps you left in step 8. Sew the elastic on both sides, reinforce with multiple seams. Now sew the gaps shut.
- If you have used the hems of original pants to be the hem of these snow-pants, you could use the existing hems as casing. Insert the elastic in the hems using the opening left in step 2. Pull it such that the leg cuffs are comfortably snug on the child's leg. Now sew the opening shut by sewing on the inseams until you reach the bottom.
- If you have made these from fabric, fold it one quarter inch, and then fold it 3/4 inch ( with a one inch gap) to make a casing. Now insert a narrow elastic in this casing. Sew both ends of the elastic together and sew the opening shut. Repeat for the other leg. Now you’re ready to play in the snow!
Read NextLittle Cupcake Shirt

