Urban Ear Warmer Knockoff Free Knitting Pattern

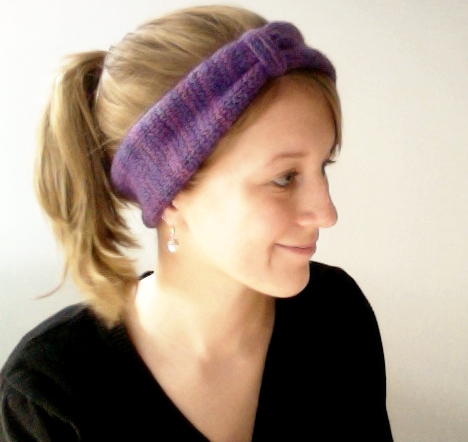
This Urban Ear Warmer Knockoff Free Knitting Pattern is inspired by a headband from Urban Outfitters. Create your own version of this knit headband pattern. It's simple to make, and cinching it creates a faux bow look that totally unique. If you aren't an expert at knitting, never fear. Free knitting patterns don't have to be complicated and this project is a great example. If you know knitting basics, you can create this adorable free headband. People will think you went to the store and picked it up, but little do they know that you made it on your own and didn't spend very much money at all. Fool your friends and look good at the same time, all you need is this great free headband pattern.
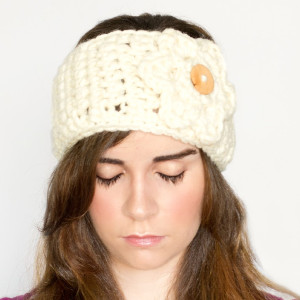
Find more headband ideas you are sure to love in our collection of 21 DIY Headbands & How to Make Headbands Tutorials.
Materials:
- Less than one skein of Malabrigo Merino Worsted (Feel free to substitute any other worsted weight yarn. Just make sure it has some wool content so it can be blocked)
- Size 8 (5mm) straight needles
Instructions:
Provisionally cast on 27 stitches.
Row 1: Slip first stitch, K to second to last stitch, P last stitch.
Row 2: Slip first stitch, P to end.
Repeat rows 1 and 2 until piece measures about 18″ from beginning. (If you’re worried about fit/tightness, I always find the best way is to put the band around your head, measuring it to your particular fit, and ending when it feels right for you).
Finishing:
- Graft the two ends together to create a seamless finish. (If you’re like me and are terrible a seaming, the braided gather is a great way to cover up a messy seam).
- Weave in ends.
- Block! The earmwarmer will have the tendancy to curl, but blocking will slightly reduce this.

- Cut three long strands from the same yarn. Using a crochet hook, fold the strands in half and draw them through the edge of the earwarmer. Leaving a loop at the top, draw the ends through the loop, attaching the strands to the earwarmer.
- Braid two braids from the 6 strings, hold them together, and wrap them around the width of the earwarmer. Continue wrapping until the gather is as big as you like. On the wrong side, tie the braids off and hide the ends in the wrap.

Read NextSea Fog Headband Knitting Pattern
Your Recently Viewed Projects
Brendaf1964
Feb 11, 2013
Did you finally get it pmlet 0848551? Slip first stitch, knit all the way to the next to last stitch then you Purl the last stitch. The wording could be confusing. Second to last stitch is actually the next to last stitch. I guess it would depend on what terminology you are used to. Hope this helpsi did not see that designer responded so I thought I would help. Have a great day!!! :)
pmlet 0848551
Jan 28, 2013
Well, you either have to slip it, knit it, or pearl it. You can't just drop it. Why do you ask me what I think?
pmlet 0848551
Jan 28, 2013
You did not answer my question on the instruction for the first row of this headband. I don't understand it. Pat
pmlet 0848551
Jan 27, 2013
I want to knit this ear warmer but I don't know what to do with the next to last stitch on the first row. It says to slip the 1st stitch, K to second to last stitch, P last stitch. What do I do with the second to last stitch?
Report Inappropriate Comment
Are you sure you would like to report this comment? It will be flagged for our moderators to take action.
Thank you for taking the time to improve the content on our site.

