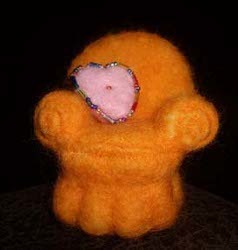
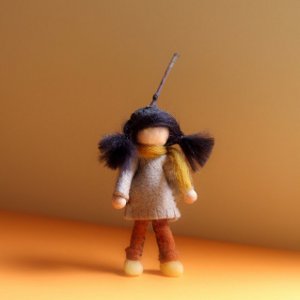
Whimsical Fairy Nymph
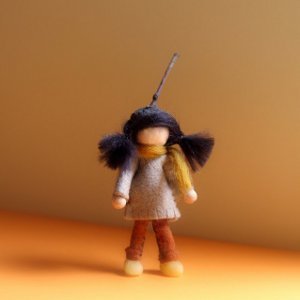
This sweet Whimsical Fairy Nymph can help add a touch of enchantment and magic to any room in your home. Use them as decorations around your home or create a whimsical enchanted Christmas tree by turning these nymphs into ornaments. Girls of all ages will love these sweet felted dolls, and you're sure to love how easy and fun they are to make! Don't be surprised if you find that you can't stop making them!
If you love making dolls, you can learn how to make a Vintage Handmade Handkerchief Doll with our free tutorial.
Materials:
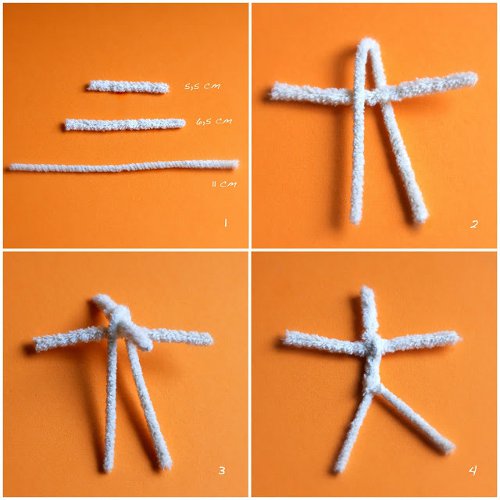
- Pipe cleaners (1x 4.5 cm, 1x 5.5 cm and 1x 11 cm)
- 1 wooden bead 15 mm
- 2 wooden beads 5 mm
- Wool felt scraps
- Beeswax scrap
- Tuft wool roving (for hair)
- Mini tuft of wool roving or a thread of wool (for the shawl)
- Scissors
- Embroidery thread
- Needle
- Eco glue
- Acorn cap or chestnut shell
- Pattern
Instructions:
- For the legs, cut a piece of pipe cleaner of 11 cm and fold it in half. You can use the ruler on the pdf-pattern for this.
- For the arms, cut a piece of 5,5 cm and for the neck a piece of 4,5 cm.
- Slide the piece for the arms between the legs and insert the piece for the neck on top.
- Wrap the legs around each other a few times so that a body is created and the arms and neck piece are tightly attached to the body. Fold one end of the neck upward and wrap the other side downward around the body. The base frame is now ready!
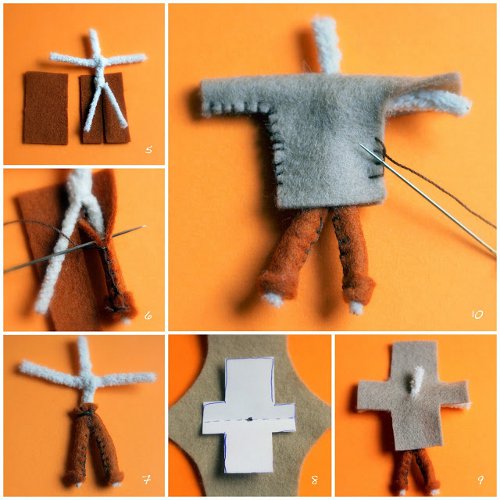
- Cut the pattern for the trousers out of the felt (click here for the free pdf-pattern). Fold the trousers/legging around the legs and sew it close to the legs with a blanket stitch. You can tuck the trousers legs or otherwise cut them a bit shorter before you sew the trousers together.
- Stitch for the zipper seam a on a and b on b and before you tie off, wrap the thread around the waist two times to secure the trousers. It is also possible to stitch the zipper seam first before you stitch the trousers, just see what works best for you.
- Choose a pattern from the pdf model A or B and cut the pattern for the jacket out of the felt.
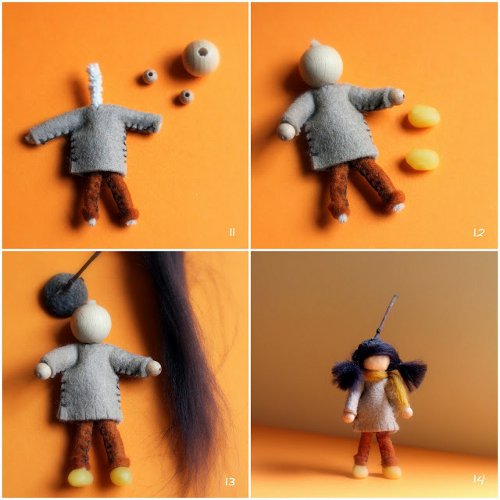
- Slide the hole on the neck and check if the sleeves fit the arm length. The arms should be a little bit longer than the sleeves so that you can attach the beads for the hands. Check if the arms are equally long and adjust if nescessary. Sew the outer edges under the sleeves and side of the jacket together with a blanket stitch. See the pdf-pattern for more details.
- Put some glue on the ends of the pipe cleaners at the sleeves and slide the beads for the hands on the pipe cleaners. Put some glue on the neck piece and slide the bead for the head on it.
- Divide the piece of beeswax into two small pieces and shape them into little shoes (simple oval shape). Press the legs gently into the beeswax shoes.
- Glue a tuft of hair on the back of the head and glue the acorn cap on top of the head on the hair. Glue a tiny string of hair on the forehead and tie the ends of the hair into two pony tails.
- Finally for the shawl, you role off a small tuft of wool between your fingers into a wire of about 6 cm long and wrap it one time around the head. If you want you can carefully cut some fringes on the bottom of the jacket of model A.
Read NextWhimsical Fairy Nymph
Your Recently Viewed Projects
Bronze Hazel
Feb 02, 2017
This is adorable and so unusual. One little tip - as a beekeeper I know that a piece of beeswax, in its natural state, isn't actually malleable. In order to shape it and press the legs into it, you would need to heat it slightly first. Probably the easiest thing to do would be to leave the beeswax pieces on a radiator for a few minutes.
Report Inappropriate Comment
Are you sure you would like to report this comment? It will be flagged for our moderators to take action.
Thank you for taking the time to improve the content on our site.


