This project was submitted by one of our readers, just like you.
Whimsical Homemade Bird Feeder
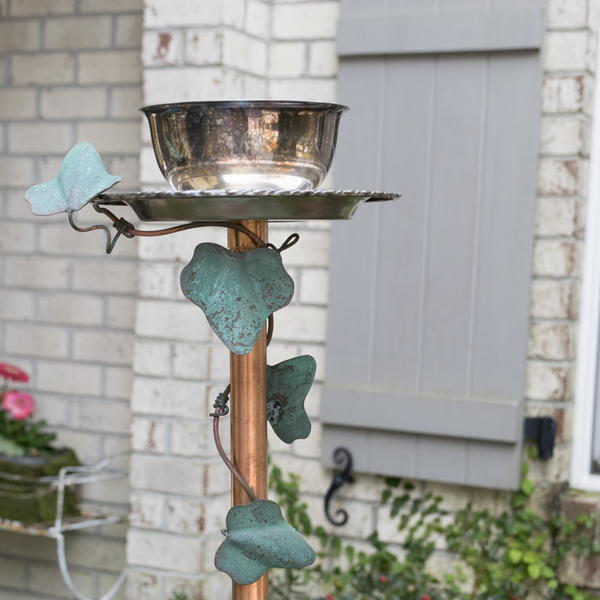
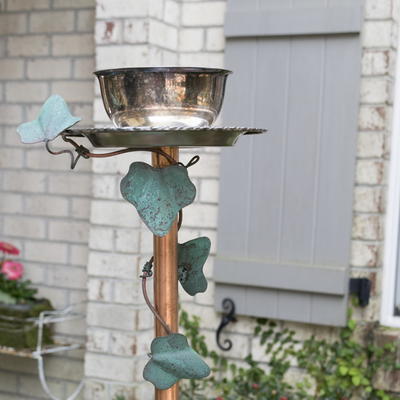
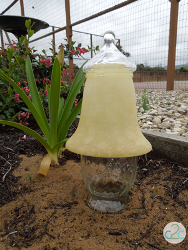
Give the birds in your backyard a nice place to eat with this Whimsical Homemade Bird Feeder. These simple homemade bird feeders combine recycled metals with copper pipe for a chic, Bohemian design. It takes only about thirty minutes to put this beautiful outdoor craft together, although you may need a second set of hands to help you drill the metal pieces and screw them together. Once you've made the basic shape of the feeder, you can dress it up by wrapping a decorative metal wire or garland around the base.
Estimated Cost$11-$20
Time to CompleteUnder an hour
MaterialsRecycled Materials
Primary TechniqueRepurposing

Project TypeMake a Project
Materials List
- Some sort of vessel to hold the bird seed
- ¾" copper tube/pipe. My tube was cut to 5’
- ¾" copper end cap
- #10 Screws, Nut and Washers
- Drill and Drill Bit…I used 1/8” to pre-drill the copper cap and a 3/16” for the actual holes
- Optional: Copper Wire/Copper Garland
Instructions
-
Find the center of the bottom of your vessel. We measured the diameter and drew it on the bottom of our vessel with a sharpie. Then we marked halfway on the diameter line and drew a perpendicular line through the first line. While this method would probably not be endorsed by my High School geometry teacher, it worked perfectly for us.
-
The silver was soft enough that we did not need to drill pilot or guide holes on it. We used the large drill bit for the hole in the middle of the bowl.
-
We also used the smaller drill bit and drilled holes through the bowl and the saucer so that any rain would drain through.
-
Drilling through the copper cap was a little more difficult. The method that worked best for us was to place it in our vise, with wood pieces on either side to protect it from getting damaged. You will definitely need to drill a pilot hole using your smaller drill bit. Once that’s through your cap, switch to your larger drill bit. WORD TO THE WISE: COPPER HAS A HIGH THERMAL CONDUCTIVITY WHICH MEANS….IT GET REALLY HOT WHILE BEING DRILLED. My husband has a blister on his finger to prove it.
-
Once you have all your holes drilled, it’s just a matter of attaching the end cap to the bowl. I placed a washer between the screw head and the bowl. Then placed the end cap on the bottom of the bowl and placed a nut on the screw.
-
Screwing the two pieces together was a two-person job for us. One of us held the nut that was in the end cap with pliers while the other one screwed the screw in.
More Fabulous Craft Ideas for You
We have some fantastic craft project recommendations for those of you who enjoy creating whimsical homemade bird feeders! If you have experience with this type of project and are looking to challenge yourself, we suggest trying your hand at crafting a mosaic bird feeder. Using broken ceramic tiles, glass beads, or even seashells, you can create a stunning and unique feeder that will surely stand out in your yard.
For those who are just starting out with DIY bird feeders, we recommend making a simple pinecone bird feeder. This project is not only easy to assemble but also budget-friendly. All you need is a pinecone, peanut butter, bird seed, and some twine to hang it up. It's a great way to attract birds to your yard while also getting a chance to admire your handiwork.
If you enjoy crafting for special occasions, why not try making a themed bird feeder for the upcoming spring season? You could create a floral bird feeder by incorporating artificial flowers and greenery into your design. This project is perfect for adding a pop of color to your outdoor space and welcoming the arrival of spring.
No matter your skill level or crafting preferences, there are endless possibilities when it comes to creating whimsical homemade bird feeders. We hope these suggestions inspire you to get creative and enjoy the process of making something beautiful for your feathered friends.
Read NextScrap DIY Garden Stakes


