Window Floral Bloom
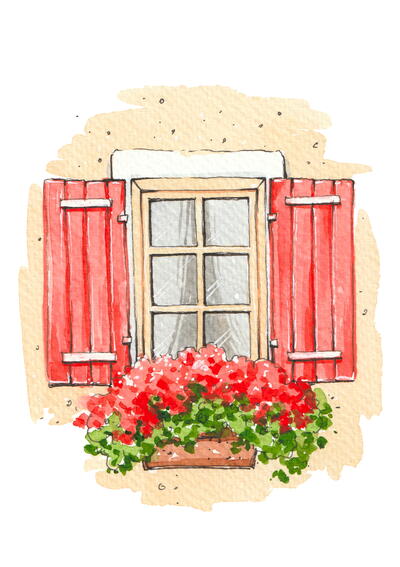
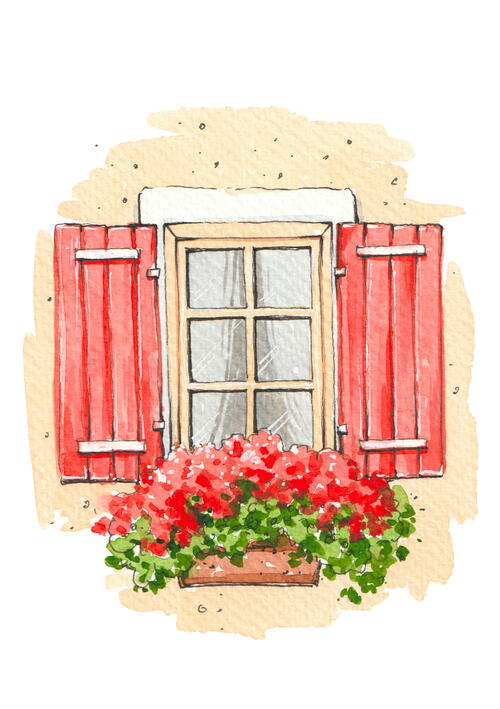
Get inspired by the beauty of simple moments, painting a bright and cozy watercolor window! Discover how pencil lines, liner and layers of watercolor can transform simple shapes into a vibrant sketch of a warm, homey atmosphere. You’ll learn to draw vivid blooming flowers, wooden shutters and shiny glass. Prepare your paints and brushes and let’s begin!
Materials List
-
Paint Colors
- Yellow Ochre
- Permanent Red Light
- Burnt Sienna
- Sap Green
- Ultramarine Deep
INSTRUCTIONS
-
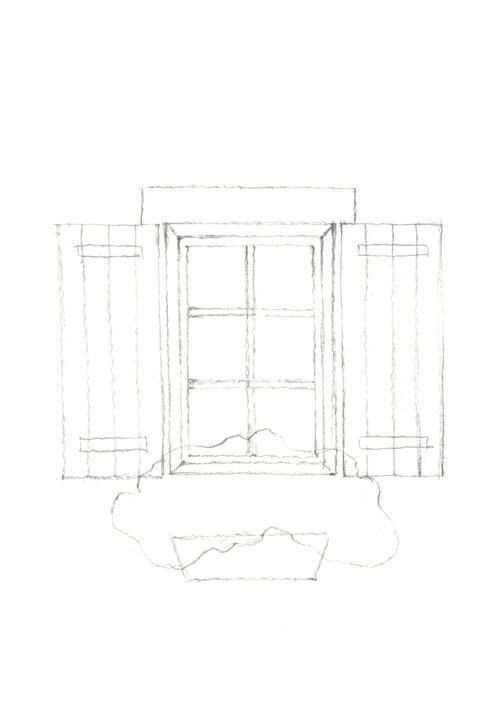
Draw a rectangle in the center of the paper. Draw another rectangle slightly smaller inside it. Connect the corners of the rectangles with diagonal lines. Draw a third rectangle inside the second one. So, now we have three rectangles, one inside another. Great! Then divide the small one vertically into two equal parts and then horizontally into three equal parts. Draw additional lines next to the vertical and horizontal lines to create a window frame. Add two rectangles to the right and left, slightly away from the window; these are the shutters. Draw stripes for the wooden panels on each shutter and rectangles connecting the panels on the top and bottom of each shutter. Below the window draw a small horizontal trapezoid widening upward. With wavy, curly and cloud-like lines, draw flowers and foliage, overlapping the trapezoid and the window a bit. Draw a frame above the window. It’s fine if your lines are not like mine; they can be a bit slanted or crooked.
-
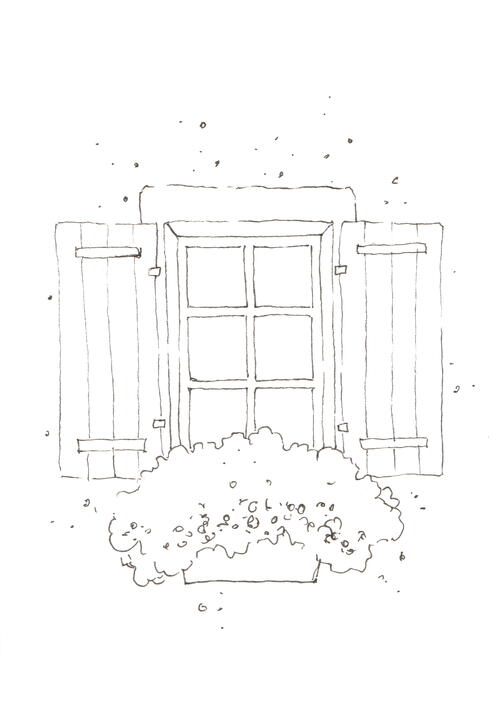
Use a waterproof black liner to outline the flowers and foliage with wavy, curly and occasionally broken lines. Randomly add small dots, lines and circles at the bottom of the foliage to show blooming flowers and greenery. Draw the shutters’ attachments to the window as small rectangles. Using slightly uneven, broken lines, outline the window, shutters, frame and flower box. Draw small dots, comma-like lines and circles around the window. Erase the pencil drawing.
-
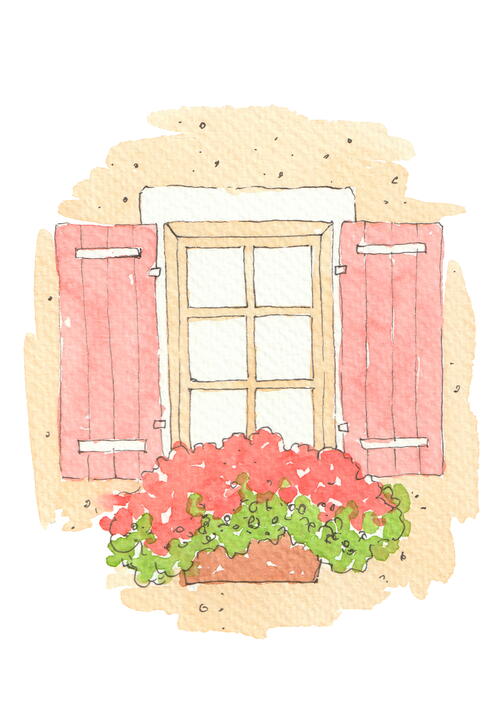
Mix Yellow Ochre with water to get a light ochre color, then paint the window frame. With broad strokes, paint the background around the window in a spontaneous shape with the same color. Wait for the paint to dry. Mix Permanent Red Light with water to get a light red. Paint the shutters, avoiding the attachments. Add a couple of drops of Permanent Red Light to the light red to make the color darker. With small strokes, paint the upper part of the flowers, leaving some white paper. Dilute Burnt Sienna slightly with water and use it to paint the flower box. After the paint dries, dilute Sap Green slightly with water and use it to paint the foliage below the flowers with small strokes.
-
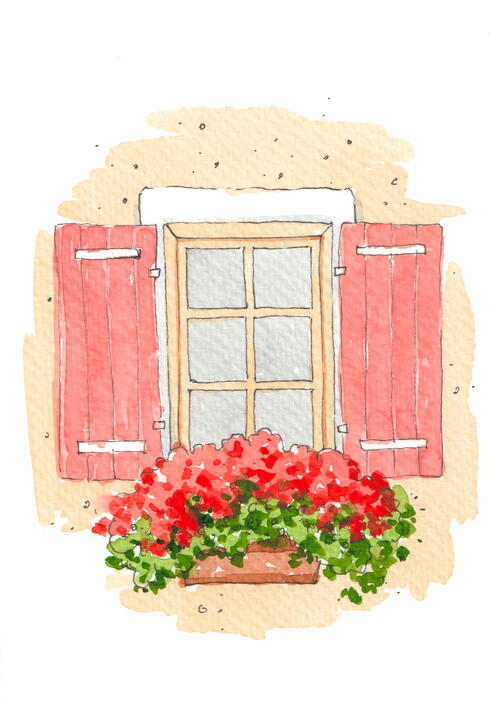
Mix equal parts Ultramarine Deep and Burnt Sienna and dilute with water to get a light gray color. Paint the window glass. With the same color, paint small, thin shadow strokes around the window frame. Use a medium tone of Burnt Sienna to paint along the window frame’s contour and add shadows to the flower box. With a darker shade of Permanent Red Light, paint the lower part of the flowers with small strokes, leaving spots of the previous layer visible. Dilute this color slightly with water and then paint the shutters’ wooden panels, leaving vertical lines of the previous layer visible at the panel joints. Use a dark shade of Sap Green to make small, spontaneous strokes on the foliage below the flowers. Amazing!
-
Add a bit more paint to the gray color from the previous step and paint curved lines on the window glass from the top downward and to the sides. Fill the area between these lines in the middle to show curtains. With a dark shade of Permanent Red Light, paint thin lines on the shutter panels next to the light lines left earlier. It’s okay if you slightly cover them as well. Add shadow lines under the shutters’ attachments with the same color. Use various shades of red to randomly paint vertical strokes on different parts of the shutter panels. Great! This will help add texture and volume.
-
With the black liner, add shadows to the corners of the window frame, the bottom and top of the shutters and the bottom of the flower box. Inside the frame, where the glass is, add bolder outlines on the top and left sides. Using a white gel pen and moving quickly with your hand, draw two diagonal hatches on each pane of glass. Add white lines at the joints of the shutter panels and also at the bottom and top of these panels. Randomly add small dots to the upper part of the flowers. Draw a few dots spontaneously on the background as well.
Great job! Our sketch is ready!
Credit Line:
Reprinted with permission from Ink and Watercolor by Anastasia Kozlova. Page Street Publishing Co. 2024. Artwork credit: Anastasia Koslova.

